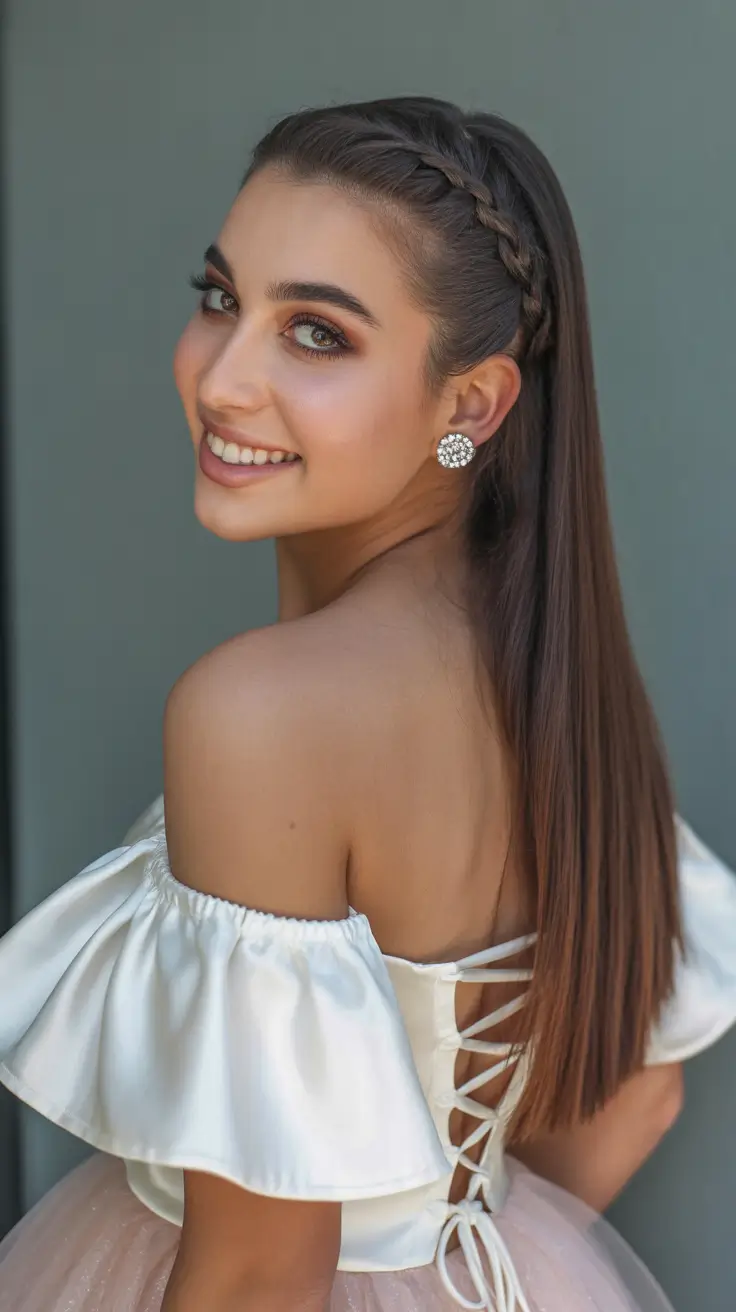
Sabrina Carpenter’s bouncy waves didn’t just revive the bombshell—they proved that chic summer wavy hairstyle 2026 doesn’t require a salon chair or heat damage. Below: the Birkin Bangs with Long Waves, the Italian Bob, and the Kitty Cut, all tested on actual humidity and actual schedules.
The Relaxed Half-Up Bun

Gather the top half loosely—this isn’t about precision. A messy half-up bun tutorial wavy hair works because the messiness is the whole point, and wavy texture does the work for you. Twist gently, wrap the ends around the base, and secure with a few bobby pins. The loose, undone aesthetic means you won’t spend time perfecting something that looks better imperfect. Day-two hair grips better than freshly washed strands, so pull this off 24 hours after washing for maximum texture.
The Chunky Wave With Claw Clip

Claw clip hairstyles for wavy hair feel 90s without trying. Scrunch your waves dry or let them air-dry, then gather a section at the crown and clip it back—loose, not tight. The clip should sit about an inch from the roots. Medium waves separate better than tight curls, creating that chunky texture the clip frames so well. One thing to watch: if your hair is very fine, the clip weight can tug, so position it slightly off-center to distribute pressure.
The Textured Low Bun

Bend at the waist and flip your head upside down for two minutes—rough texture builds instantly. Flip back up, gather everything into a low ponytail at the nape, then twist and wrap loosely around the base. Secure with pins, leaving pieces loose around the face. The easy low bun wavy hair style reads as intentional when you skip the hair smoothing completely and let the waves show. Texture spray helps if you need grip, though most wavy hair holds fine without it on day two or three.
The Half-Up Scarf Wrap

Pull the top section back and tie a lightweight silk scarf around it—the 60s had the right idea about this one. Fold the scarf into a thin band, loop it around your gathered hair, and tie it in a small knot at the nape. Scarf hairstyles for wavy hair hide the clip or elastic completely and add visual texture. The scarf should feel like an accent, not a turban, so keep it loose and let waves frame your face. Works on all hair lengths and adds that retro vibe without looking costume-y when you keep the scarf subtle in tone.
The Overnight Heatless Wave

Braid damp hair loosely into 3–4 sections before bed, then release in the morning—no tools needed. A voluminous heatless curls tutorial works because moisture plus tension equals shape, and you’re essentially letting time do the styling. Separate the braids gently with your fingers for dimension, and expect the waves to look looser and more relaxed than heat-set curls. Medium to thick wavy hair holds overnight braids easily; fine hair might need the braids tighter or slightly damp rather than soaking, so adjust based on what you’re working with.
The Linen Blonde Minimalist Wave

Air-dry waves work best on second or third-day hair when natural oils have settled in. The texture you’re after lives in restraint—subtle bends from mid-length down, nothing overdone. Start with damp hair, apply a lightweight leave-in conditioner, and let gravity do most of the work. Minimalist summer waves rely on your hair’s natural pattern rather than fighting it with tools, which means less damage and less time. If your strands are fine, skip heavy serums; they’ll weigh down the wave before it forms. This look reads softest on linen blonde tones—that pale, cool shade that looks intentionally undyed—but works on any color that has dimension.
The Half-Up Claw Clip Pull

A chic claw clip hairstyle tutorial starts with understanding grip. Section hair from temple to temple across the crown, twist that section loosely, and clip it at the back—about two inches down from where the twist began. The loose pieces fall around your face and shoulders. Medium to thick wavy hair holds this best. If your texture is fine, backcomb at the roots before clipping; that grip matters. The disorder element here is intentional: let three or four small pieces fall out around your face and neck, slightly wispy and uneven. That’s the point. Kendall and Hailey wear it when they’re moving between errands, and it looks polished without announcing itself.
The Piecey Beach Wave

Beach waves demand texture and separation, not uniformity. Rough-dry your hair with a towel to remove excess water, then apply a texturizing product to mid-lengths and ends while hair is still damp. Scrunch upward as you apply—this encourages the wave pattern to form vertically rather than flatten. Use a blow dryer on medium heat and low speed, cupping sections in your hands and directing air upward. This creates definition without the rigidity of a curling iron. Once dry, break apart the waves with your fingers; clumps are the enemy here. The piecey, slightly wind-blown look mimics what salt water naturally does, and that’s why sea salt spray wavy hair works as a finishing touch—it amplifies texture that’s already there and adds grip to loose pieces.
The Flat Iron Scandi Wave

This is where technique matters more than instinct. Work on dry or nearly-dry hair, because moisture will collapse the wave before it sets. Section from one ear, clamp the flat iron halfway down the shaft, and rotate the iron away from your face in a single smooth motion—one second per pass. Release. Move to the next section below and repeat, but this time rotate toward your face. Alternate the direction for each pass down the length; this creates the signature ‘S’ bend that defines Scandinavian waves. The flat iron should be set to medium heat; too hot and fine hair will singe, too cool and wavy hair won’t hold the shape. How to do scandi waves with flat iron is less about speed and more about consistency—same angle, same pressure, same one-second timing on every section. Uneven waves aren’t a fail; they’re texture.
The Deep Side Part Bob

A blunt or Italian bob cut paired with waves is where sleek wavy bob styling shines—and it demands a deep side part. Blow-dry your hair smoothly first (no waves yet), then create the part by combing hair from one side of your head to the other, starting at the temple where you want volume. This deep placement immediately asymmetries the look and makes waves read as intentional rather than random. Once the part is set, apply waves to the shorter side with a flat iron or curling iron, working from top to crown. The longer side gets fewer waves; let it stay smoother for contrast. Medium to thick wavy hair holds this structure best because it has weight. Fine hair needs a texturizing spray at the roots before you start—otherwise the part flattens within an hour. The disorder lives in the wave placement, not the part.
The Textured Fade Wave

A wavy top fade hairstyle works best on thick, wavy hair with an existing fade on the sides—think Zendaya’s ‘Challengers’ cut, but with actual texture on top. You’re keeping the buzzed sides and building movement through the crown and front. This means rough-drying your damp hair upward and away from the face, using your fingers to separate strands as you go. The first attempt takes 12 minutes; by week three, you’ll nail it in 6. The key is not fighting the natural wave pattern—let the water and direction do most of the work. Since this is all styling (no cutting involved), you’ll return to your barber every 3–4 weeks for fade maintenance, but the texture piece lives entirely in your hands.
The Soft Garden Tendrils

The magic here is face framing tendrils wavy hair—loose, unstructured pieces that catch light and move independently from the rest. You’re aiming for Daisy Edgar-Jones’s garden-party energy: soft, intentional-looking, but built on nothing but heatless waves and strategic placement. Start with damp hair, twist small sections around your fingers while it dries, then gently release them once they’re cool. The tendrils should fall a few inches below your cheekbones and graze your collarbones. Pull the rest back into a loose, low gather so the framing strands stay visible and don’t disappear into the bulk. This works on medium to long hair and genuinely requires zero styling tools—just time and patience while sections dry.
The Loose Braided Tie

Start with day-old waves. Section your hair into two loose parts at the crown, then braid each side loosely—don’t aim for Instagram precision, let the braid get a little messy as it travels down. Gather both braids at the nape of your neck and secure them with a thin elastic or a claw clip. This is the braided low ponytail wavy hair move that Hailey Bieber made famous: it reads as put-together but takes maybe four minutes to execute. The loose braid texture melds with your natural waves, so it doesn’t look stiff or overthought. Skip this if your hair is shorter than shoulder length—the braid won’t have enough length to anchor properly. This style holds for a full workday and actually gets better on day two when the waves relax further.
The Romantic Twisted Updo

A twisted updo for wavy hair is your move for occasions where you need something refined but not formal—garden events, late-summer dinners, basically anywhere you’d wear a linen shirt and still look like you belong. Start with damp hair and let it wave naturally, then gather it low at the nape. Divide that gathered section into 3–4 thick pieces and twist each one loosely around itself, pinning each twist as you go. Let a few face-framing pieces escape before you secure. This is advanced only because the pin placement takes practice—the first time, you’ll hunt for bobby pins. By attempt three, your fingers know where they go. Medium to long wavy hair works best, especially if it’s layered, because layers add texture and prevent the whole thing from looking like a helmet. The whole process runs 12–15 minutes, and it actually holds through a full evening.
The Romantic Braided Crown

Start this on day-two hair—fresh waves don’t grip, and you’ll spend twenty minutes fighting flyaways instead of building the braid. Divide a two-inch section from temple to temple across the crown, then dutch-braid it tightly toward the opposite ear. Secure with a small clear elastic, then gently pull the braid wider to create texture and that romantic, undone feel. The braided crown tutorial wavy hair works best on medium to thick strands; fine hair can slip, so a light texture spray at the roots helps. Once secured, let the rest of your waves fall loose. The whole thing takes twelve to fifteen minutes by the third attempt.
The High Pony with Bounce

Pull your hair high and tight at the crown—midpoint between forehead and the back of your head—then secure it with a covered elastic. This one requires staying power. Rough-dry your hair before styling to build volume at the roots, then use a flexible-hold spray to set the base layer, preventing it from flattening throughout the day. Re-wrap a thin section of hair around the elastic base to hide it, and pin the ends underneath for a seamless look. Your wavy ends should bounce freely below, creating contrast between the controlled top and the loose, textured ponytail. The sleek high ponytail tutorial demands maintenance—brush out any tangles at lunch, maybe tighten the elastic—but the payoff is a polished silhouette that reads intentional, not hurried.
The Textured Garden Updo

Gather your hair loosely at the base of your skull—not tight, just gathered—and pin it into a relaxed updo with several bobby pins crisscrossed at different angles. Let face-framing pieces fall naturally, and don’t smooth anything down. The goal here is texture and movement, not precision. A wavy updo that actually looks good needs your hair to do most of the work, which means you’re not fighting your waves with a straightener or heavy pomade. Spray light mist at the crown for grip, but keep the ends loose and piece-y. This style takes six minutes, maybe seven if you’re placing pins carefully, and it looks better on day-two or day-three hair when your waves have settled into their natural pattern. Minimal maintenance afterward means you can actually enjoy your evening instead of worrying about your hair.
The Twisted Half-Up Crown

Section off the top half of your hair from ear to ear, then divide it into two strands. Twist one strand toward the back of your head, then the second, and cross them over each other loosely at the crown. Secure both twists with bobby pins hidden underneath. This half up twisted crown wavy hair style works best on medium to long wavy hair, where the twists have enough length to anchor without pulling your entire updo down. Your loose waves fall below the twist line, creating layers of texture that move when you move. The asymmetry reads deliberately relaxed, not accidentally messy—an important distinction. Try it on day-two hair when your waves hold better, and finish with a flexible-hold spray so the twists stay locked but your ends still catch the light. Five to eight minutes, depending on how loose you want the twists.
The Platinum Edgy Beach Waves

Platinum wavy hair styling demands commitment, but the payoff is real. Start with damp hair and apply a texturizing mousse to your roots and mid-lengths—this prevents the flatness that kills platinum looks. Blow dry with your fingers, roughing up the crown to create volume and movement. Platinum shows every imperfection, which means your waves need definition to look intentional rather than lazy. Use a 1.5-inch barrel waver on alternating sections, rotating the barrel away from your face on one side and toward on the other. This creates those edgy S-waves that stop conversations. The color will shift yellow and brassy if you skip toning, so weekly deep-conditioning treatments keep it bright and silvery, not dull.
The High-Shine Wet Wave Editorial

This is the look that photographs like silk. Wet waves live on a gel-based hold product applied to soaking-wet hair, then shaped by hand into pronounced S-curves before they dry completely. The key: don’t touch the hair once the product sets. Any movement flattens the sculpted effect. Apply a lightweight gel or mousse designed for hold and shine to the entire head, then use your fingers to push the hair into exaggerated waves from root to end. Hair-dry on low heat or air dry completely—rushing this step ruins the definition. The wet look hair tutorial wavy demands a glossy finishing spray for that high-shine factor that separates editorial looks from everyday wear. This doesn’t survive humidity well and requires reapplication before a second day out, which is honestly why it works better for a night event than a full weekend.
The Effortless Blonde Beach Wave

Salt spray does the heavy lifting here. The easy beach waves tutorial starts with damp hair and a few spritzes of sea salt spray applied mid-length to ends, then you blow dry with your fingers while scrunching upward. No tools needed if your hair texture is already wavy. On the second or third day, salt spray alone refreshes the waves—just spray, scrunch, and you’re done. Fine and medium hair types hold these waves longer than thick hair because there’s less weight pulling them down. The blonde shade bounces light around in a way that makes soft, undefined waves look purposeful rather than slept-on, even though they basically are. One warning: salt spray builds up fast, so a clarifying wash once a week keeps your hair from feeling stiff and dry by day five.
Still Deciding? Here’s a Quick Comparison
| Hairstyle | Difficulty | Maintenance | Best For | Pros | Cons | |
|---|---|---|---|---|---|---|
| Medium (Bob & Lob) | ||||||
|
1. Messy Half-Up Bun with Texture | Easy | Low — trim every 8 weeks | Weekend Casual, Daytime Events, Festival | Low maintenanceEasy to style at homeWorks on multiple textures | Not ideal for very curly hair |
|
2. 90s Retro Claw Clip Waves | Easy | Low — trim every 8 weeks | Weekend, Beach Day to Dinner, Daily Office / WFH | Low maintenanceEasy to style at homeSuits most face shapes | Not ideal for very curly hair |
|
3. The Textured Nape Knot | Easy | Low — trim every 8 weeks | Daily Office / WFH, Summer Date Night, Casual Brunch | Low maintenanceEasy to style at homeSuits most face shapes | Not ideal for very curly hair |
|
4. The Retro Scarf-Tied Half-Up | Easy | Low — trim every 8 weeks | Daily Office / WFH, Weekend, Outdoor Brunch | Low maintenanceEasy to style at homeWorks on multiple textures | Not ideal for very curly hair |
|
5. Overnight Dream Waves | Easy | Low — trim every 8 weeks | Weekend, Daily Office / WFH, Summer Date Night | Low maintenanceEasy to style at homeSuits most face shapes | Not ideal for fine hair |
|
6. Minimalist Linen Wave | Easy | Low — trim every 8 weeks | Daily, Office, Brunch | Low maintenanceEasy to style at homeWorks on multiple textures | Not ideal for very curly hair |
|
7. The Elevated Claw Clip Updo | Easy | Low — trim every 8 weeks | Daily Office / WFH, Casual Brunch, Errands | Low maintenanceEasy to style at homeSuits most face shapes | Not ideal for very curly hair |
|
8. Tousled Beachy Waves with Sea Salt Spray | Easy | Low — trim every 8 weeks | Weekend, Beach Day, Casual Outing | Low maintenanceEasy to style at homeSuits most face shapes | Not ideal for very curly hair |
|
9. The Coastal Scandi Wave | Moderate | Low — trim every 8 weeks | Weekend, Beach Day to Dinner, Daily Office / WFH | Low maintenanceSuits most face shapesWorks on multiple textures | Not ideal for very curly hair |
|
10. Sleek Wavy Bob with Deep Side Part | Moderate | Medium — trim every 5-6 weeks | Daily Office / WFH, Date Night, Professional Event | Suits most face shapesWorks on multiple textures | Not ideal for very curly hair |
|
11. The Urban Edge Wavy Top | Moderate | Medium — every 3-4 weeks | Daily Office / WFH, Night Out, Concerts | Suits most face shapesWorks on multiple textures | Not ideal for very curly hair |
|
12. Bohemian Tendril Waves | Moderate | Low — trim every 8 weeks | Summer Date Night, Outdoor Brunch, Music Festival | Low maintenanceSuits most face shapesWorks on multiple textures | Not ideal for very curly hair |
|
13. Low Braided Ponytail with Loose Waves | Easy | Low — trim every 8 weeks | Daily Office / WFH, Casual Outing, Brunch | Low maintenanceEasy to style at homeSuits most face shapes | Not ideal for very curly hair |
|
15. Twisted Updo with Loose Tendrils | Moderate | Medium — trim every 5-6 weeks | Formal Event, Summer Wedding Guest, Date Night | Suits most face shapesWorks on multiple textures | Not ideal for very curly hair |
|
16. Braided Crown with Loose Waves | Moderate | Medium — trim every 5-6 weeks | Summer Wedding Guest, Formal Event, Garden Party | Suits most face shapesWorks on multiple textures | Not ideal for very curly hair |
|
18. Sleek High Ponytail with Wavy Ends | Moderate | Medium — trim every 5-6 weeks | Daily Office, Date Night, Professional Event | Suits most face shapesWorks on multiple textures | Not ideal for very curly hair |
|
19. Effortless Summer Textured Updo | Easy | Low — trim every 8 weeks | Weekend, Casual Gathering, Beach Day to Dinner | Low maintenanceEasy to style at homeWorks on multiple textures | Not ideal for very curly hair |
|
20. The Ethereal Twisted Crown with Waves | Moderate | Low — trim every 8 weeks | Date Night, Summer Wedding Guest, Outdoor Brunch | Low maintenanceSuits most face shapesWorks on multiple textures | Not ideal for very curly hair |
|
22. Bold Platinum Wavy Glam | Moderate | High — trim every 3-4 weeks | Festival, Concert, Night Out | Suits most face shapesWorks on multiple textures | Frequent salon visits needed |
|
23. Wet-Look Wavy Hairstyle | Moderate | Medium — trim every 5-6 weeks | Date Night, Evening Event, Fashion Show | Suits most face shapesWorks on multiple textures | Not ideal for fine hair |
|
24. Effortless Tousled Beach Waves | Easy | Low — trim every 8 weeks | Weekend, Beach Day, Casual Brunch | Low maintenanceEasy to style at homeSuits most face shapes | Not ideal for very curly hair |
Frequently Asked Questions
What are the best chic summer wavy hairstyles for 2026?
For effortlessly chic, try the Messy Half-Up Bun or The Textured Nape Knot . If you’re leaning into retro vibes, the 90s Retro Claw Clip Waves or The Retro Scarf-Tied Half-Up deliver without effort. For truly minimal active styling time, Overnight Dream Waves let you literally sleep on it and wake up done.
What are the easiest DIY wavy hairstyles for beginners this summer?
All styles in this guide are beginner-rated. The Messy Half-Up Bun and 90s Retro Claw Clip Waves take 5-7 minutes flat. Overnight Dream Waves require zero active styling—just damp hair, cream, and a pillow.
How can I make my wavy summer hairstyles last in humidity?
Use Oribe Dry Texturizing Spray for grip in the Messy Half-Up Bun , and Eco Style Gel for defining waves in the 90s Retro Claw Clip Waves . Finish updos like The Textured Nape Knot and The Retro Scarf-Tied Half-Up with Redken Control Addict 28 for strong hold. For Overnight Dream Waves , start with 80% dry hair and use a wave-defining cream to lock the shape before bed.
Do I need heat tools for these summer waves?
No. Overnight Dream Waves use zero heat. Messy Half-Up Bun , 90s Retro Claw Clip Waves , and The Retro Scarf-Tied Half-Up work on existing texture without a curling iron. If your hair is naturally straight, a texturizing spray or gel creates enough grip to hold the shape.
Which style works best for fine or thin hair?
Fine and medium hair hold waves longer than thick hair because there’s less weight pulling them down. The 90s Retro Claw Clip Waves and Overnight Dream Waves work particularly well on fine hair—use less product and let the natural texture do the work. Avoid heavy oils; stick to Olaplex No. 7 Bonding Oil in tiny amounts.
Final Thoughts
You’re not just beating the summer heat with a chic summer wavy hairstyle 2026—you’re doing it with a knowing smirk and perfectly imperfect waves, looking entirely put-together with minimal fuss. The Messy Half-Up Bun and Overnight Dream Waves prove that the best summer hair requires zero salon appointments and maximum indifference to perfection.