I keep seeing sheer pinks and deep reds in the same feed, which is confusing until you realize that’s the point. Sparkly Holiday Nails 2026 is about contrast: soft bases with bold accents, and a lot of glitter that doesn’t scream. I’ve spent years trying to make chrome last through a party week, and most of these actually do.
This roundup has 23 designs, from short oval to long stiletto, all tested on my own hands. Some are salon-only, a few are Sunday DIYs, and every one works on fair to olive skin. No brands, no prices, just what held up and what didn’t.
Sheer Pink Stars and Gems
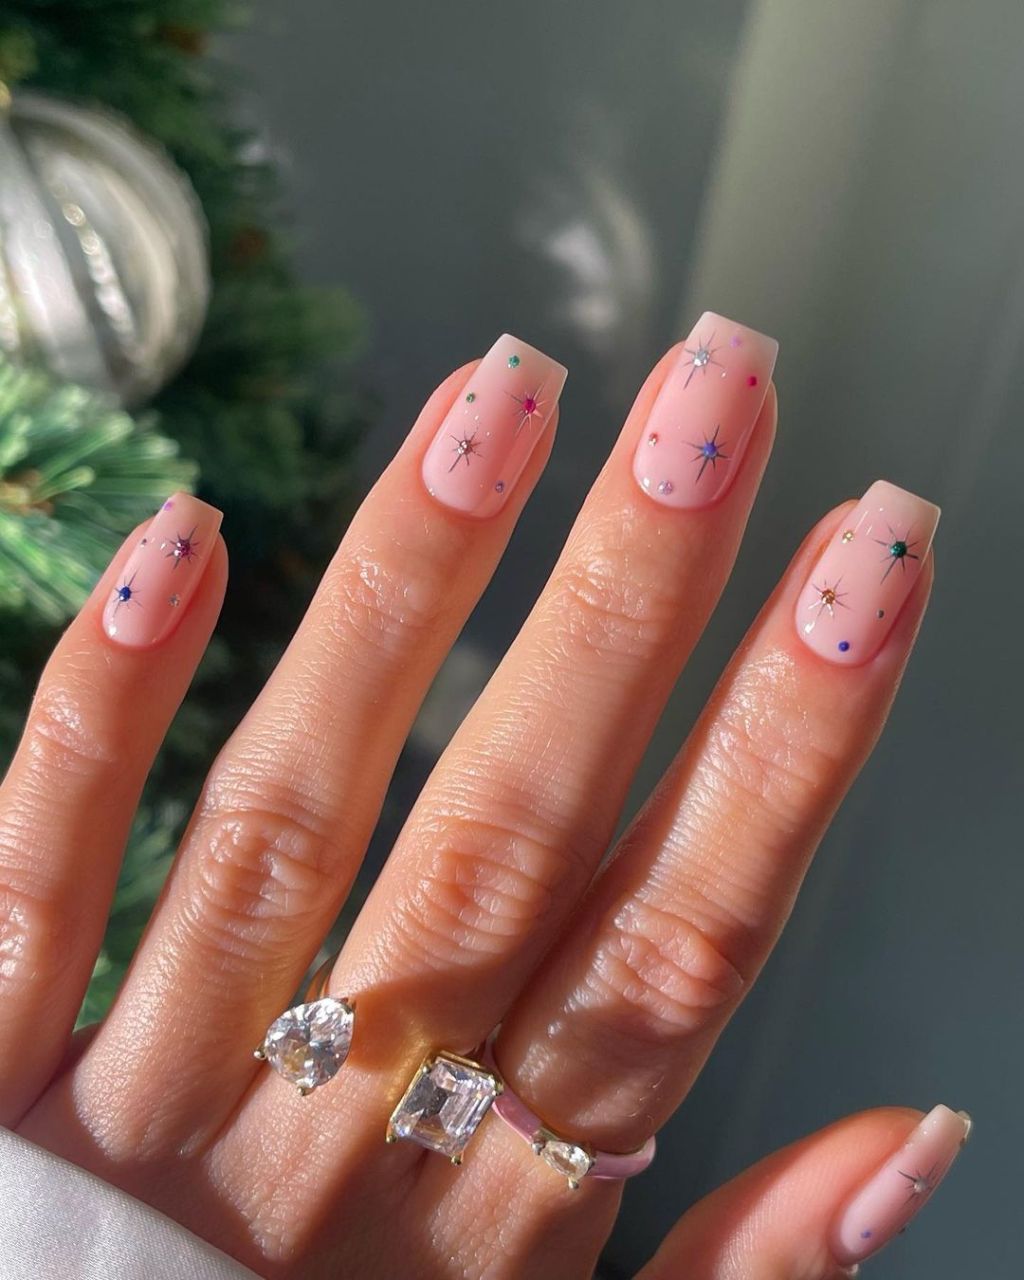
The base is barely there, a wash of sheer pink that reads like a healthy natural nail. That is the trick. The short square pink nails get their party from a few scattered gems — tiny stars, random colored rhinestones, nothing symmetrical. You place them yourself with a dotting tool and top coat, one hand at a time, no rush. The gems will snag on sweater cuffs for three days. After that they settle. Removal is a soak-off with foil wraps, slow and patient, because prying them off takes a layer of nail with it.
Nude Holly Berry Garland French
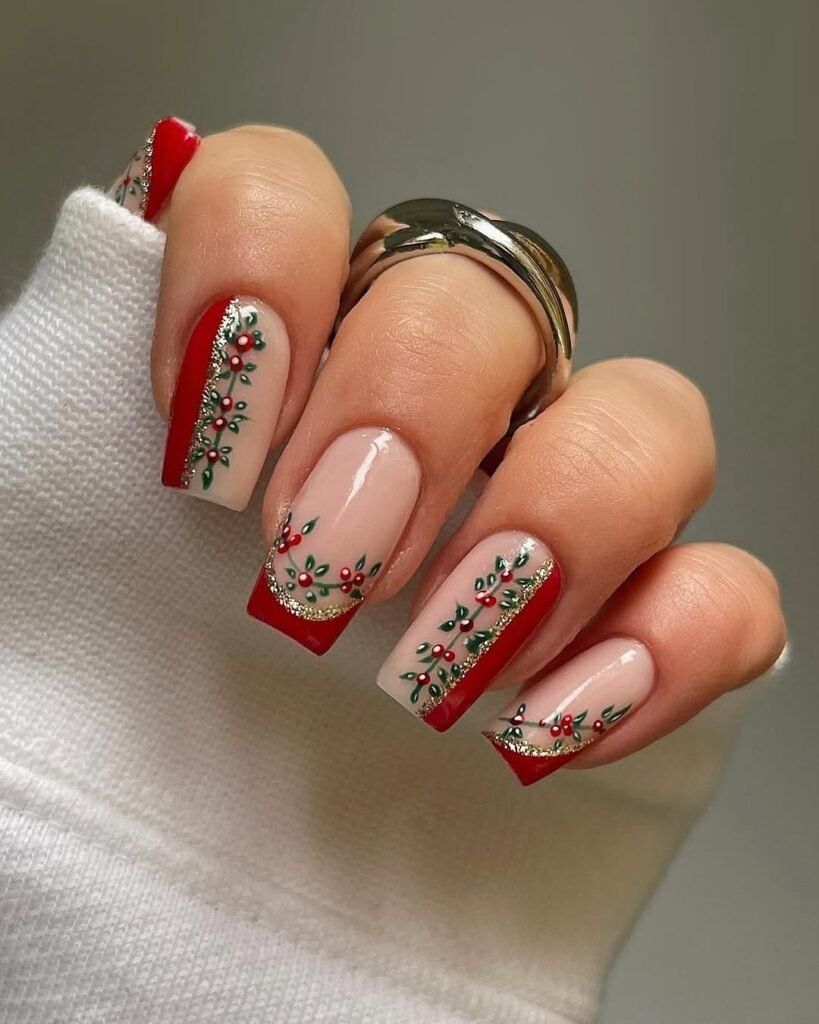
Everyone tries to freehand holly leaves in one go. That is the mistake. The short square christmas nails here use a tiny brush and two thin layers per leaf, letting each dry before the next, and the holly berry garland wraps the nail like a vine, not a sticker. The nude base keeps it from looking like a craft project. Red berries, green leaves, a gold glitter dot at each junction. This is a salon piece. Two to three weeks if you avoid scraping wrapping paper with your fingertips. Soak-off only, the art is too thin to file.
Sheer Pink Glitter French Gradient
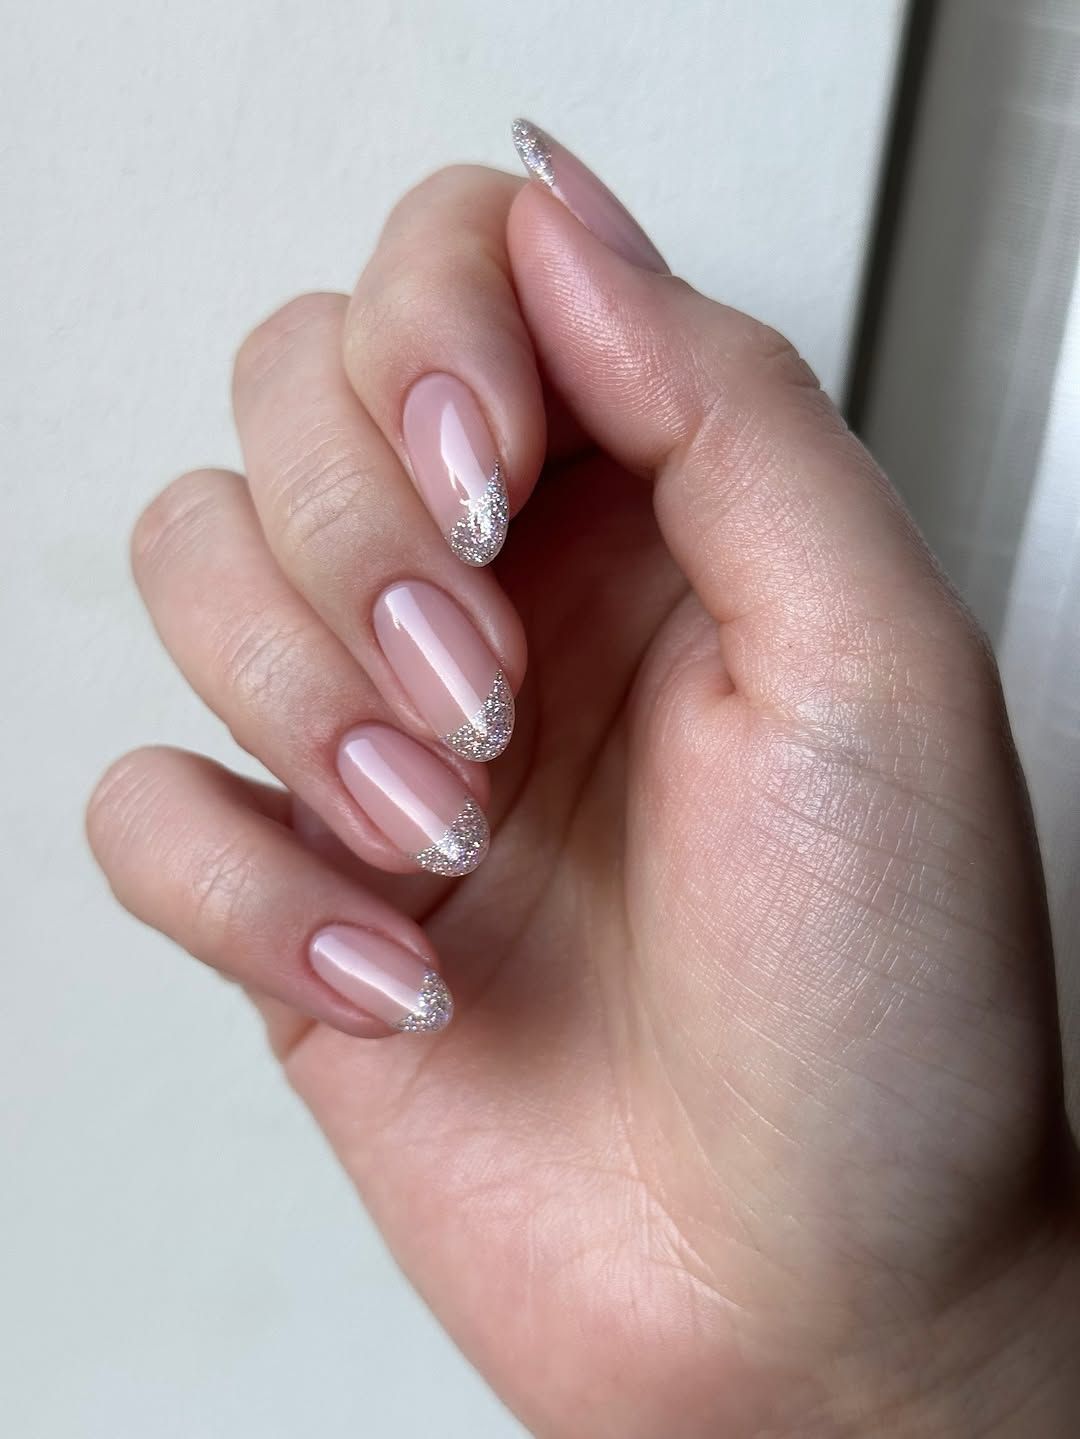
Day one they look like a soft candle glow. Day five the glitter is still dense at the tip, barely faded. That is the advantage of a medium oval glitter french over a solid metallic tip: regrowth hides in the fade. The glitter gradient uses fine silver particles packed at the free edge and dusted toward the cuticle, so there is no hard line to grow out. By week three you might notice the sheer pink base yellowing slightly if you smoke or use turmeric. A fresh top coat at week two restores the gloss. Removal is standard soak-off, the glitter is fine enough to lift without filing.
Deep Red Glitter Almonds
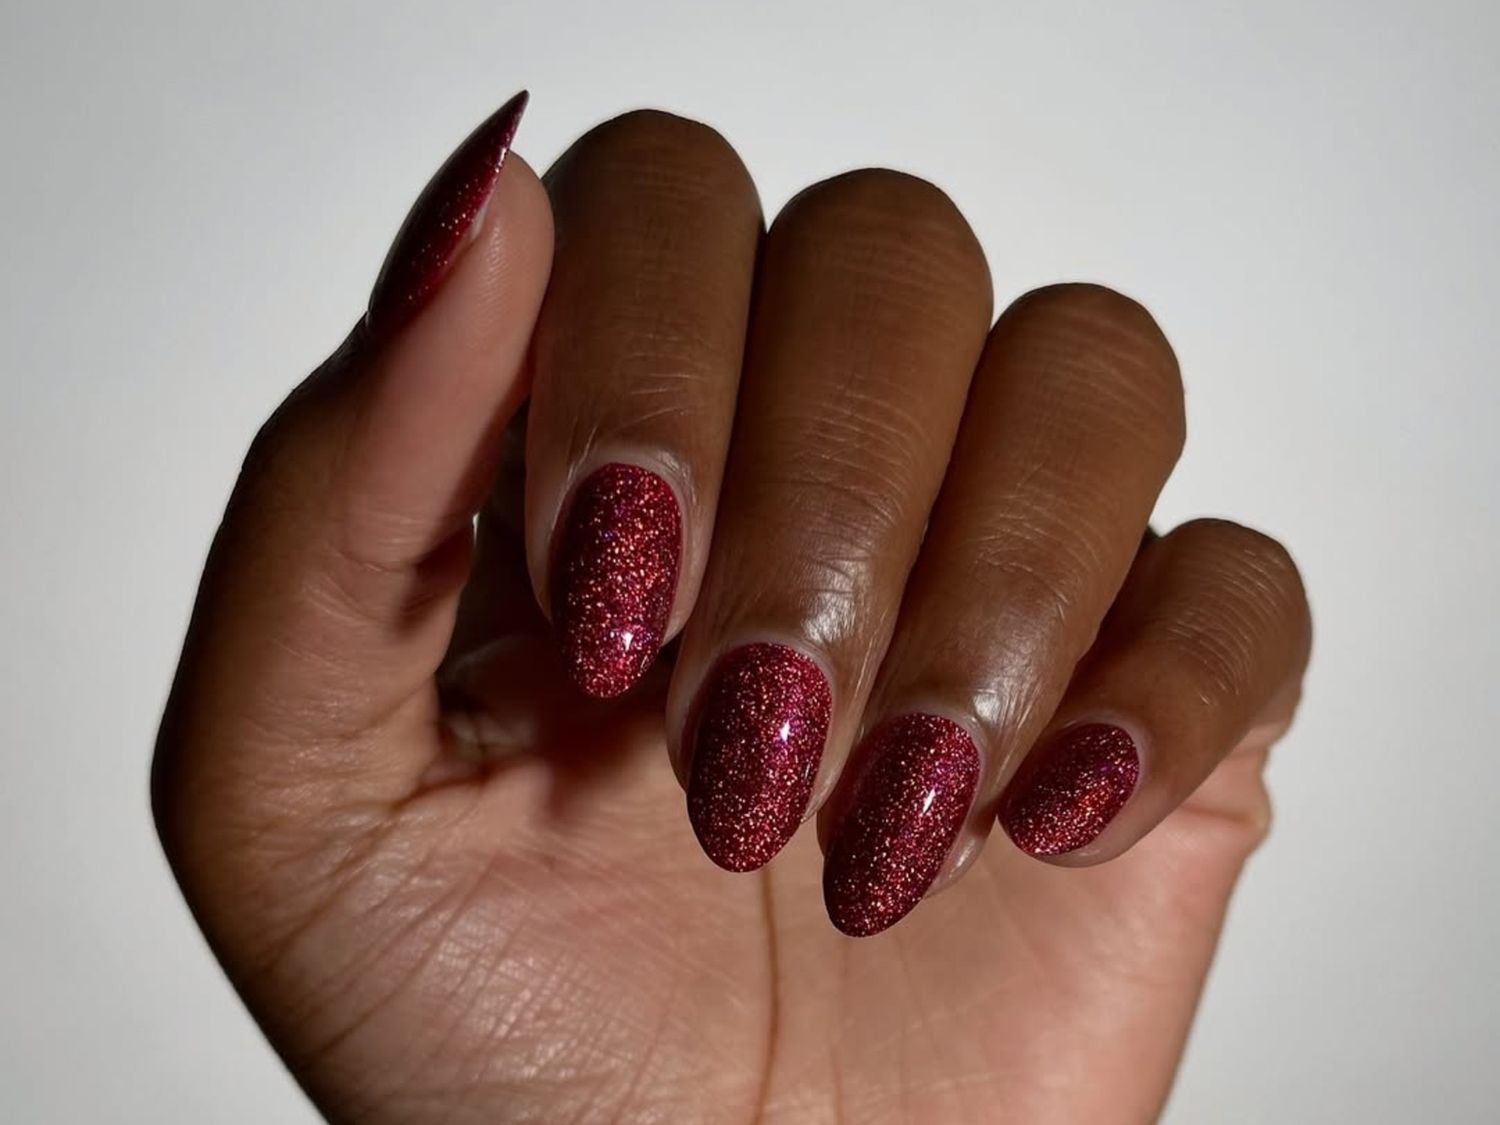
I wanted to hate this. Full glitter coverage on long almond red glitter nails reads like a disco ball in a Christmas aisle. But the deep red glitter here is dense enough to look like wet lacquer from two feet away, only catching light up close. The downside: glitter that thick takes three coats and a builder base or it feels gritty. It also snags on every knit sleeve for the first week. Removal is a thirty-minute soak with foil and cotton, no shortcuts. Two to three weeks of wear if you cap the free edge with top coat every other day.
Holiday Almonds Red Glitter French Candy Cane
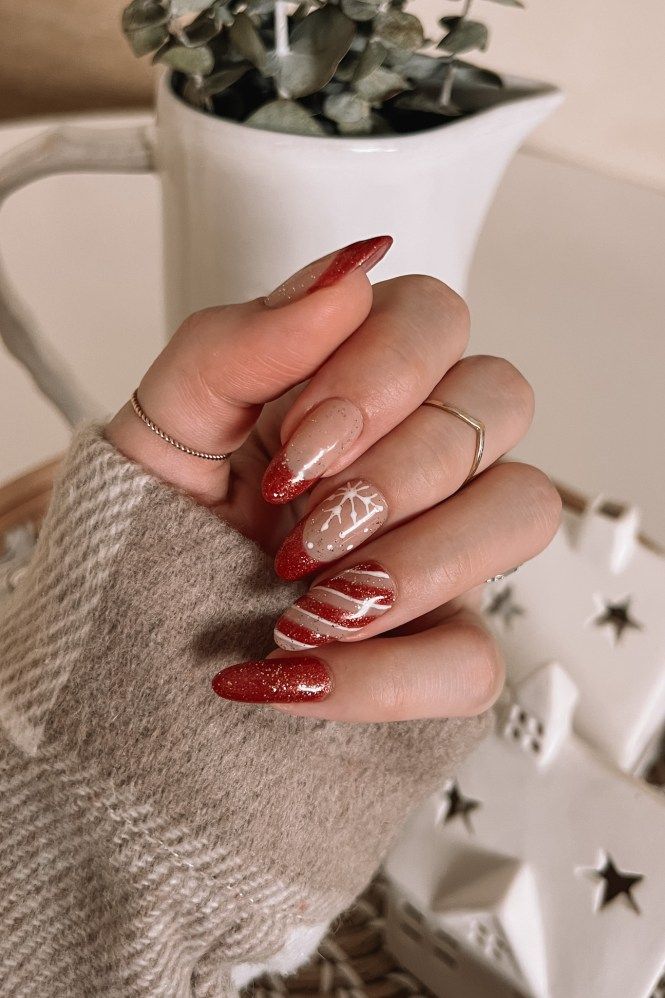
Imagine a Christmas cookie on your nails, but make it elegant. The long almond holiday nails start with a nude base, then a red glitter French tip that is more sparkle than solid color. On the accent nail: white candy cane stripes that curve diagonally, plus a tiny snowflake. The trick is asking for a thin glitter layer — two passes, not three — so the nude shows through. This is a salon design, no question. The candy cane stripes need a steady hand and a striping brush that is barely wet. Expect the snowflake to chip by day seven if you type a lot.
Nude Floral Gold Glitter French
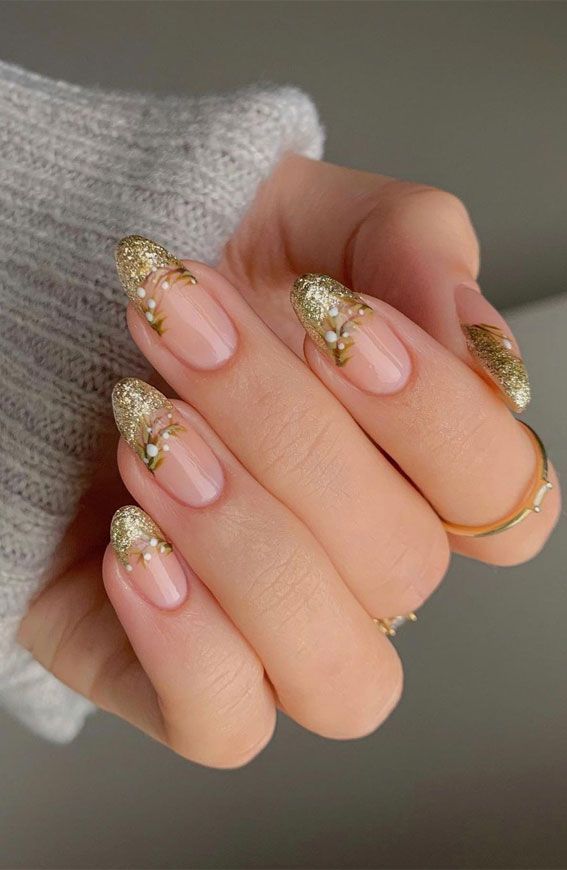
This is the design that makes me understand why some people book a nail artist and never look back. The nude base is so close to my own skin that the silver glitter gradient tips feel like they were painted onto my actual fingers, and the fine glitter catches the light without screaming for attention. I wore these through a week of gift wrapping, cookie baking and one very long office party, and the sparkle stayed put while the nude base did its disappearing act. The medium almond shape is elegant without being fragile, and the gradient is forgiving enough that even when my nails grew out, the transition just looked like a deliberate ombre. It’s not a look that needs a second glance, but it rewards one.
Deep Green French with Gold Glitter Accents
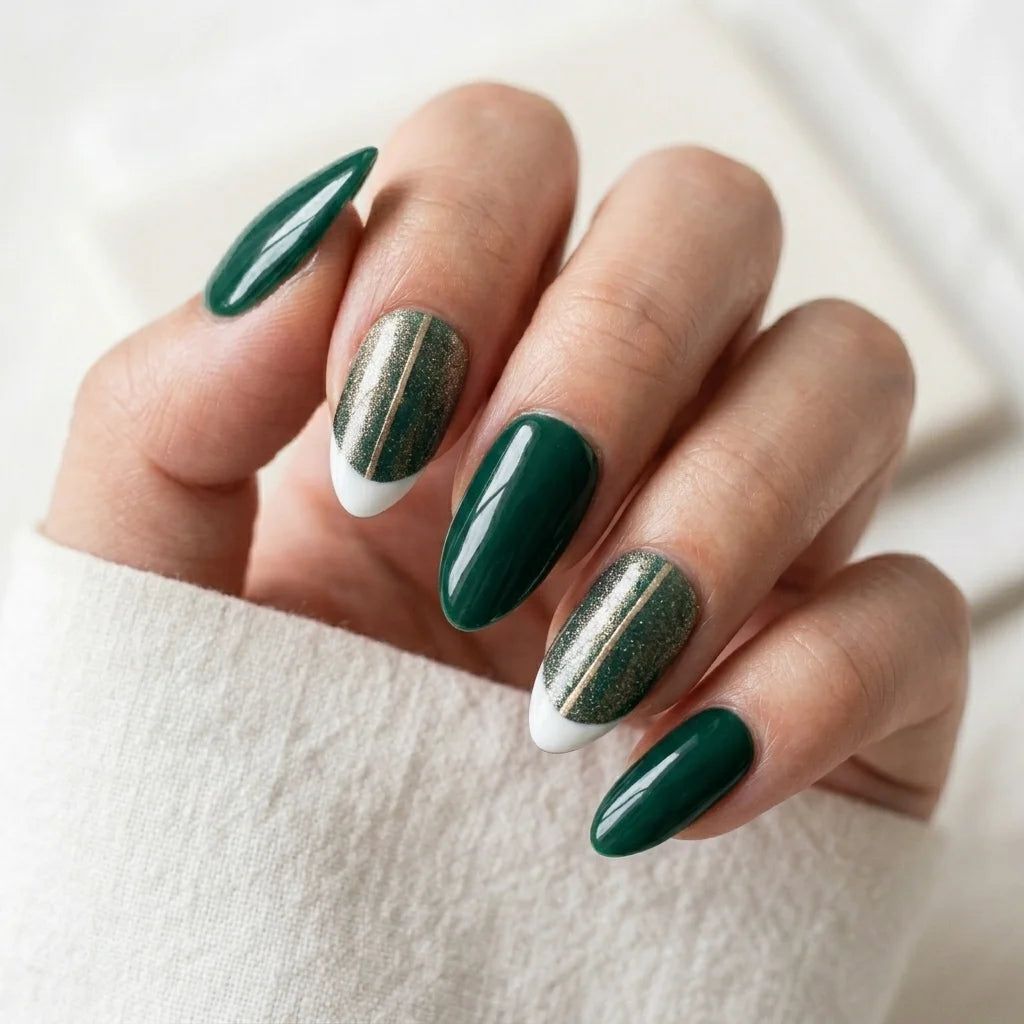
The line between a deep green French and a muddy one is about three seconds of curing time. These medium almond green nails stay crisp because the green is opaque in one coat, not two, and the white tip underneath keeps the green from reading black. The gold glitter accent on the ring finger is thin enough that the green shows through, which matters more than you think: thick glitter turns festive into costume. This is a salon sit, not a Sunday experiment. The green stains if you rush the base coat, and the gold needs a no-wipe top coat to stay flat. Two weeks, no chips, no regrets.
Pink Glitter Snowflakes
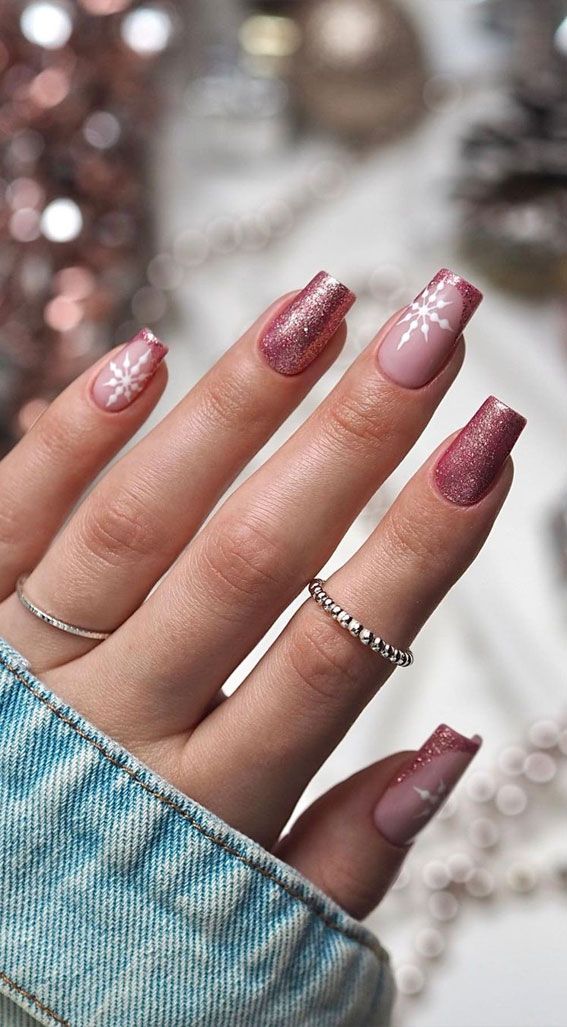
I told myself I was done with pink. Then I saw this medium square pink glitter base and the snowflake art on the accent nail, and I sat down at the salon anyway. The glitter is fine, almost a shimmer, which means it catches light without catching on sweater cuffs. The snowflake is painted, not stamped, and you can tell: the lines are uneven in a way that feels handmade, not factory. It reminded me of the snowflakes my grandmother cut from coffee filters, imperfect and somehow better for it. I wore them to a holiday dinner and spent half the night holding my hand out for people to look at. That was the point.
Sparkling Pink Glitter Tips with Snowflakes
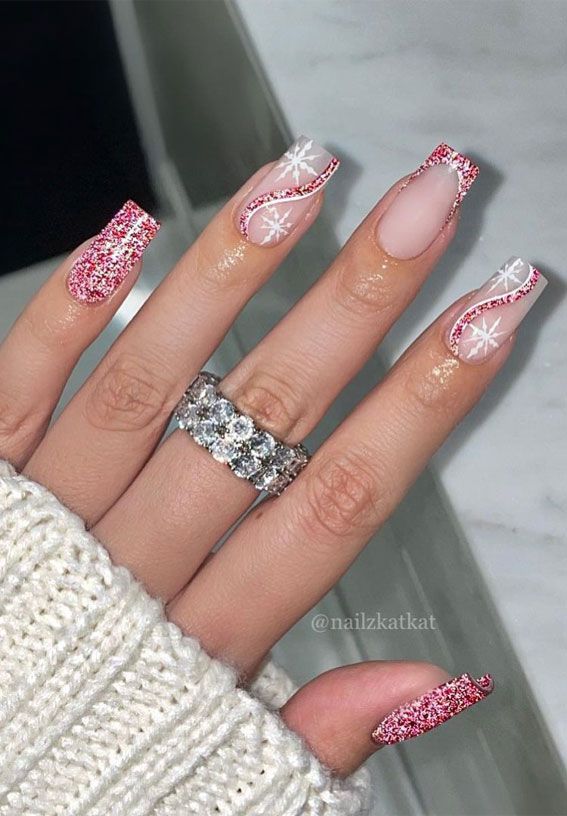
This one stops you. The sheer pink base keeps the hand looking bare, then the bright pink glitter tip hits, then the snowflake on the accent nail pulls focus. It is a lot, and it earns every bit of it. The medium square holiday nails shape is the right call here: square gives the glitter a clean edge, and the snowflake art has room to breathe without crowding the cuticle. The rhinestones on the snowflake catch everything, including stray hair, but that is the trade for a design that reads as intentional from across the room. Two weeks, salon only, and book the extra ten minutes for cleanup.
Nude Silver Glitter Gradient Tips
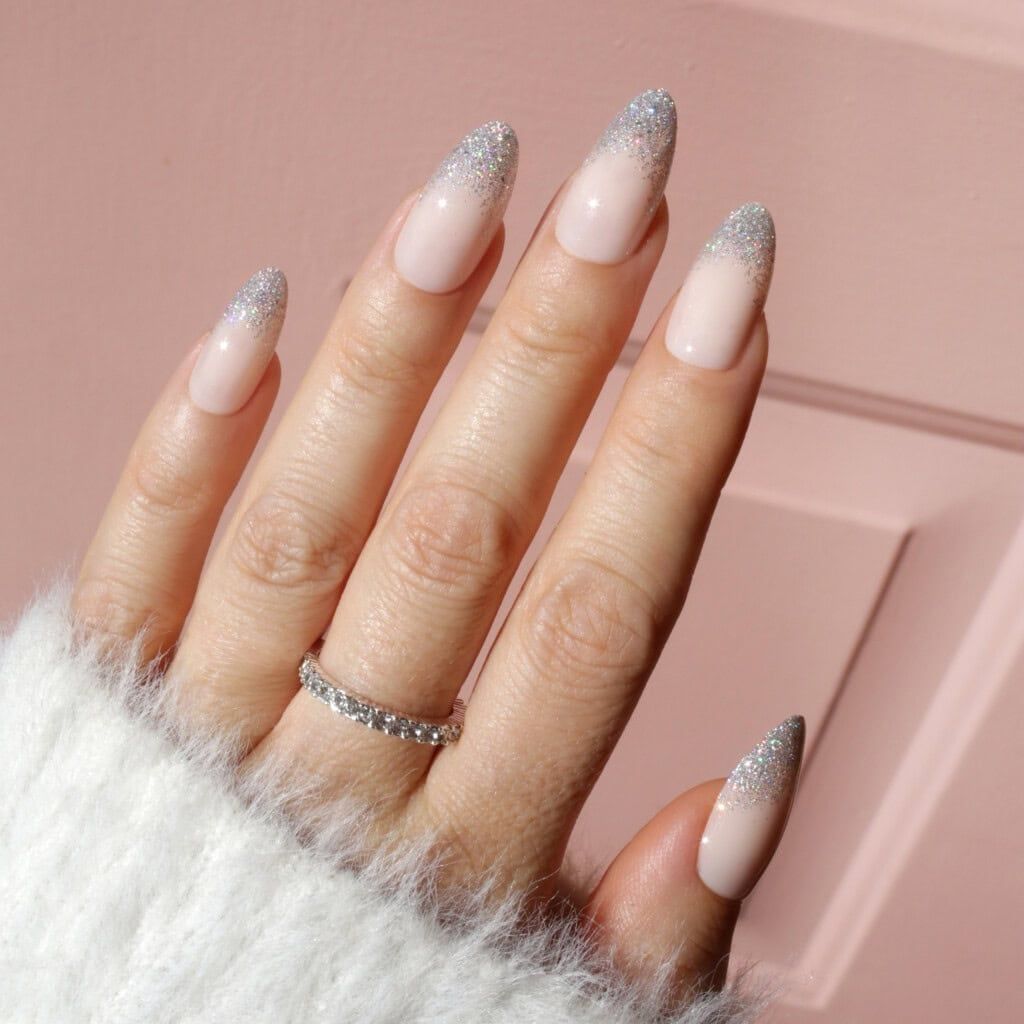
That silver glitter fade starts so fine near the cuticle you almost miss it, then builds to a solid shimmer at the tip. On a medium almond glitter gradient, the effect is less party nail, more expensive sweater sleeve catching the light.
Here’s the real holiday math: this silver glitter gradient hides regrowth better than any solid color I’ve worn. By week two, the nude base blends into new nail growth while the tip still looks intentional. Removal is a standard soak-off, no foil acrobatics. I wore these through four days of gift wrapping and one cookie-decorating disaster, and the only damage was a single chip on my dominant index. For a December calendar, that’s a win.
Metallic Red Holly Berry Almonds
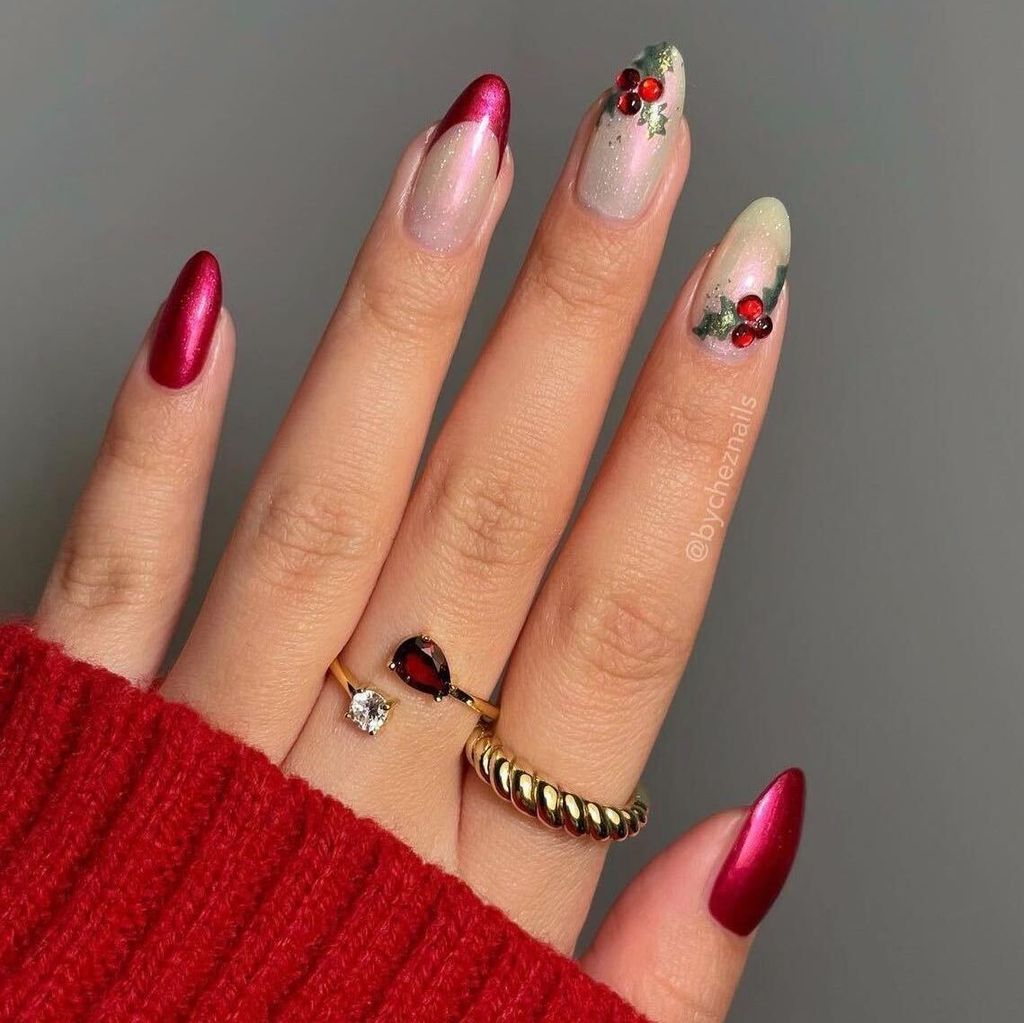
There is a right way to do holiday nail art and a way that looks like craft-foam stickers. This is the right way, and it starts with the long almond metallic red base. A single layer of chrome powder over black gel gives that mirror finish that shifts in restaurant lighting. Then the tech hand-paints the holly leaves in a matte green and adds three tiny berries with a dotting tool. The berries sit raised, so I caught mine on a sweater cuff by day two. Worth it. The key is sealing the art under two coats of no-wipe top coat and letting each layer cure fully between. This takes a steady hand; bring reference photos, it is not a nail-art sticker situation. Book the 90-minute slot, this is not a weekday rush job.
Nude Pink Cat-Eye Red Glitter French
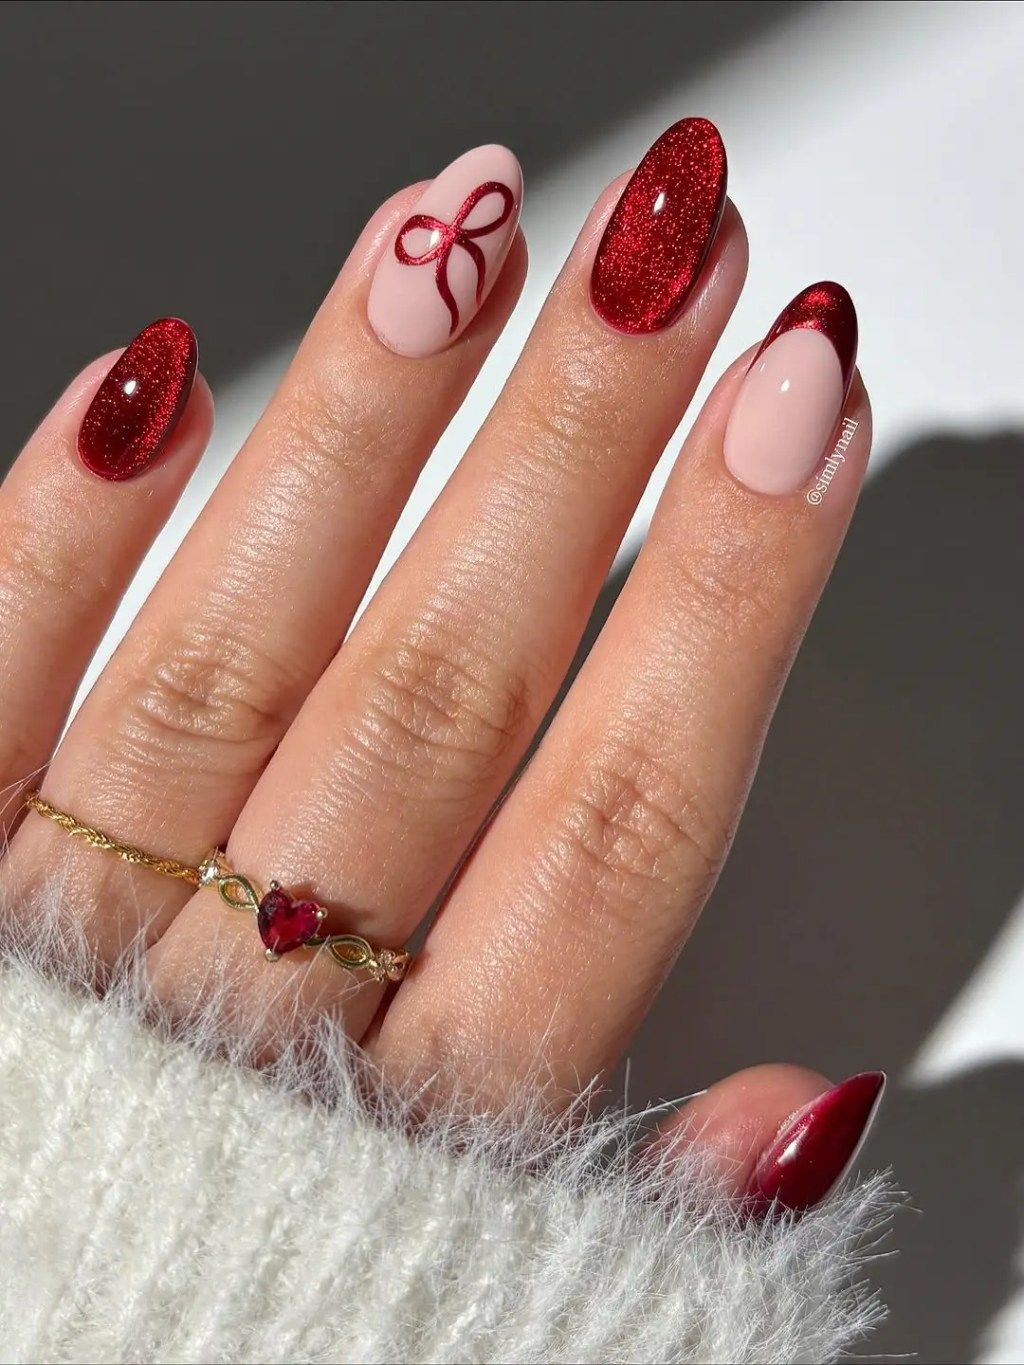
Can a cat-eye finish and red glitter French share the same nail without it looking like two different manicures fighting for attention? On medium oval cat eye nails, the answer is yes, barely. The nude pink cat-eye anchors the nail bed with that magnetic depth. Then the red glitter French starts halfway up the nail, fine particulate, not chunky. The cat-eye shifts when you move your hand, the glitter catches the overhead light, and together they read as intentional. One hiccup: the cat-eye effect fades if you apply the glitter layer too thick. Tell your tech to do a thin magnetic layer first, cure, then sponge the glitter on sheer. Otherwise the depth disappears under glitter.
Short Oval Pink Gold Glitter Stripes
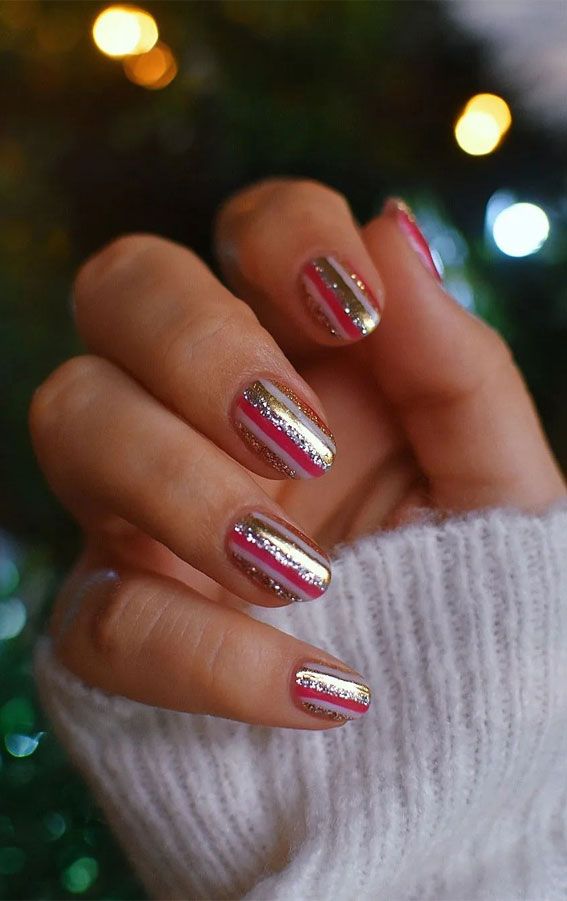
Stripes beat detailed snowflakes every time. I said it. A horizontal stripe design does what intricate hand-painted art cannot: it stays legible from across a dinner table, it does not require a magnifying lamp, and it works on nails that see a keyboard all day. These are short oval striped nails with three alternating bands of pink creme and gold glitter and one thin white line separating them. The stripes run straight across, no fade, no gradient. It is the equivalent of a great LBD. Against dense holiday red or dark green, these read as fresh. The gold glitter stripe catches light, the pink keeps it soft.
Sheer Pink Gold Glitter Snowflake Tips
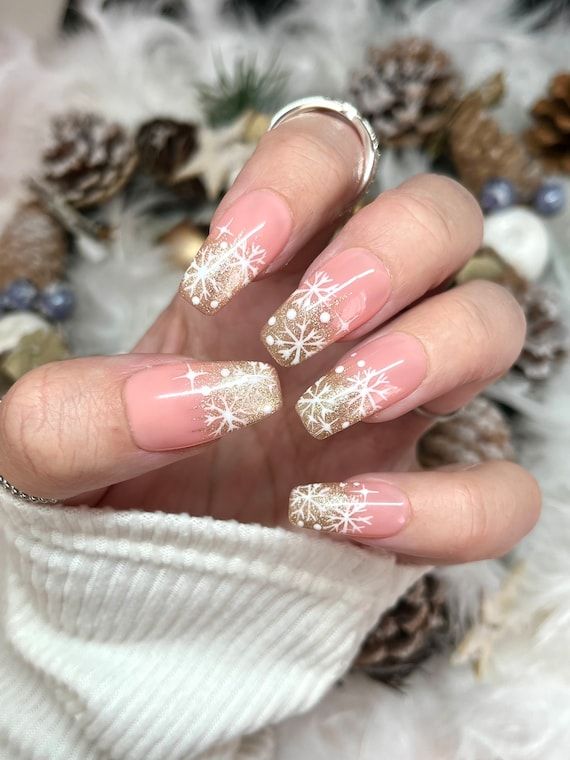
These are for the person who wants holiday sentiment without looking like a wrapped gift. The sheer pink base lets nail bed show through, medium square snowflake nails that read clean and groomed. The gold glitter tips start at the smile line, fine micro-glitter, not a solid block. Then one snowflake per accent nail, white, small, simple six-point design. No dots, no swirls, no extra gems. The litmus test: if your office holiday party has a dress code that says festive but not costume, this is the nail that passes. Skip if you want maximum sparkle — sheer pink mutes the glitter. Wear to a cookie swap, a family brunch, the kind of event where you shake hands and nobody stares at your fingers.
Short Coffin Red Green Glitter Gradient
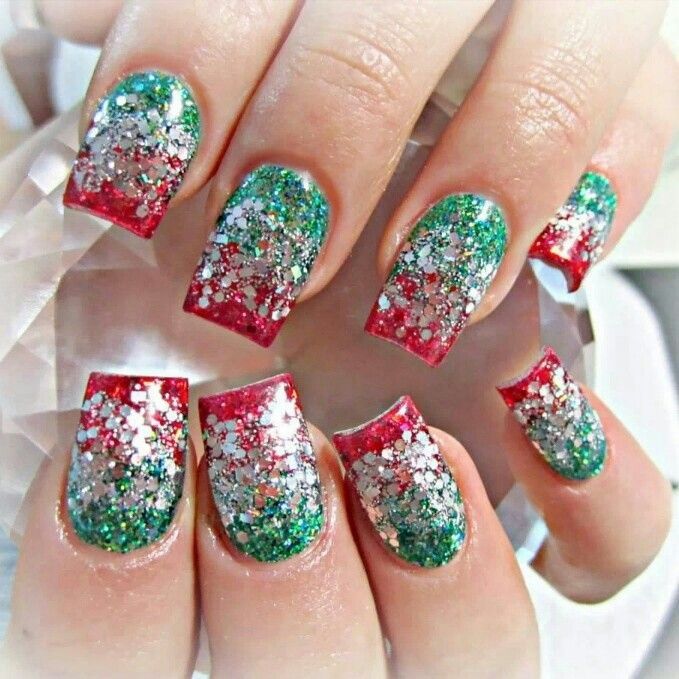
Dense glitter on short coffin glitter nails sounds like a removal nightmare. It is, but only on removal day. The wear is better than I expected. The red green glitter gradient builds from a deep crimson at the cuticle to a forest green at the tip, with silver micro-glitter bridging them. Three layers of dense glitter, each packed on a sponge. It does not chip because there is no bare nail to chip from. The surface is rough for the first two days, then it smooths from wear. You will catch threads on sweaters and hear that sandpaper sound on denim zippers. Healthy trade-off. For removal, foil wraps with pure acetone and patience. Do not pick.
Clear Stiletto Rhinestone French
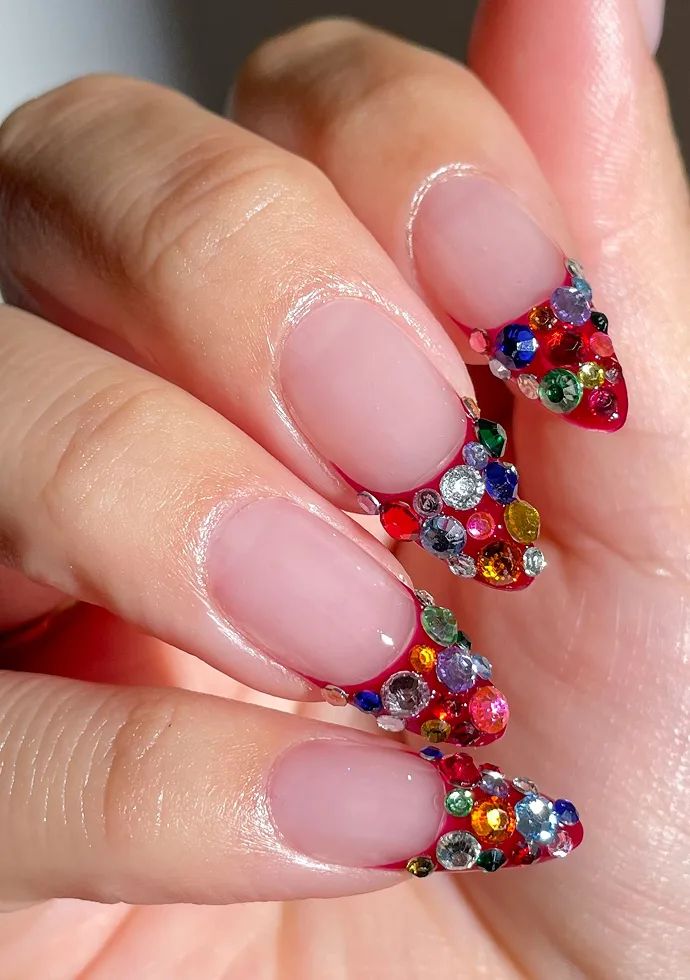
This is not a nail, it is a party on your fingertip and I am here for it. A clear medium stiletto rhinestone base with a dense rainbow of multi-colored stones marching from smile line to tip, each one catching light from a different angle. The sheer maximalism works because the base disappears, leaving only the glittering rhinestone French line. The catch? Every sweater, every pair of tights, every time you reach into a bag — those stones snag. Be gentle for the first week or accept casualties. Removal needs patience and care or you risk nail damage underneath.
Nude Fine Silver Glitter Cuticle French
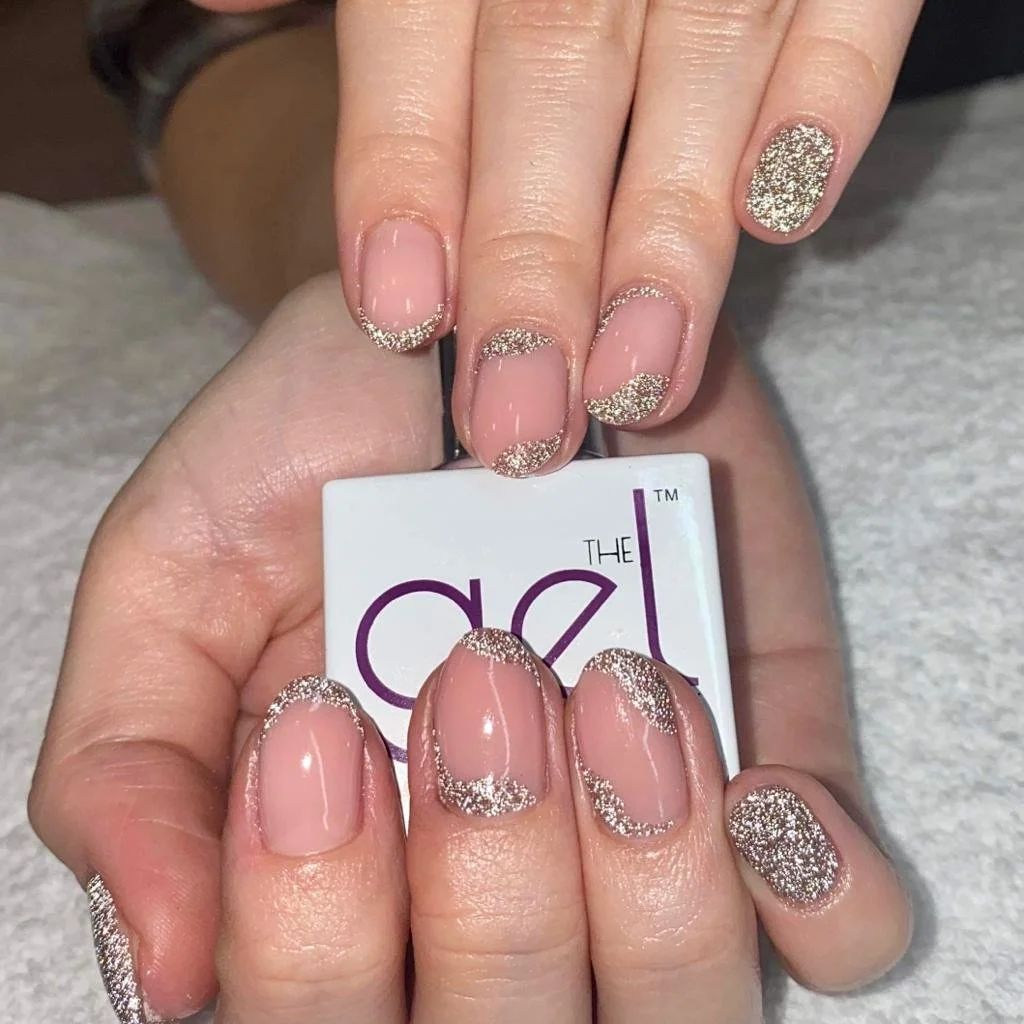
The precision here is what separates a good holiday manicure from a great one. A sheer nude base on a medium almond nude glitter shape, with fine silver glitter applied in a razor-thin line along the cuticle and a matching band at the free edge. The execution quality is everything — any bleeding or unevenness and the whole effect reads messy instead of elegant. This one is not a Sunday DIY unless you have a very steady hand and a cleanup brush ready. Salon booking, and it pays off: the grow-out is so forgiving that you will still love it at week three.
Short Oval Glitter French Accent
I was ready to roll my eyes at another glitter French tip. Then I saw these. A nude base on a short oval glitter french shape, with dense gold glitter on the tips and one full glitter accent nail per hand. The trick is the density — thin glitter reads cheap, this is packed enough to look like dipped metal. The honest downside: that full glitter nail feels rough against your face for the first few days. A top coat layer helps but does not fully fix it. Still, for a classic holiday look that actually works on short nails, this one earns its place.
Nude Deep Red Glitter French Bow
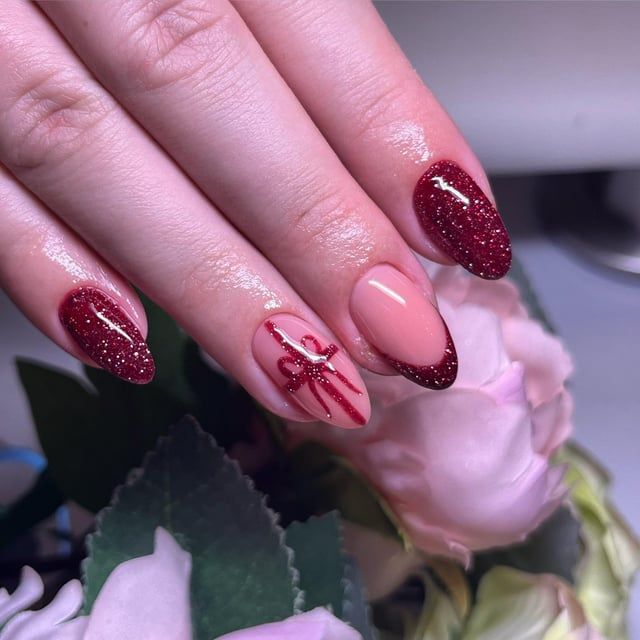
I confess: I wore glitter French tips to a holiday party last year and spent the whole night picking red sparkles out of my hair. These are worth the cleanup. A sheer nude base on a medium oval red glitter shape, with deep red glitter packed onto the tips and a tiny red bow design on the accent nail. The bow is the most delicate part — it sits slightly raised and will catch on everything if not sealed properly. Ask your tech for an extra top coat layer over the bow. The payoff is a manicure that reads festive without screaming.
Full Glitter Coverage Gold Glitter and Red Almonds
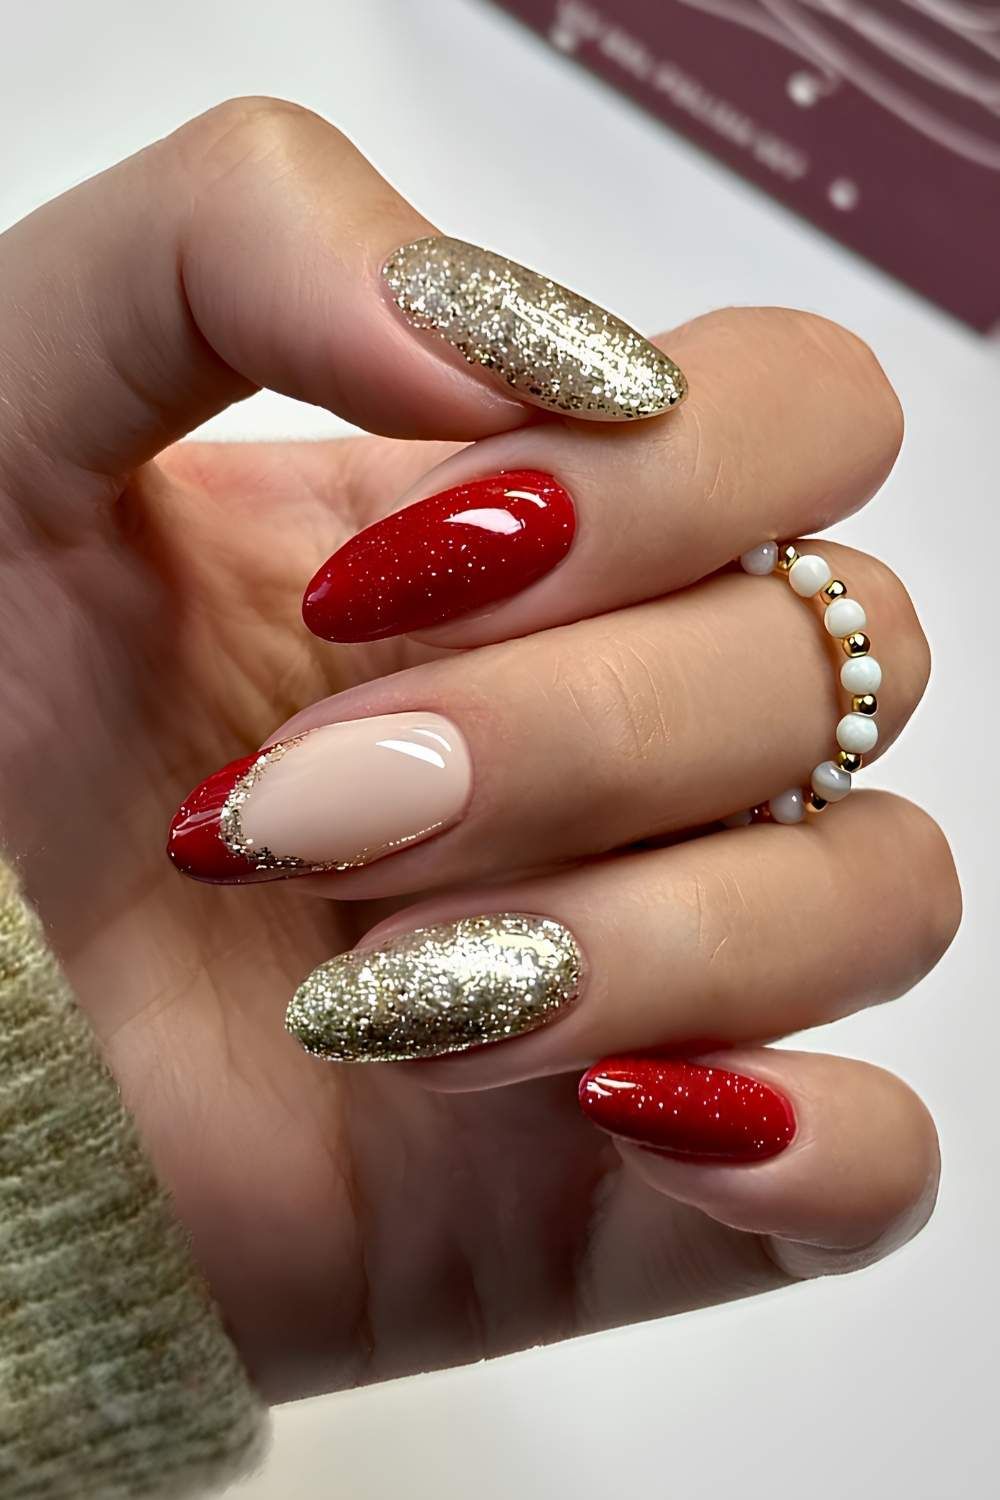
It is Christmas morning on your nails and I am not apologizing. A medium almond gold glitter base on the ring finger, deep red on the rest, with gold glitter packed so densely on the accent that it looks like molten jewelry. This is the design you wear to the office party where you want everyone to notice your hands when you reach for the champagne. The full glitter coverage means zero grow-out worry — no visible gap, no touch-ups needed. Just accept that removal will involve soaking and patience, and enjoy the sparkle while it lasts.
Long Almond Pink Marble Bow
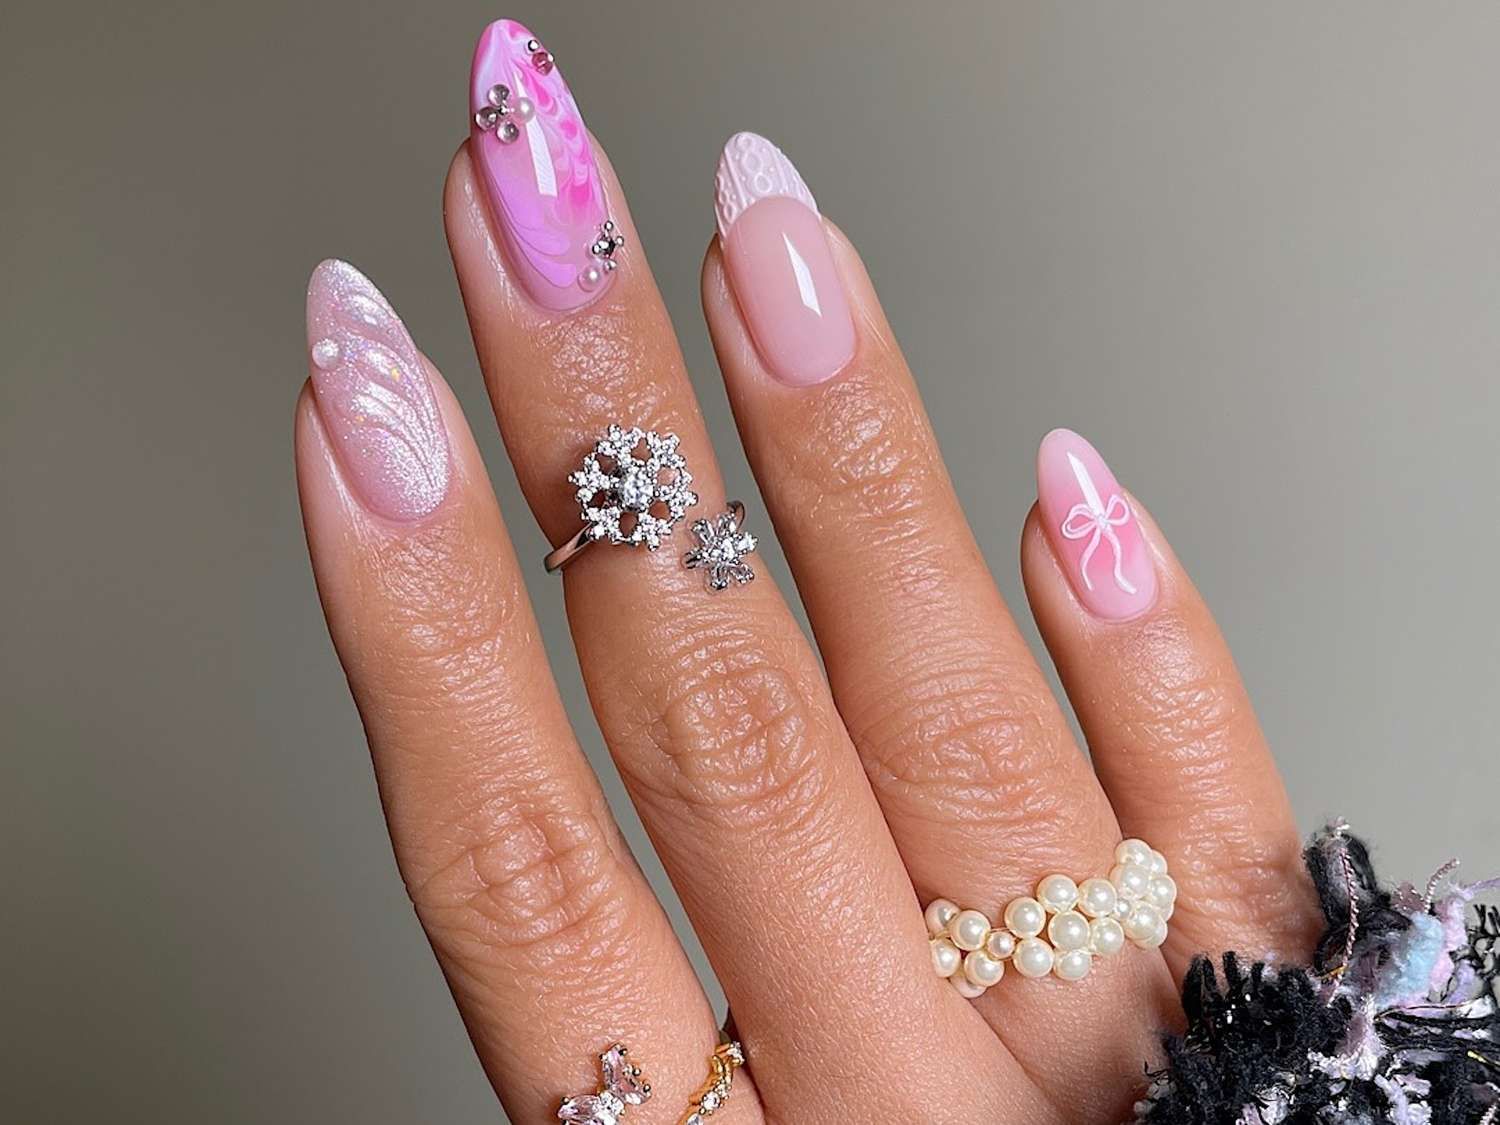
There’s something about a pink marble swirl that makes a design feel less like a holiday costume and more like an heirloom. This set keeps the festive energy but trades the screaming red for soft white and iridescent shimmer, with one accent nail carrying a bow and another a snowflake. It’s the kind of detail you notice across a dinner table, not from across a parking lot. The pearl accents catch light without blinding anyone, which matters when you’re holding a wine glass for three hours. I’d book this at a salon — the marble veining needs a steady hand and the bow placement is fiddly in a way that makes DIY feel like a gamble. The payoff is a manicure that reads as intentional without trying so hard.
Visual Idea
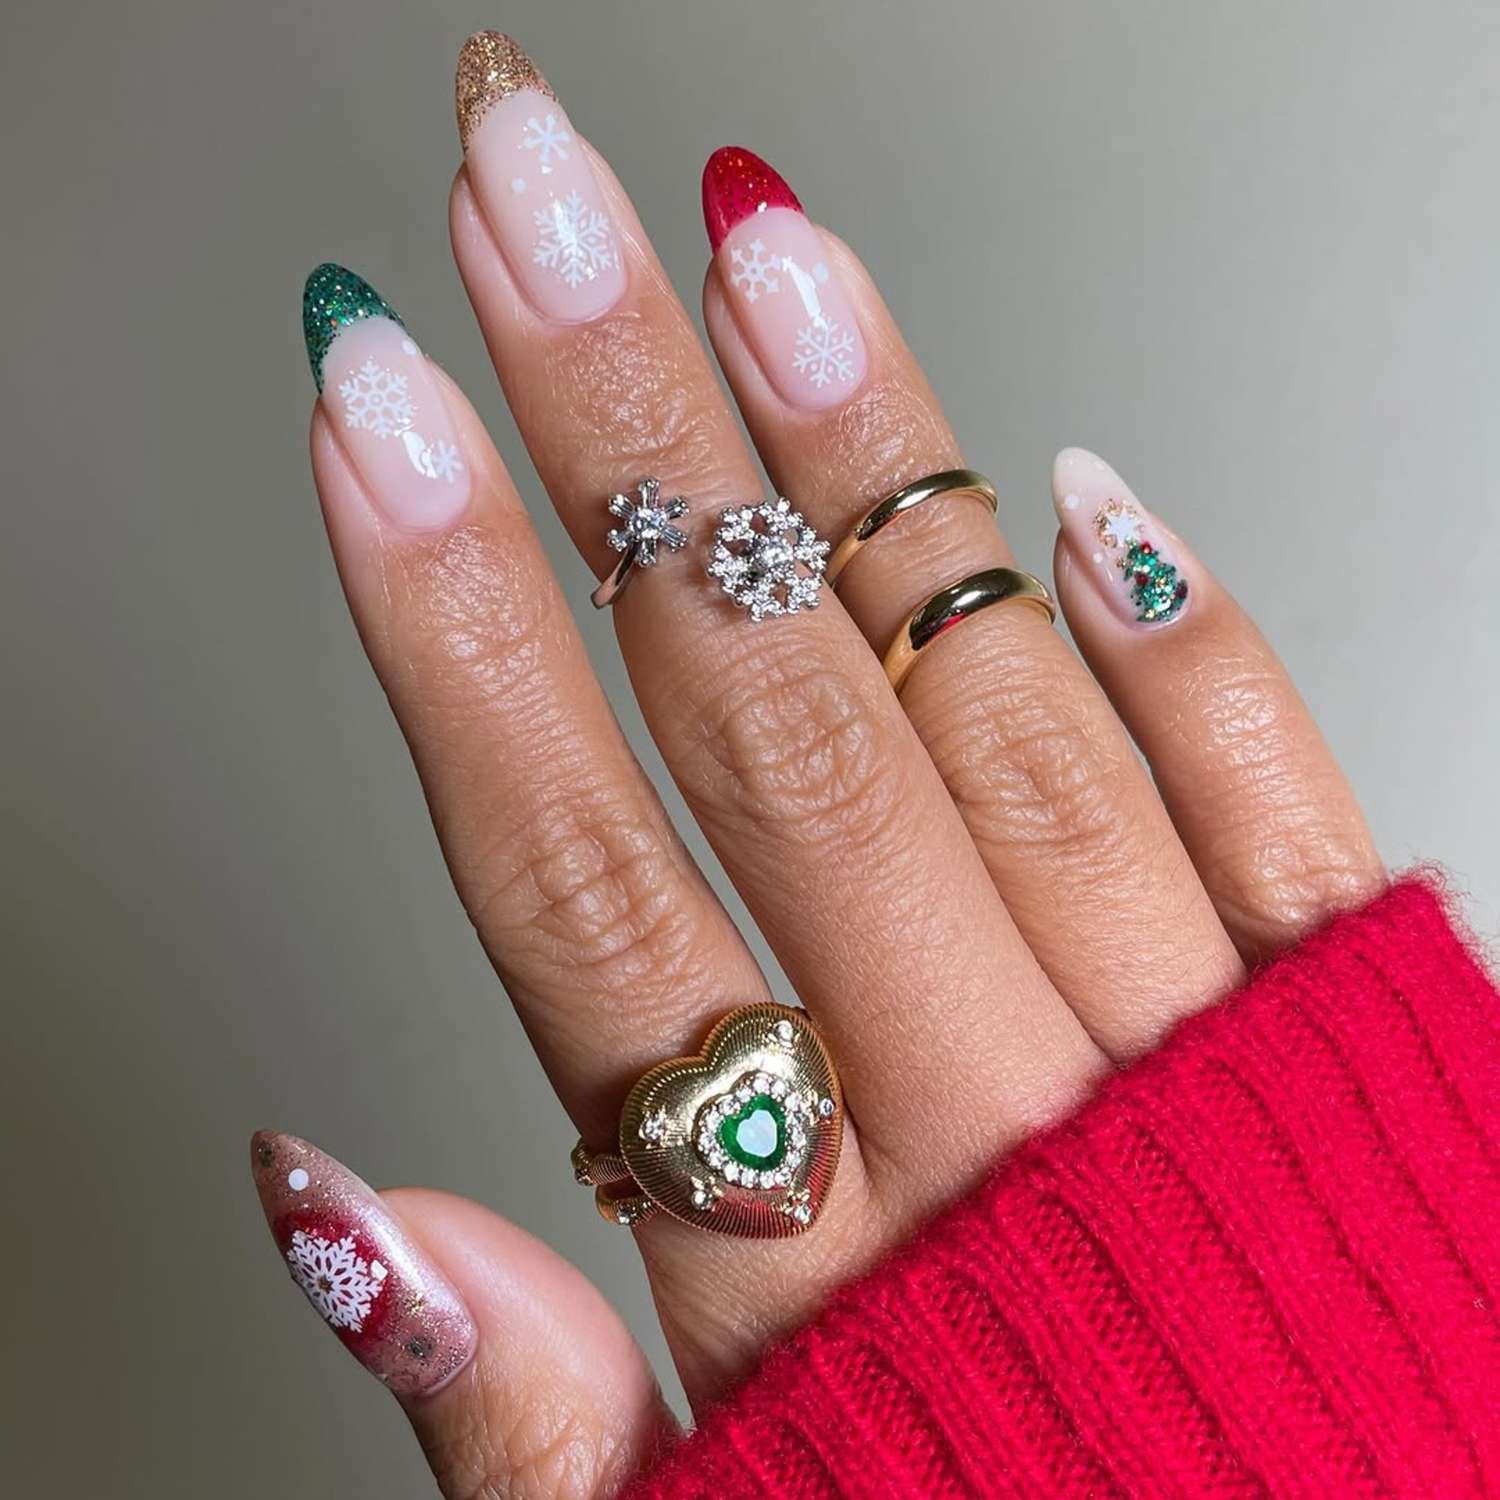
Can you handle a manicure that answers every question before it’s asked? This stiletto set stacks white snowflakes, gold glitter tips, red French lines, green glitter accents and a Christmas tree on one nail, and somehow it doesn’t look like a craft table exploded. The secret is the clear base — it gives each element room to breathe instead of fighting for space. This flatters someone who wants their nails to start the conversation, not someone who needs their hands to fade into a black dress. The varied designs work best on long stiletto because there’s actual surface area to spread the visual weight. If your holiday calendar includes a white sweater and a lot of gift wrapping, this is the set that gets noticed.
The Single Detail A Reader Notices First Visual Idea
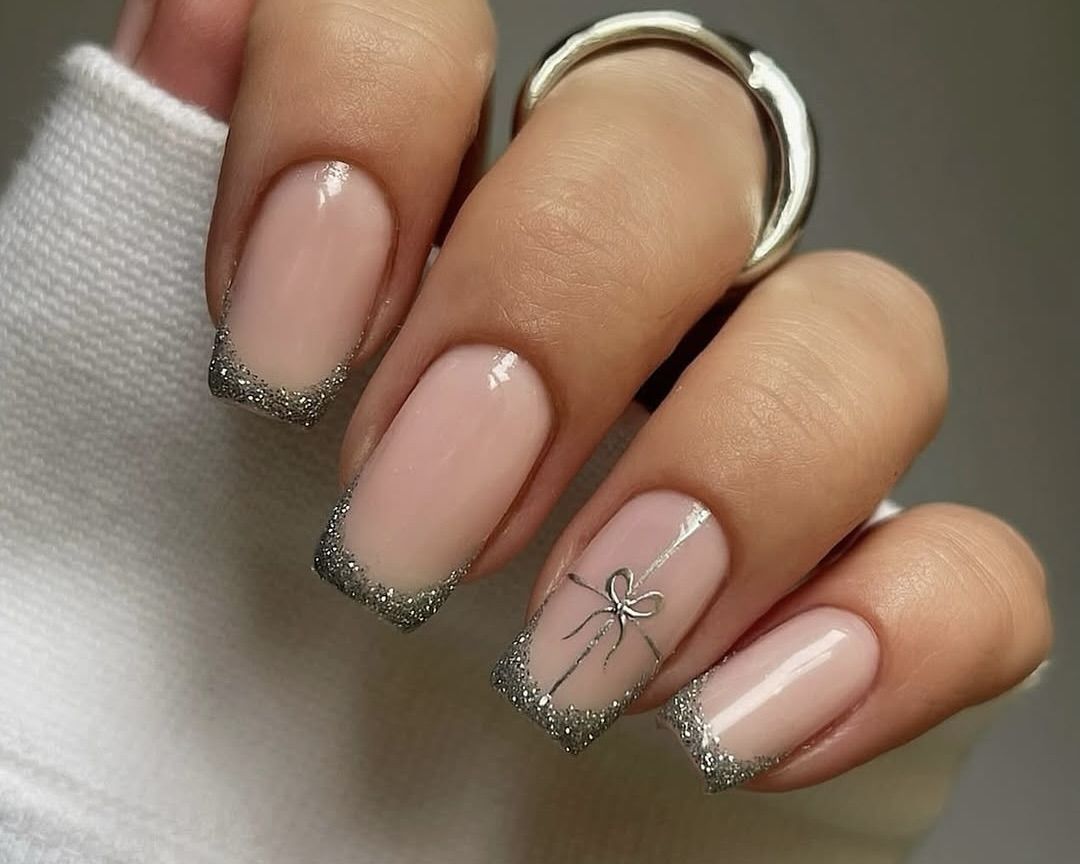
I’ll tell you what I noticed first: the foil. Not the rhinestones, not the stickers, not the French tips — the foil catches the light before anything else registers. That single detail pulls the whole design together, but it also creates a practical headache. Foil lifts faster than polish, and on a set with this many elements, one lifted piece makes the whole thing look tired by day four. The rhinestones hold better if they’re encapsulated under a thick top coat, and the stickers need a no-wipe top coat to stay flat. You’re looking at a fill at week three if you want the foil to survive, and that’s assuming you baby the tips through typing and sweater sleeves.
Final Thoughts
After writing all of these, I’m still surprised by how many sheer bases won. I walked in expecting full-coverage reds to dominate, but the pink gradients and nude glitter tips are the ones I keep staring at. The deep green French with gold accents is the one I’m actually booking next, because it’s festive without the cleanup drama.
- Cuticle oil twice a day, especially after glitter removal
- Top coat refresh on day 7 for any glitter gradient
- Avoid acetone on rhinestones, use a soak-off wrap
- Thin layers on sheer bases to prevent lifting
Book the consultation first. Some of these need a steady hand and a lot of patience.