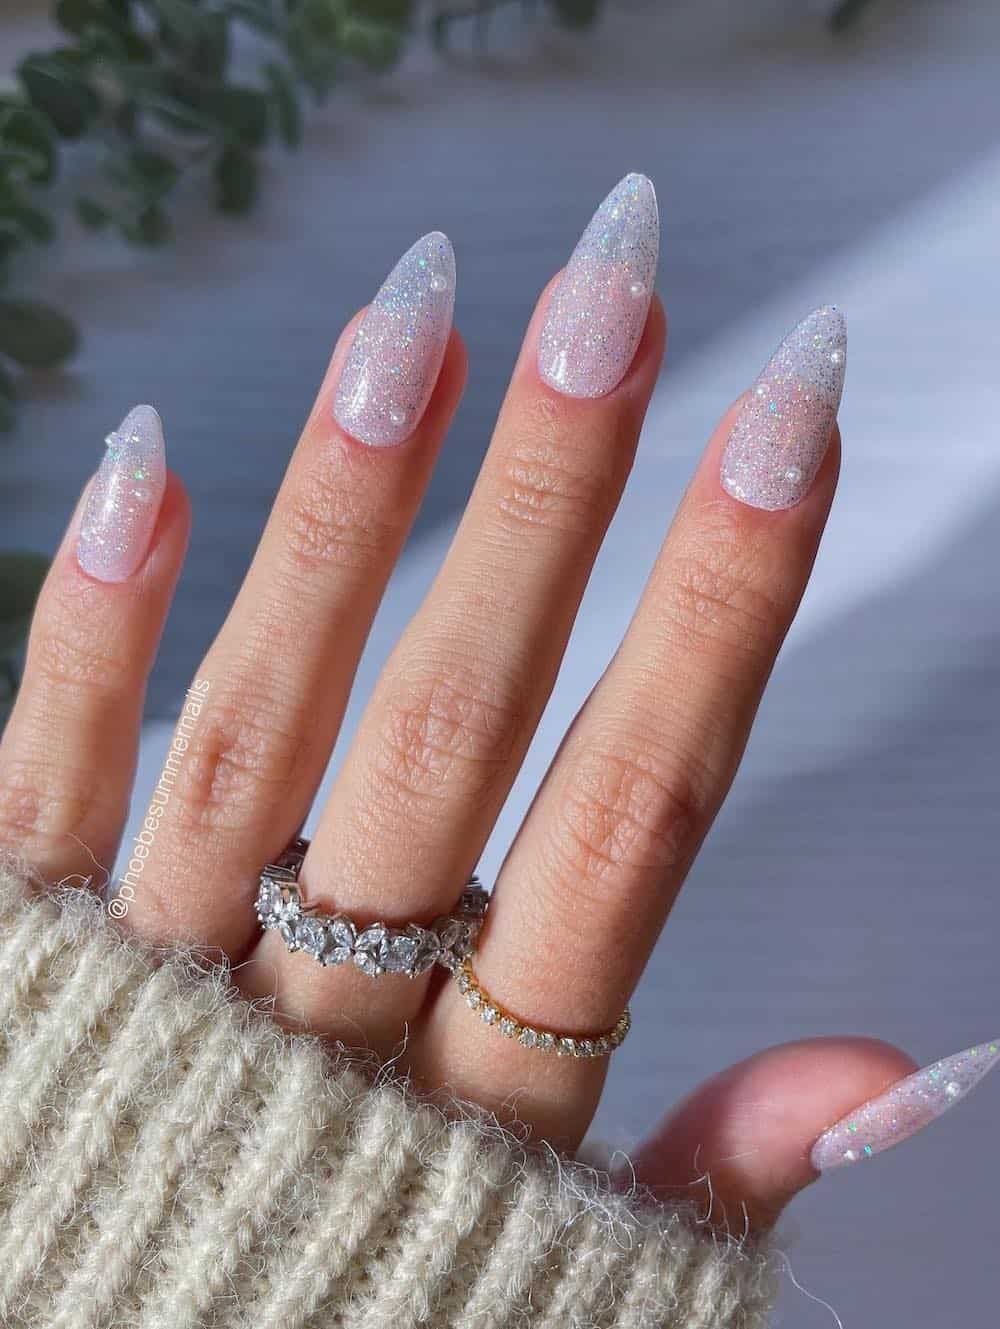
I keep seeing rhinestones creeping up from the cuticle line, not scattered like confetti but placed with intent. The 2027 take on Crystal Rhinestone Nails is quieter than last year’s full-on bling, more structured, like the sparkle finally learned to sit still.
Here are 23 designs that run from a single accent stone to full-on crystal armor, short squovals to extra-long coffins, salon bookings to Sunday DIY projects. I’ve tested most of these through typing, gym sessions, and the occasional regrettable sweater snag, so you get the real wear time, not the filtered version. Whether your nail beds are short or your skin runs warm, there’s a shape and shade here that won’t fight you.
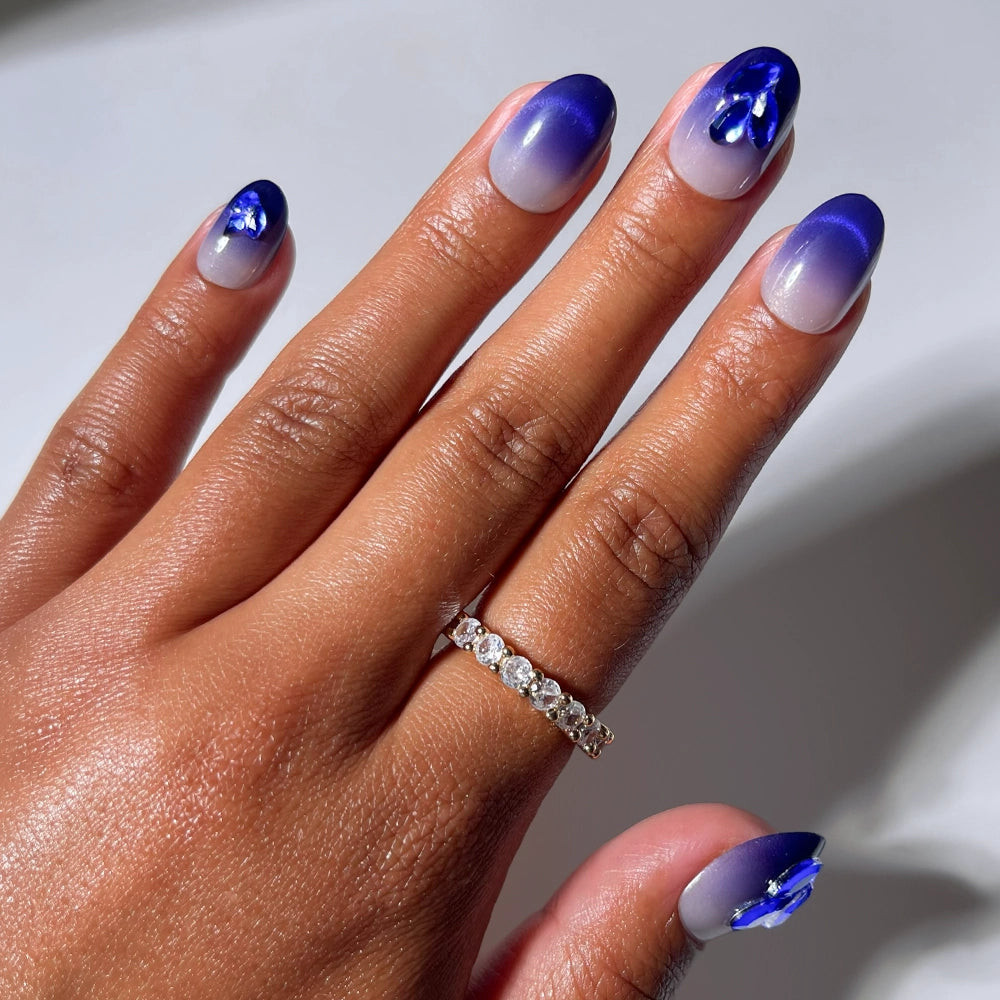
Sapphire Gem Ombre Oval Nails
Celestial Nude Stiletto with Heart Gem
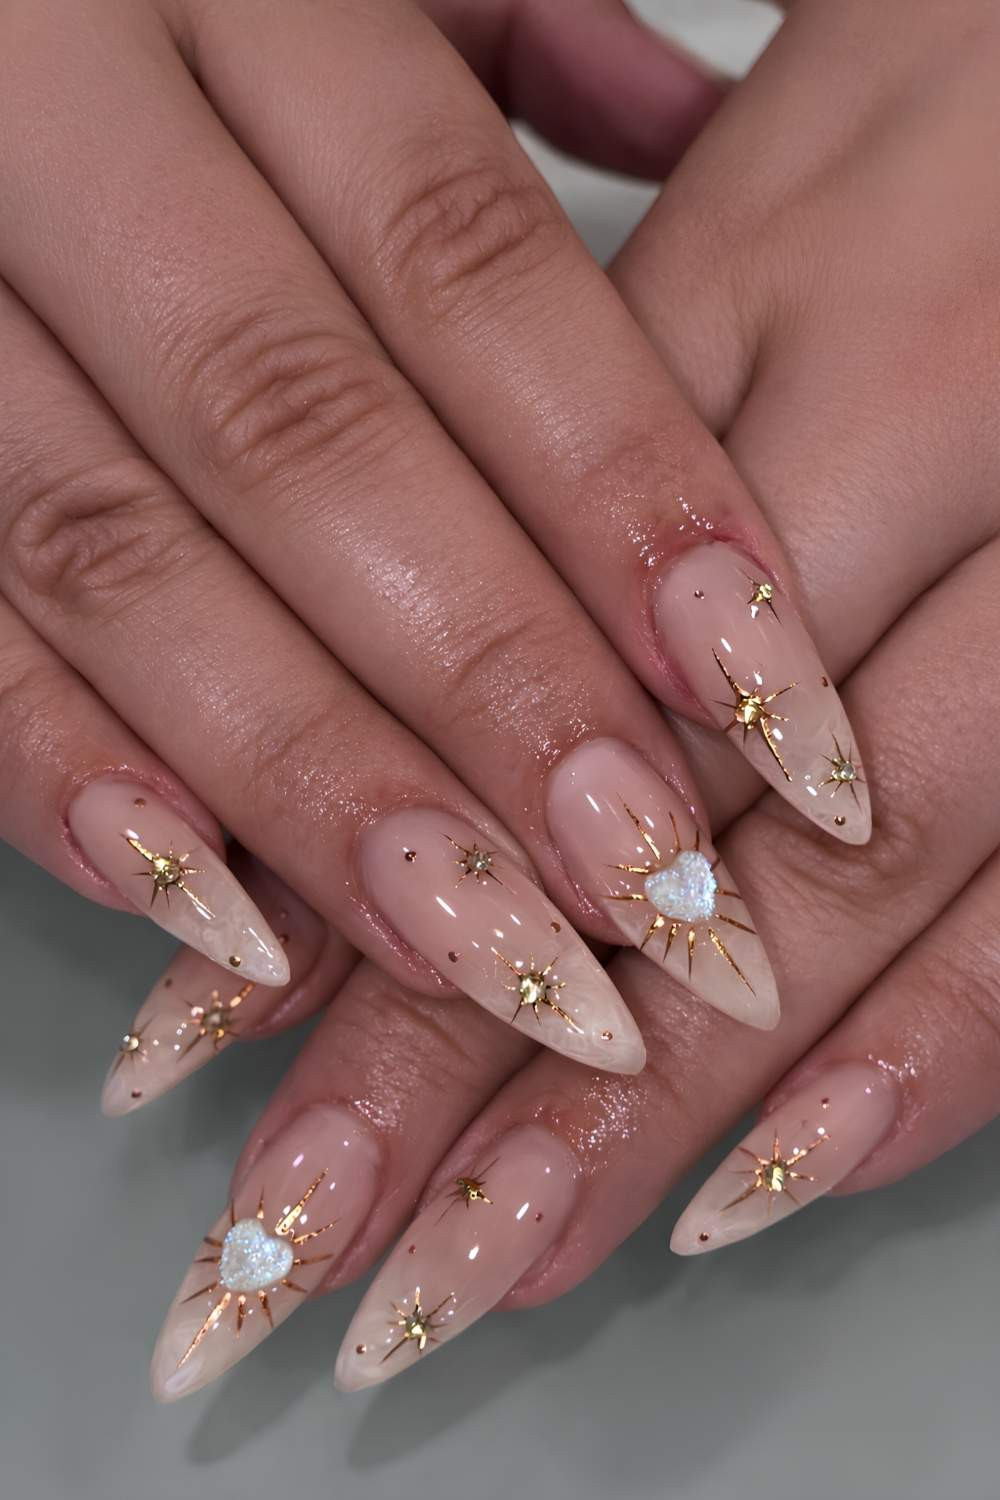
Who actually wants a white heart-shaped gem on their ring finger for three weeks? Someone who does not type for a living, for starters. The nude stiletto shape is long and pointed, which means the gold star charms and small studs will catch on every sweater, every pocket lining, every stray thread. The sheer nude base is forgiving on grow-out, but the real question is whether you have a salon appointment every two weeks to keep the charms from lifting. This is a look you book, not one you attempt at home with a glue pot.
Elegant Cuticle Line Rhinestone Square Nails
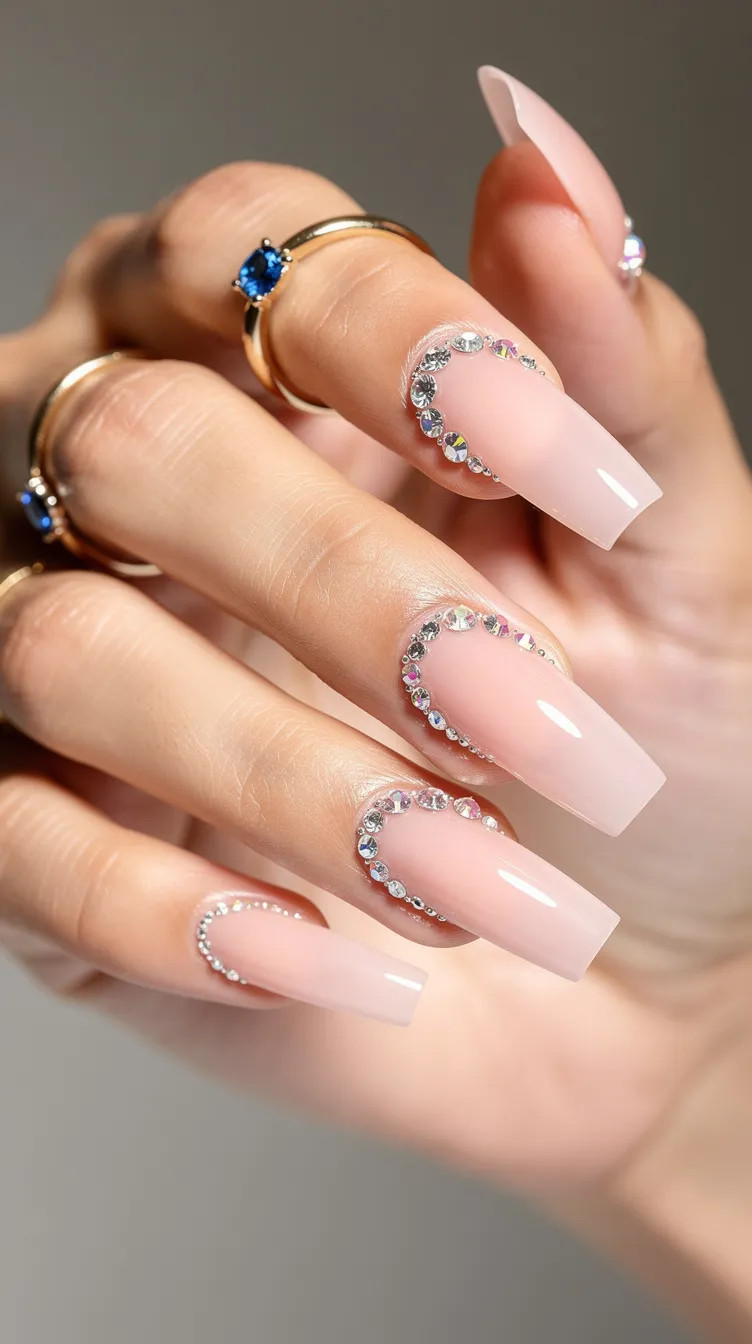
The cuticle line rhinestone placement is exactly where your nail meets your skin, which means every time you wash your hands, those tiny gems take a direct hit. The sheer pink base hides the first week of growth so well you might forget you have nails at all. These small gems are surprisingly durable, lasting two to three weeks if you are careful with cuticle oil and avoid picking at them. The snag risk is real, but the payoff is a clean, refined line that does not scream for attention.
Floral Rhinestone Almond Nails
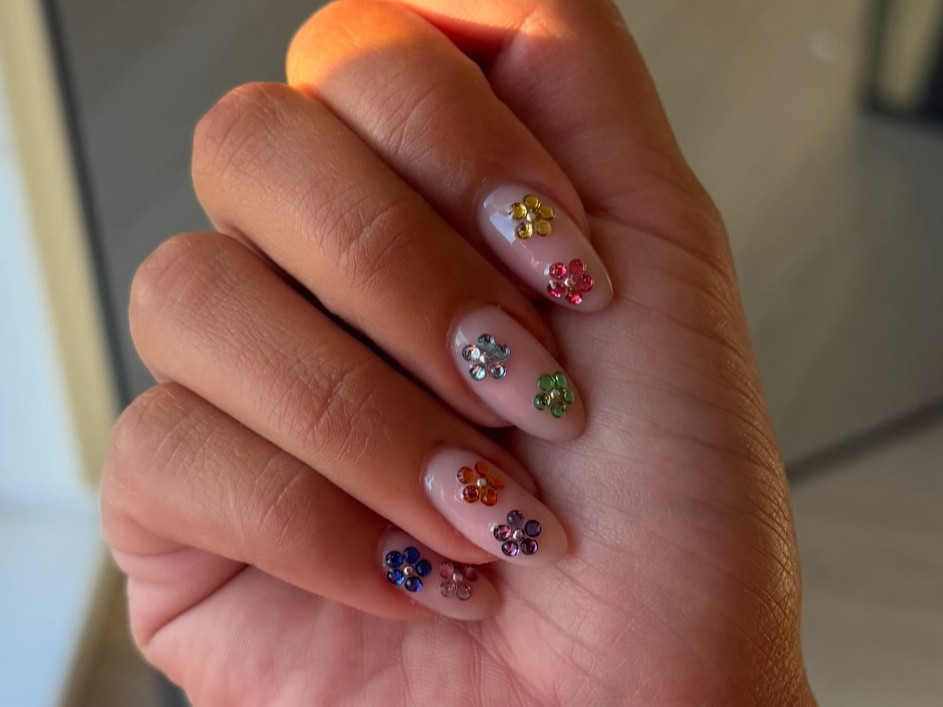
These are not slap-and-go rhinestones. The floral rhinestone placement on almond nails requires a steady hand and a clear plan for where each petal lands. The clear base lets the multi-colored stones do the work, and the glossy finish seals everything in. This is a summer nail, meant for outdoor events and photo backdrops. The small flower gems will chip at the edges around day 10 or 12, so plan your event calendar accordingly. The execution quality is what separates these from a craft project.
Pearlescent Crystal Almond Nails
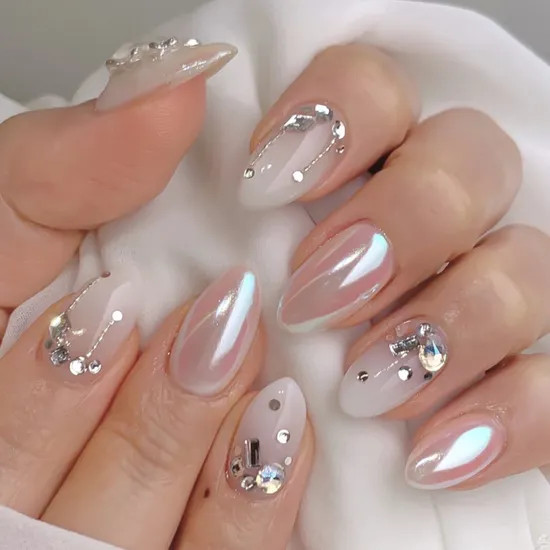
You have seen pearlescent nails before, the ones that look like a single coat of white shimmer. These are not those. The pearlescent crystal finish on a sheer white base is layered, with clusters of small rhinestones and larger rectangular crystals on the accent nails, plus fine silver lines and dots on the rest. The downside is the upkeep: those crystals catch on everything, and the pearlescent sheen shows every chip. It is a bridal look that demands a salon visit and a promise not to open a jar of pickles for two weeks.
Uniform Rhinestone Milky Oval Nails
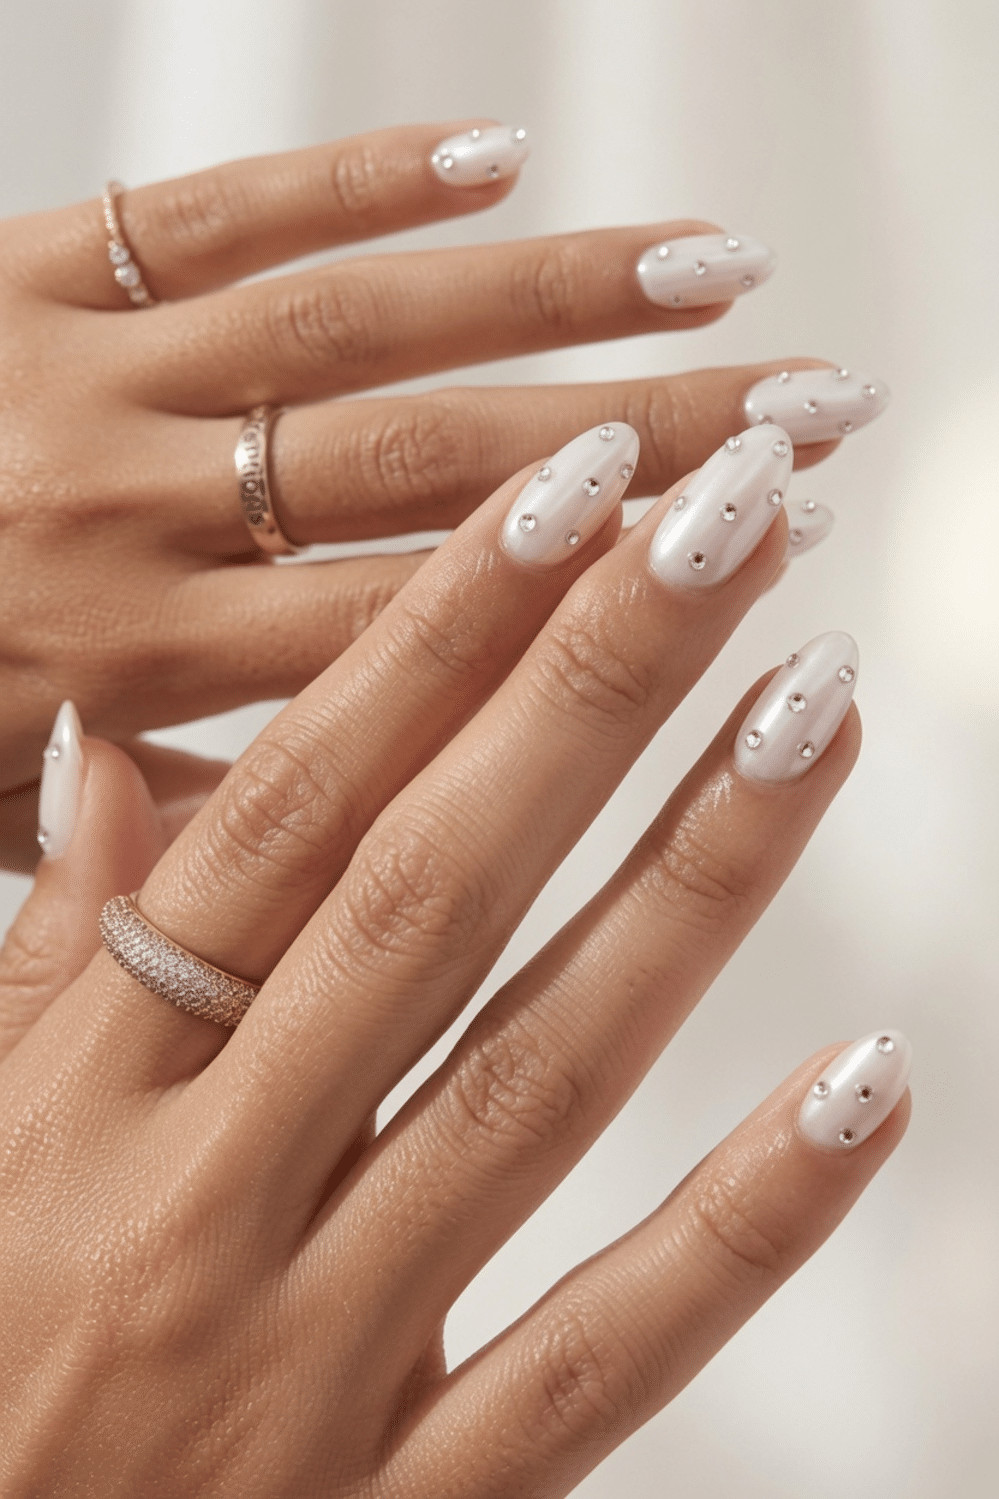
When did all over rhinestone start looking this uniform? Every single nail is covered in small, clear stones set into a milky white pearlescent base, and the effect is almost architectural. I stared at this set for three days. The precision is what sells it — no gaps, no overlapping, just a grid of sparkle that reads like jewelry. Full-coverage gems are tricky, though. Expect some to loosen or fall off after two weeks. The pearlescent base is forgiving for grow-out. Careful removal is a must.
Scattered Shimmer Rhinestone Oval Nails
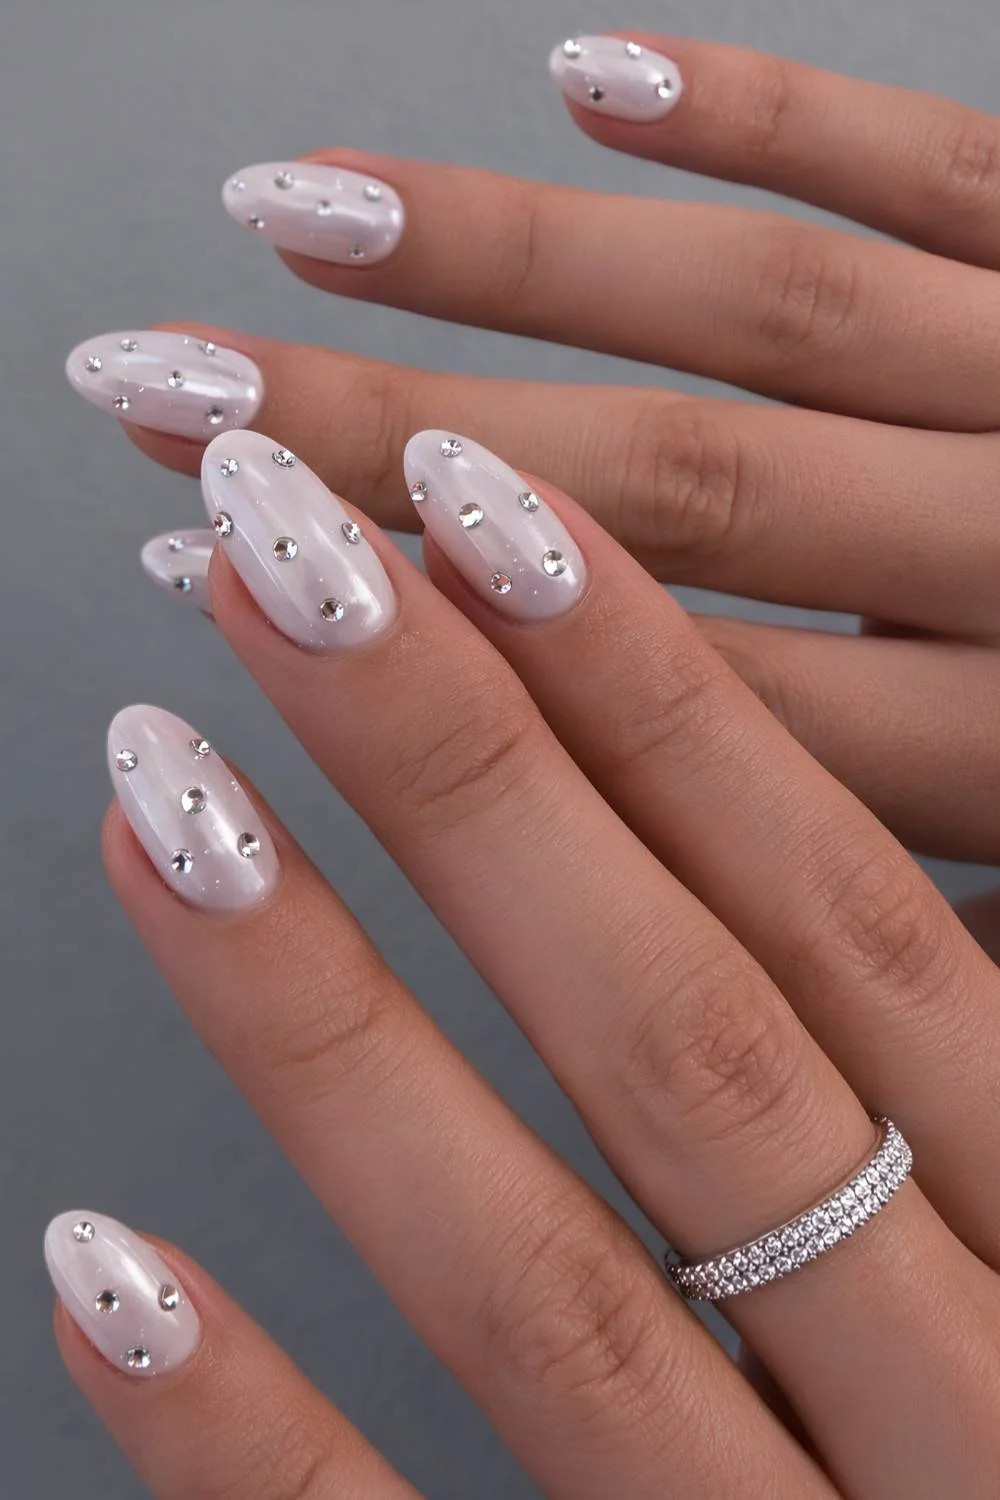
I have to confess: I wore a set almost identical to these last spring, and I was shocked at how long they lasted. The shimmer rhinestone placement is scattered but deliberate, each stone catching light from a different angle, and the milky white polish underneath keeps it from looking busy. I expected a few to pop off by day five. They held through two weeks of typing, washing dishes, and one ill-advised attempt to open a jar.
Upkeep is straightforward: check the stones after a hot shower — the steam can loosen the adhesive. I lost one on day twelve, but the shimmer base is so reflective you barely notice the gap. Gentle removal is recommended to avoid damage.
Embellished French Tip Oval Nails
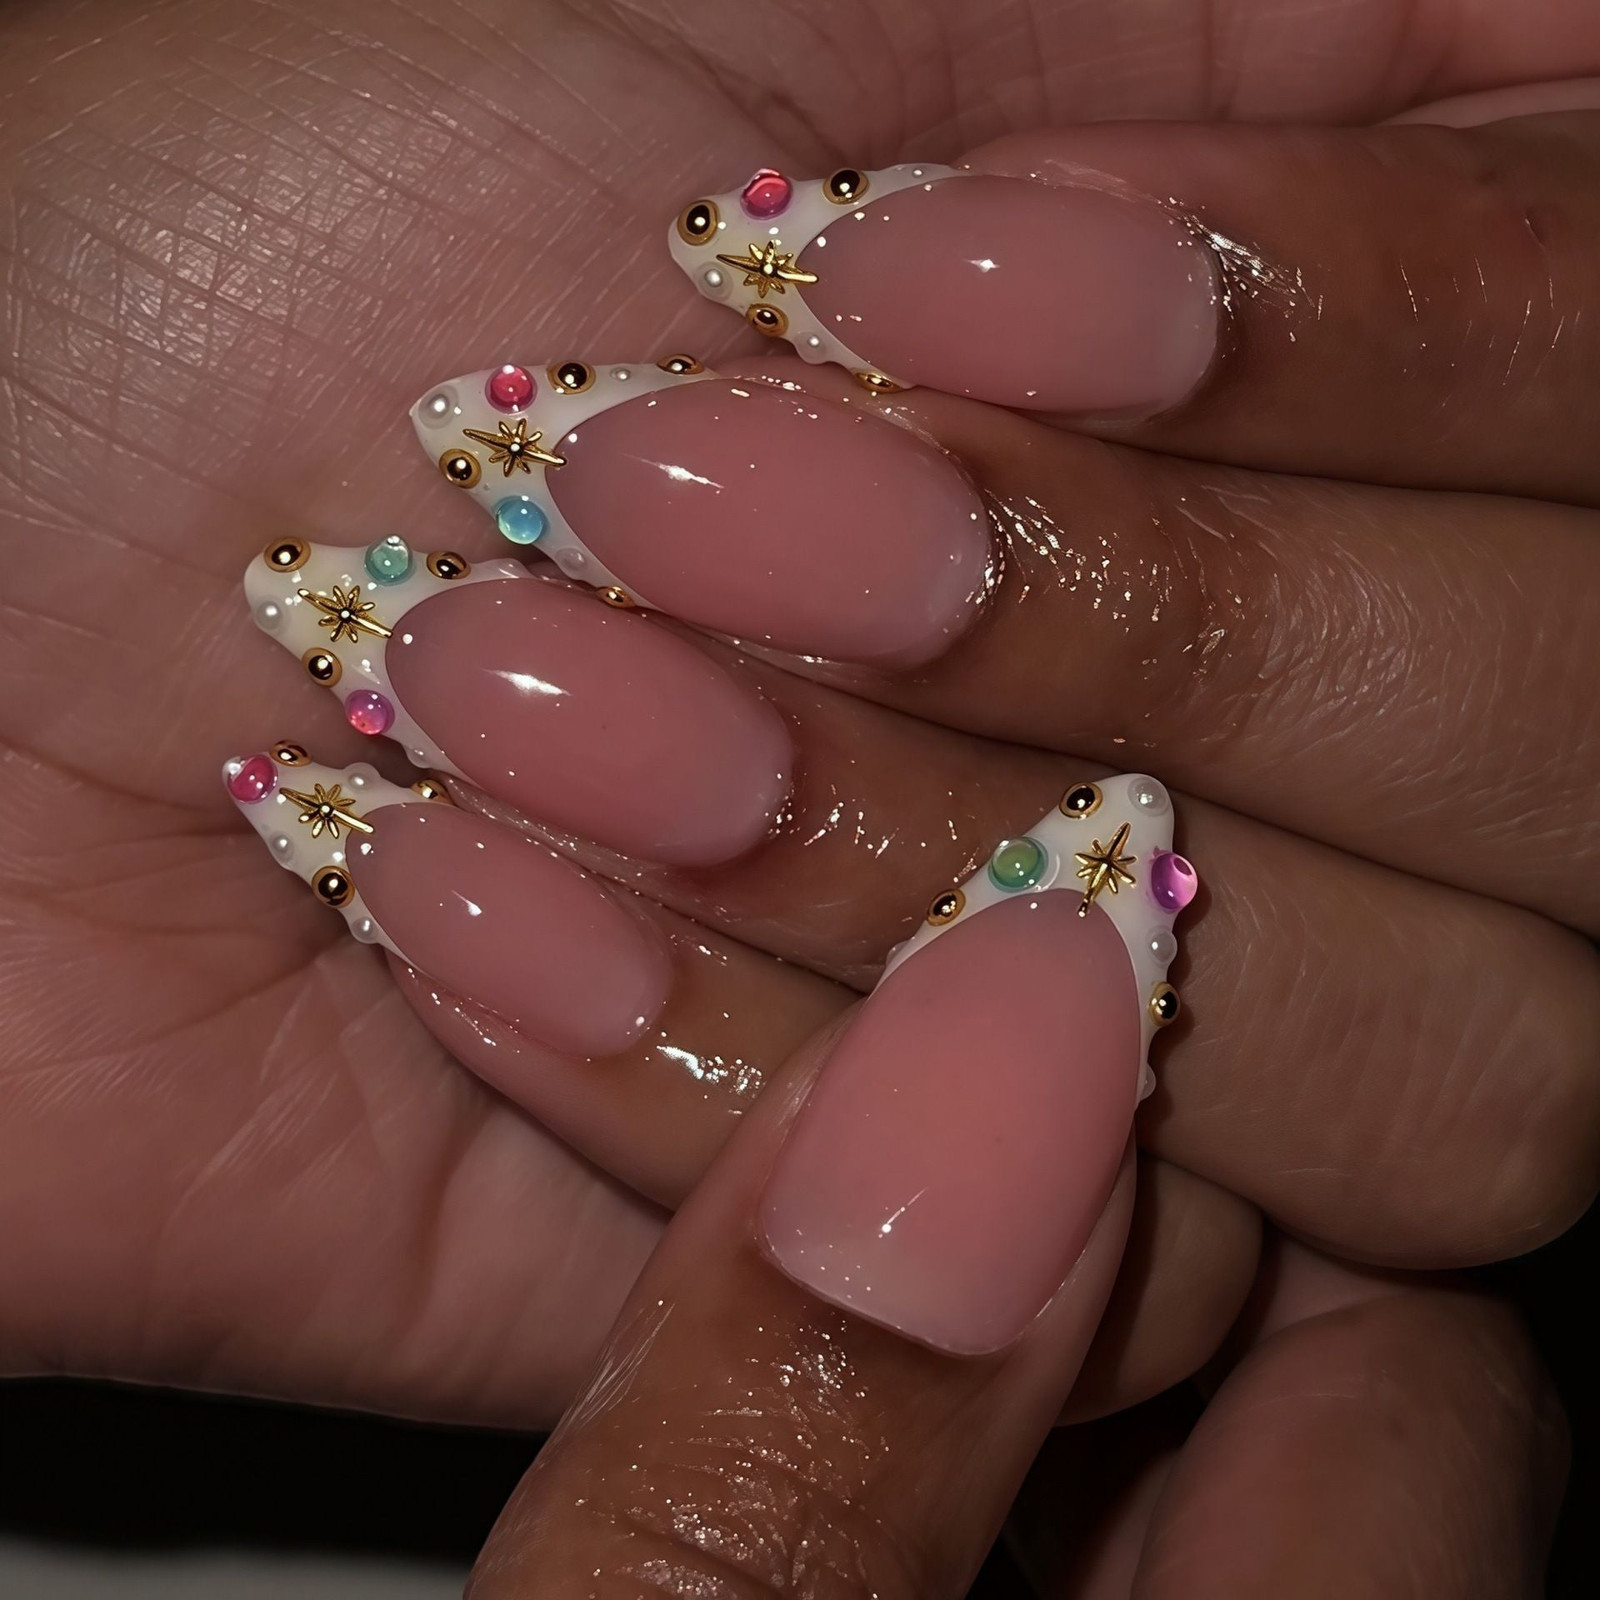
A French tip rhinestone line is deceptively simple: it’s not the stones that are hard, it’s the symmetry. The pink base is a sheer wash, the white tip is crisp, and the gold star studs sit right at the smile line. At home, use a thin brush to place each stone while the top coat is still tacky. At the salon, ask for a no-wipe top coat and a dotting tool for spacing. The studs snag on knitwear, yes, but the grow-out is invisible because the base is sheer. Book it, this one is not a Sunday DIY.
High Sparkle Glitter Crystal Oval Nails
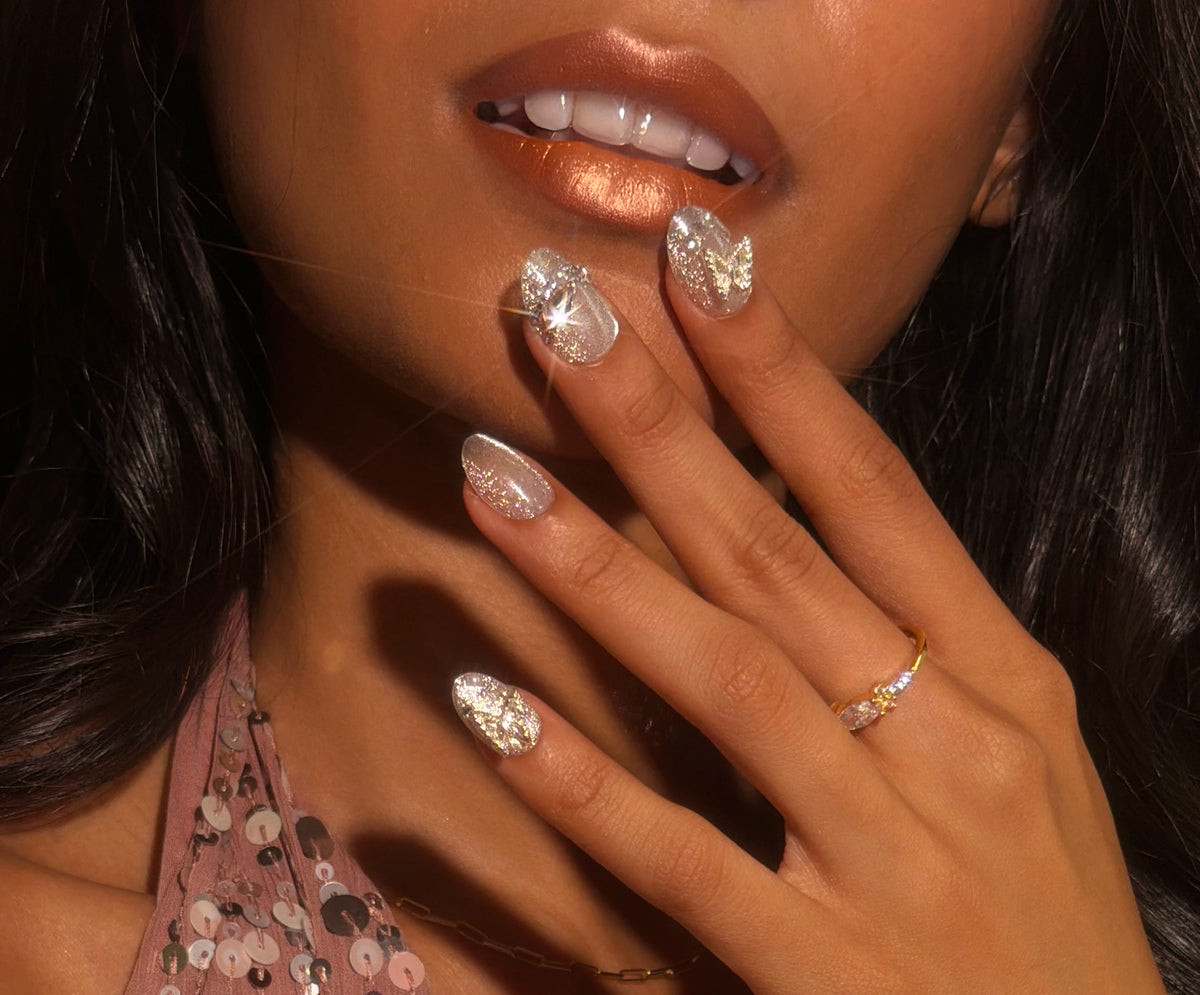
This level of high sparkle glitter is not for a Tuesday morning meeting. It is for a party, a holiday dinner, or a night where you want people to notice your hands before you say hello. The silver glitter covers the index and middle fingers completely, while the ring finger gets scattered larger crystals over a sheer base. The contrast is intentional: the glitter catches every light, the crystals add weight. Grow-out is visible because the base is sheer, so plan for a fill at week two. It is not subtle. It is not supposed to be.
Lavender Butterfly Charm Almond Nails
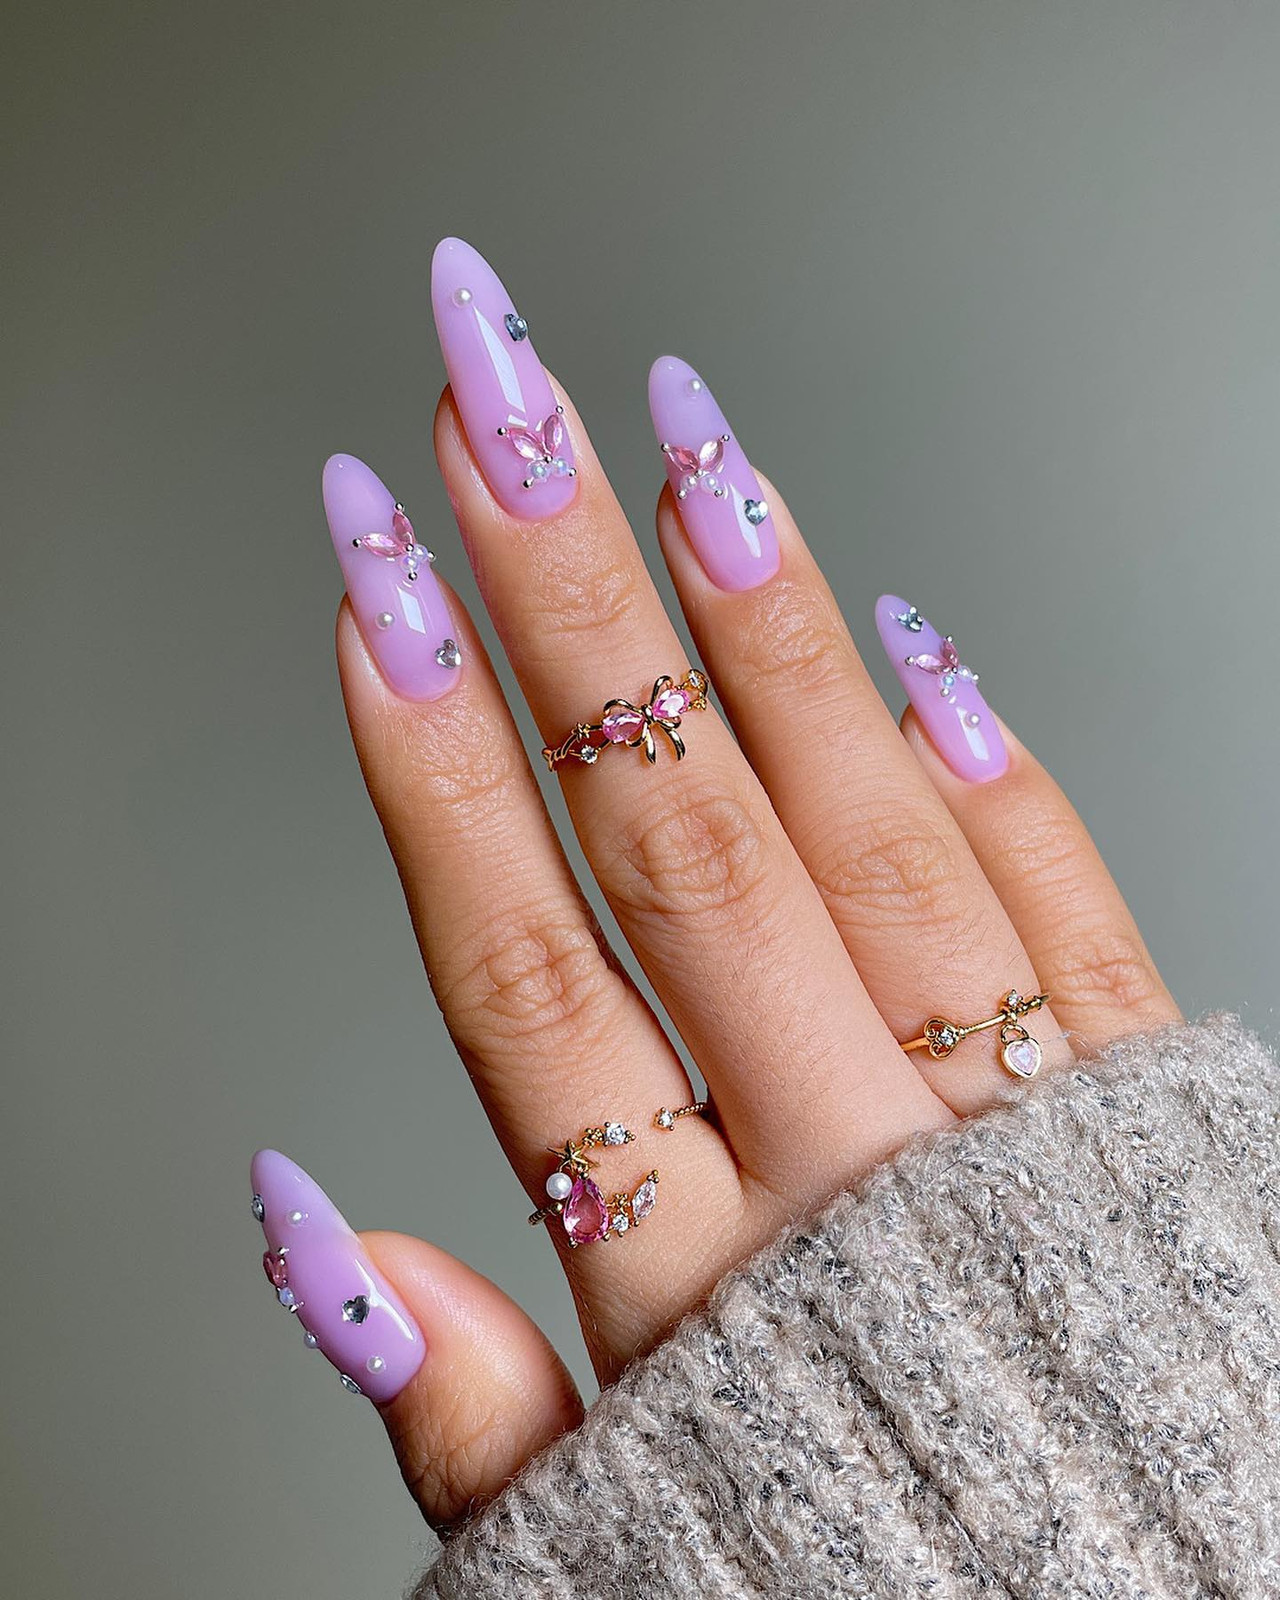
Who actually wants a butterfly charm on their nail? Someone who does not type for a living, that is who. The pastel lavender base is soft and flattering on warm and cool skin tones alike, and the scattered gems add texture without overwhelming the shape. But the butterfly is a snag risk — I have seen them catch on sweater cuffs, hair, and once, a seatbelt buckle. If you work with your hands, skip the charm and keep the gems. If you want whimsy and can be careful, this is a sweet, spring-ready set that photographs beautifully.
Short Oval Sheer Pink Scattered Rhinestones
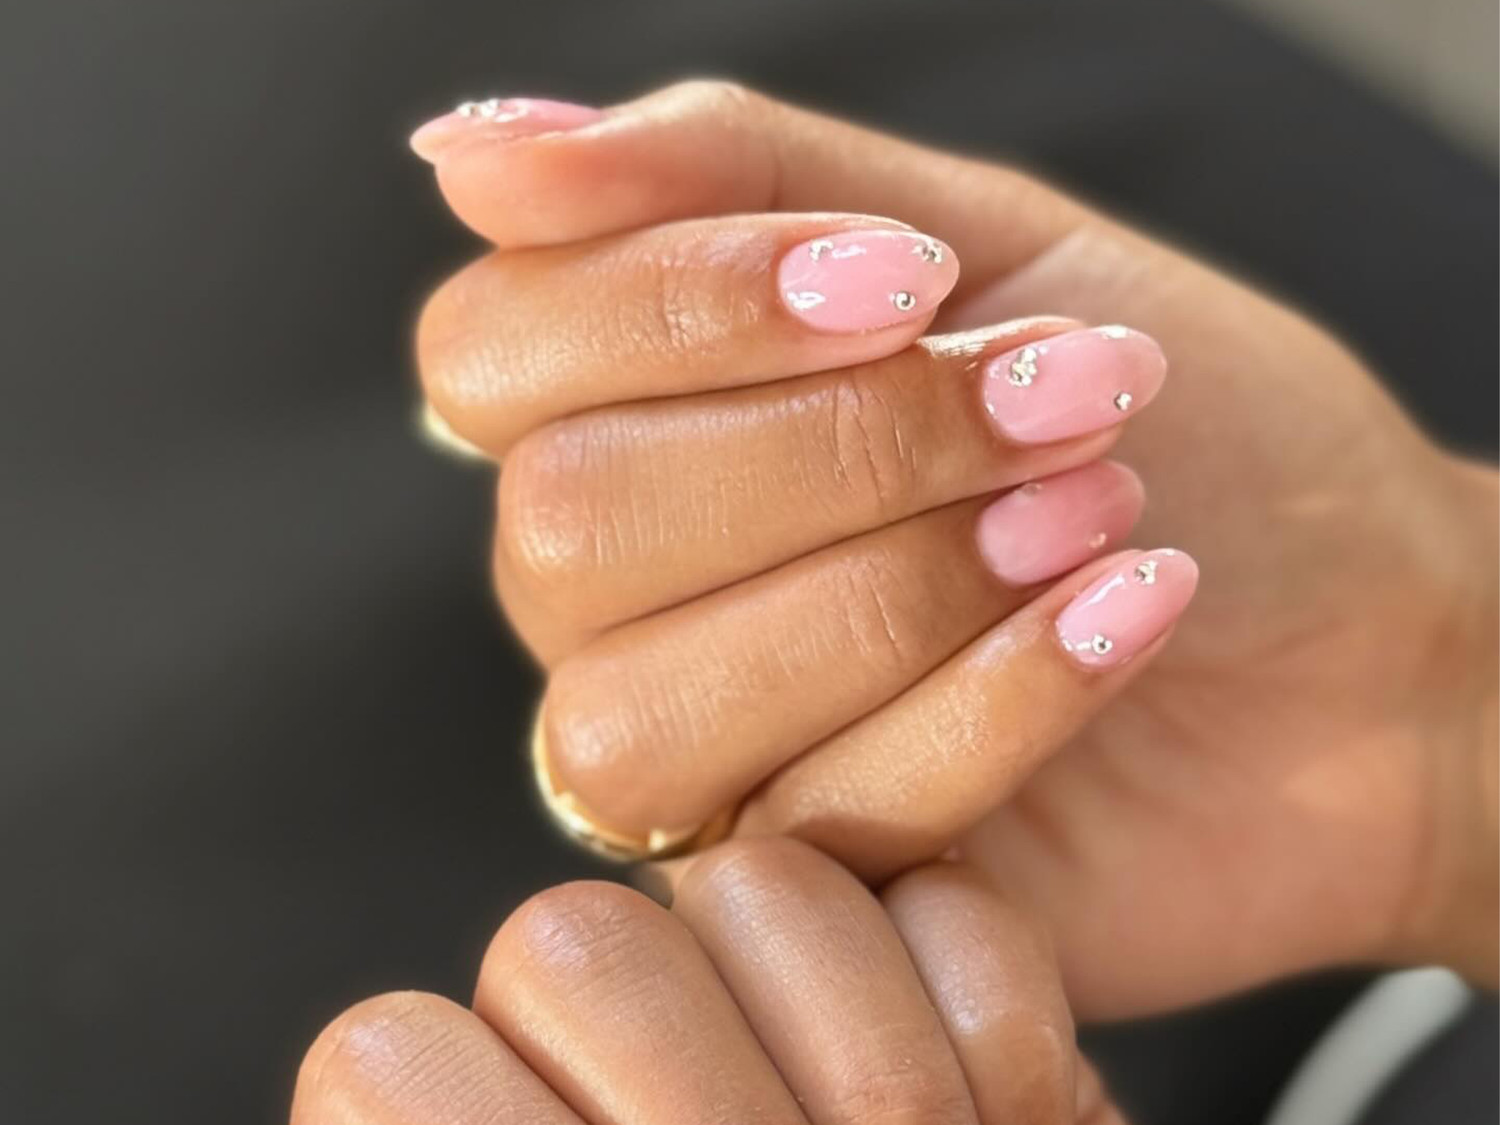
The neat cuticle work and smooth polish on these short ovals make the scattered clear rhinestones look intentional, not like something fell off a craft project. A sheer light pink base means the grow-out is nearly invisible at week two, and because the gems sit flat on a short nail, they snag on nothing. I wore these through typing, sweater season, and a contact lens emergency. No casualties. The short rhinestone shape keeps the whole thing practical, and the sheer light pink reads warm on fair to olive skin without fighting your natural flush. Three weeks in, two gems had loosened. That is a win.
Pink Glitter Iridescent Stiletto with Red Gems
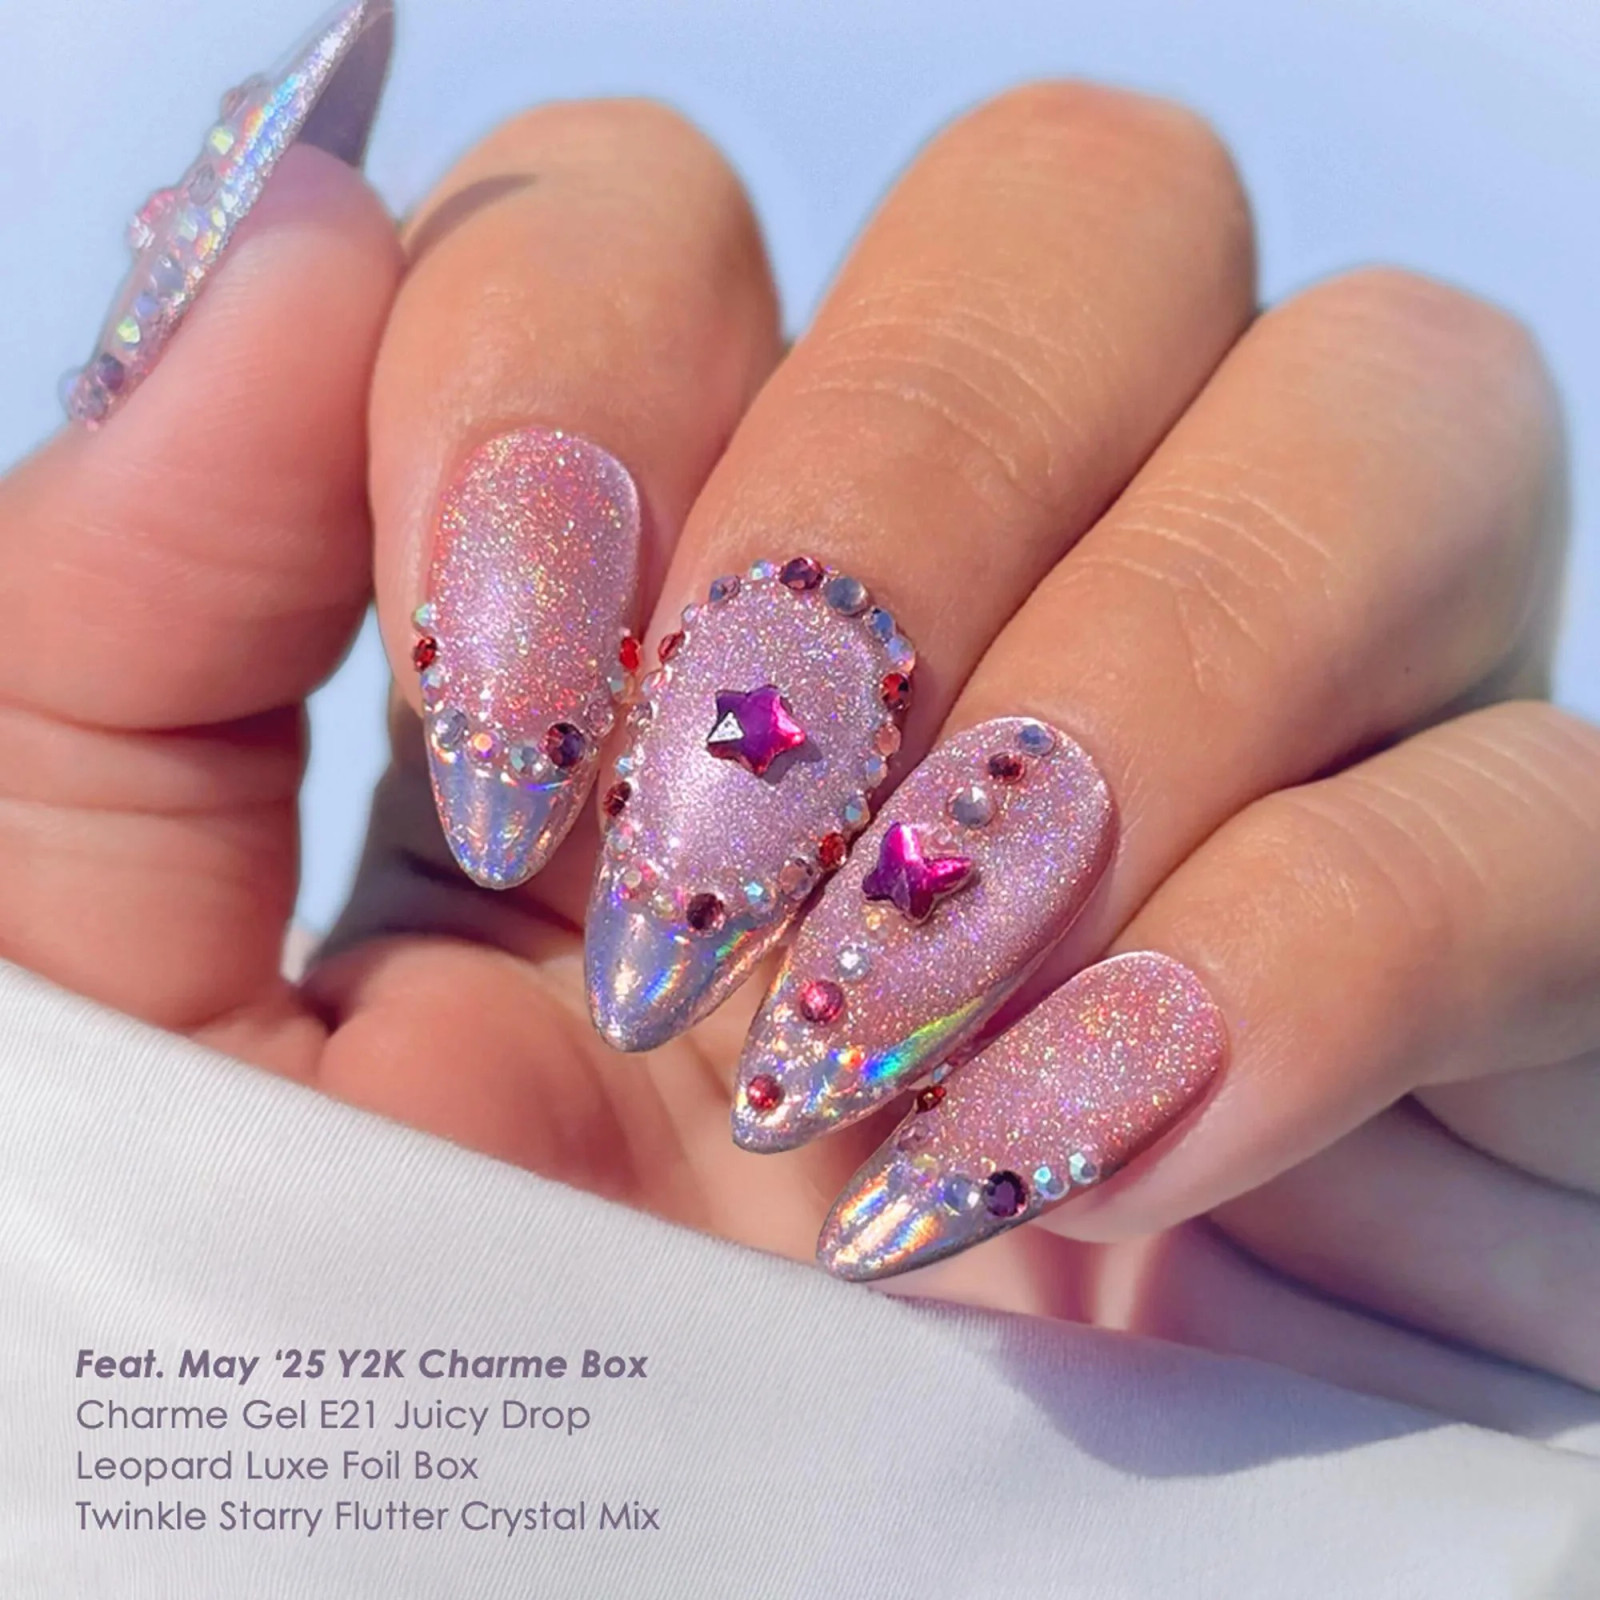
The pink glitter stiletto with iridescent tips and red rhinestones is the design that makes understated nails look like they forgot to show up. This is not a subtle set. The star charm on the accent nail, the scattered red gems, the long shape that demands you move your hands like you are in a music video. It is a lot. And that is the point.
But here is the comparison. A short oval with scattered clear gems reads as everyday wearable. This one reads as a commitment. The glitter base requires a salon application because the iridescent tips need a thin chrome layer over a white base, and the red gems need to be set into a tacky layer, not dropped on top of cured gel. DIY is possible if you have a lamp and steady hands. I do not. I booked it. The star charm caught on my hair twice in the first hour. Worth it.
Nude Coffin Glitter Crystal Nails
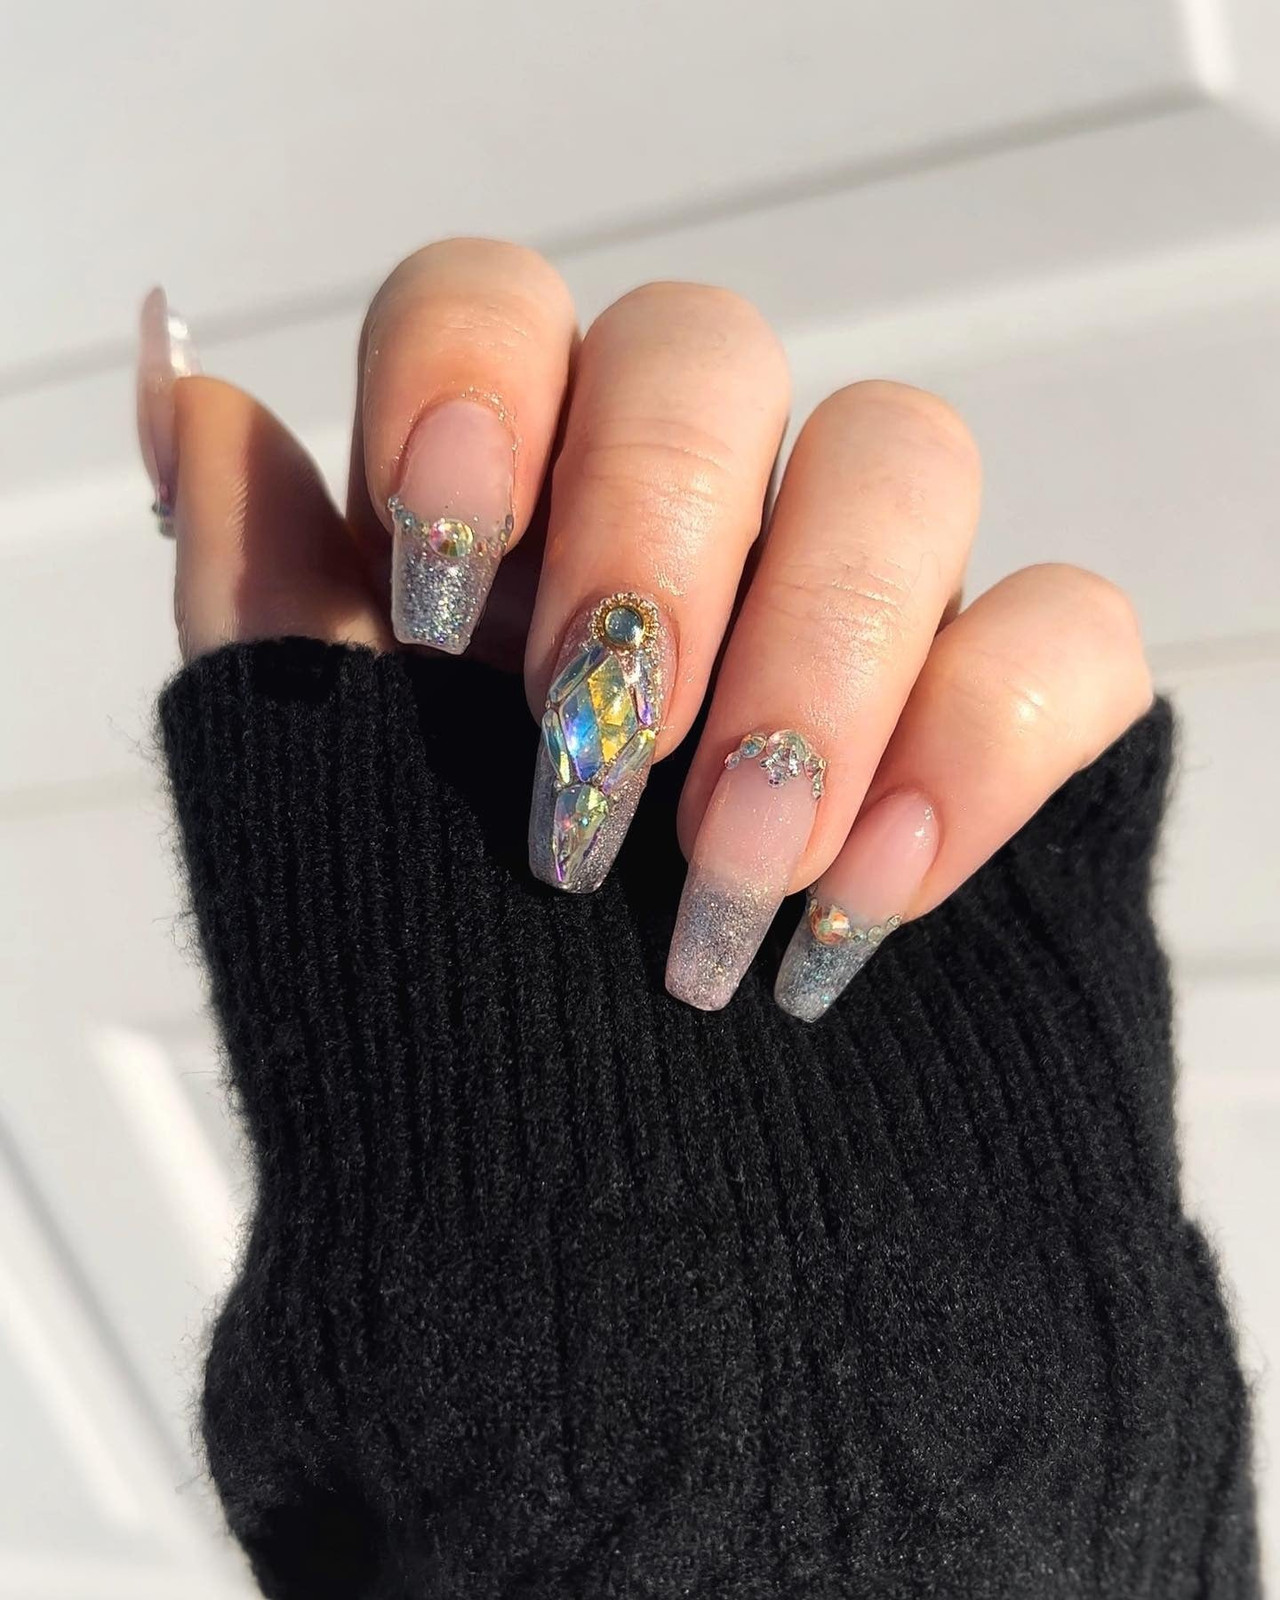
The nude coffin shape with silver glitter accents and a large central rhinestone cluster is built for evening light. The technique here is about layering: a sheer nude base, then a thin layer of silver glitter that catches the light without overwhelming the nail, then the cluster set into a tacky layer so the gems sit flush against the surface. That cluster is the anchor. Without it, the design reads as a standard glitter fade. With it, the eye stops on the center of each nail, which makes the coffin shape feel balanced rather than top-heavy. This is a holiday or anniversary set, not a Tuesday lunch set. The glitter holds up through handwashing if you cap the free edge with top coat. The gems will last two weeks before one shifts. Plan the refill.
Extra-Long Coffin Rhinestone Cluster Nails
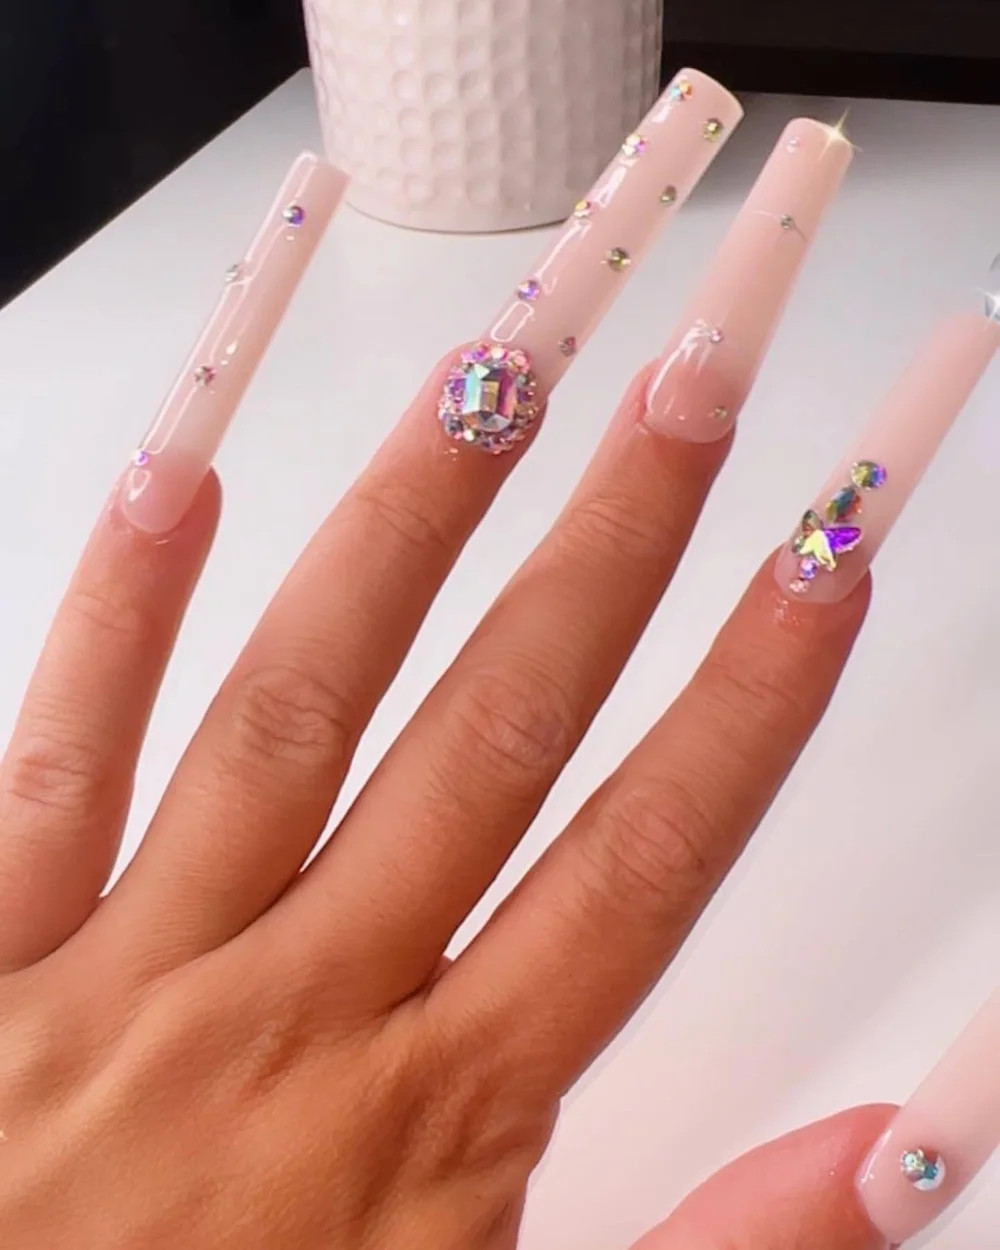
My gut reaction to these extra-long coffins with the large central rhinestone cluster was: that is a lot of nail. And then I looked closer. The sheer pink base is forgiving, the line cleanliness at the cuticle is precise, and the cluster sits centered enough that the weight does not tip the nail sideways. But here is the honest downside. That cluster is heavy. On an extra-long coffin, the leverage at the free edge means one wrong catch on a jacket zipper and you are filing down to a short almond. The long coffin rhinestone shape demands you type with your palms flat and open doors with your knuckles. The rhinestone cluster is beautiful. It is also a responsibility. I would wear this for a weekend, not a work week.
Clear Glitter Coffin Embellished Nails
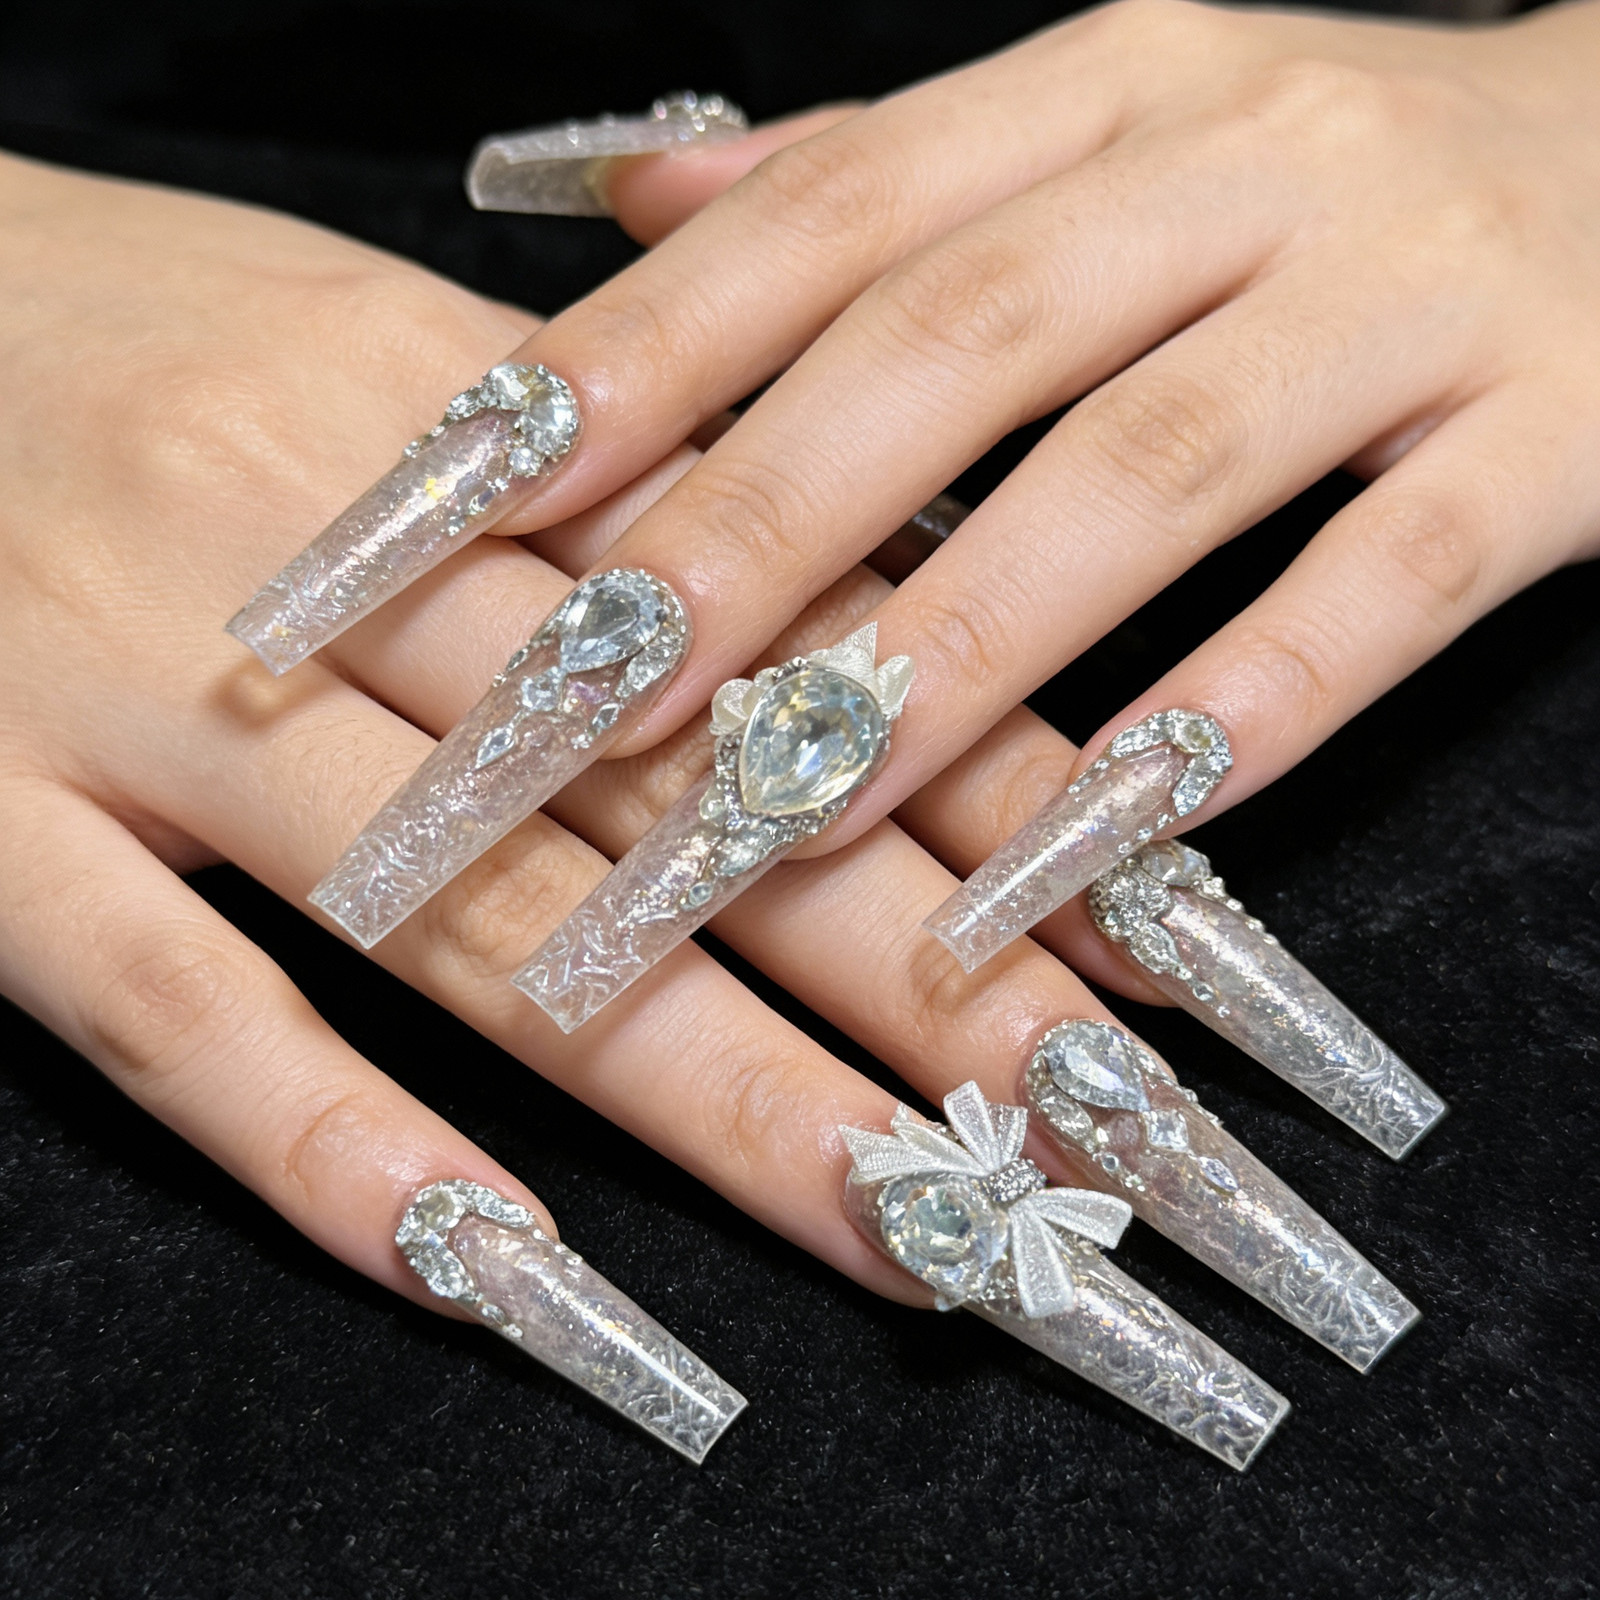
Do you have the patience for a design where every nail has a different crystal arrangement, including floral shapes and a central teardrop? Because that is what these clear glitter coffin nails deliver. The clear base with silver glitter keeps the look light, but the real work is in the placement. Each teardrop crystal is set into a tiny well of builder gel so it does not pop off at the first handwash. The floral and bow shapes require a tweezer and a steady hand. This suits someone who wants a conversation starter on every finger. It does not suit someone who types for a living, swipes their phone one-handed, or has a toddler. The glitter base is durable. The crystals are not. Plan for one or two to go missing by week two. That is the trade-off for this level of detail.
Full Crystal Embellished Stiletto Nails
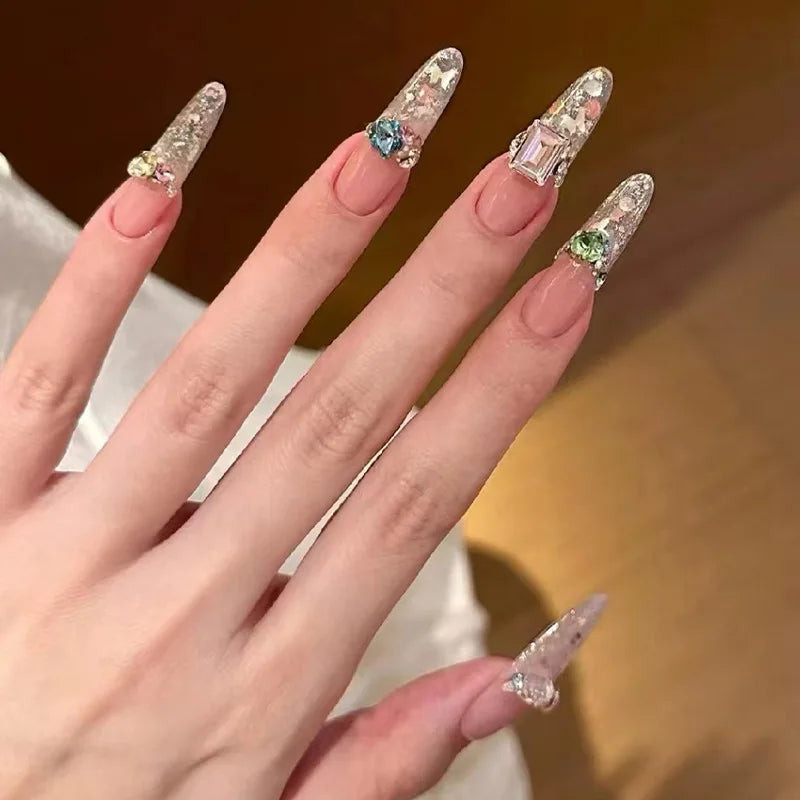
Every surface is covered, every angle catches the light, and every finger has a different crystal size so it never reads as one solid block. The full crystal stiletto nails I tried had iridescent crystals mixed with clear ones, which kept the look dimensional instead of flat. Day one at a party: zero complaints. Day three typing: one crystal shifted. By day seven, I had two gaps and a lot of questions about how I wash my hair with these on. The answer is carefully, with a silicone scrubber. Removal took three rounds of soaking because the gems create air pockets that foil dissolves unevenly. They are loud, they are fragile, and they are exactly right for one night of feeling like a chandelier.
Nude Blue Accent Cuticle Rhinestone Nails
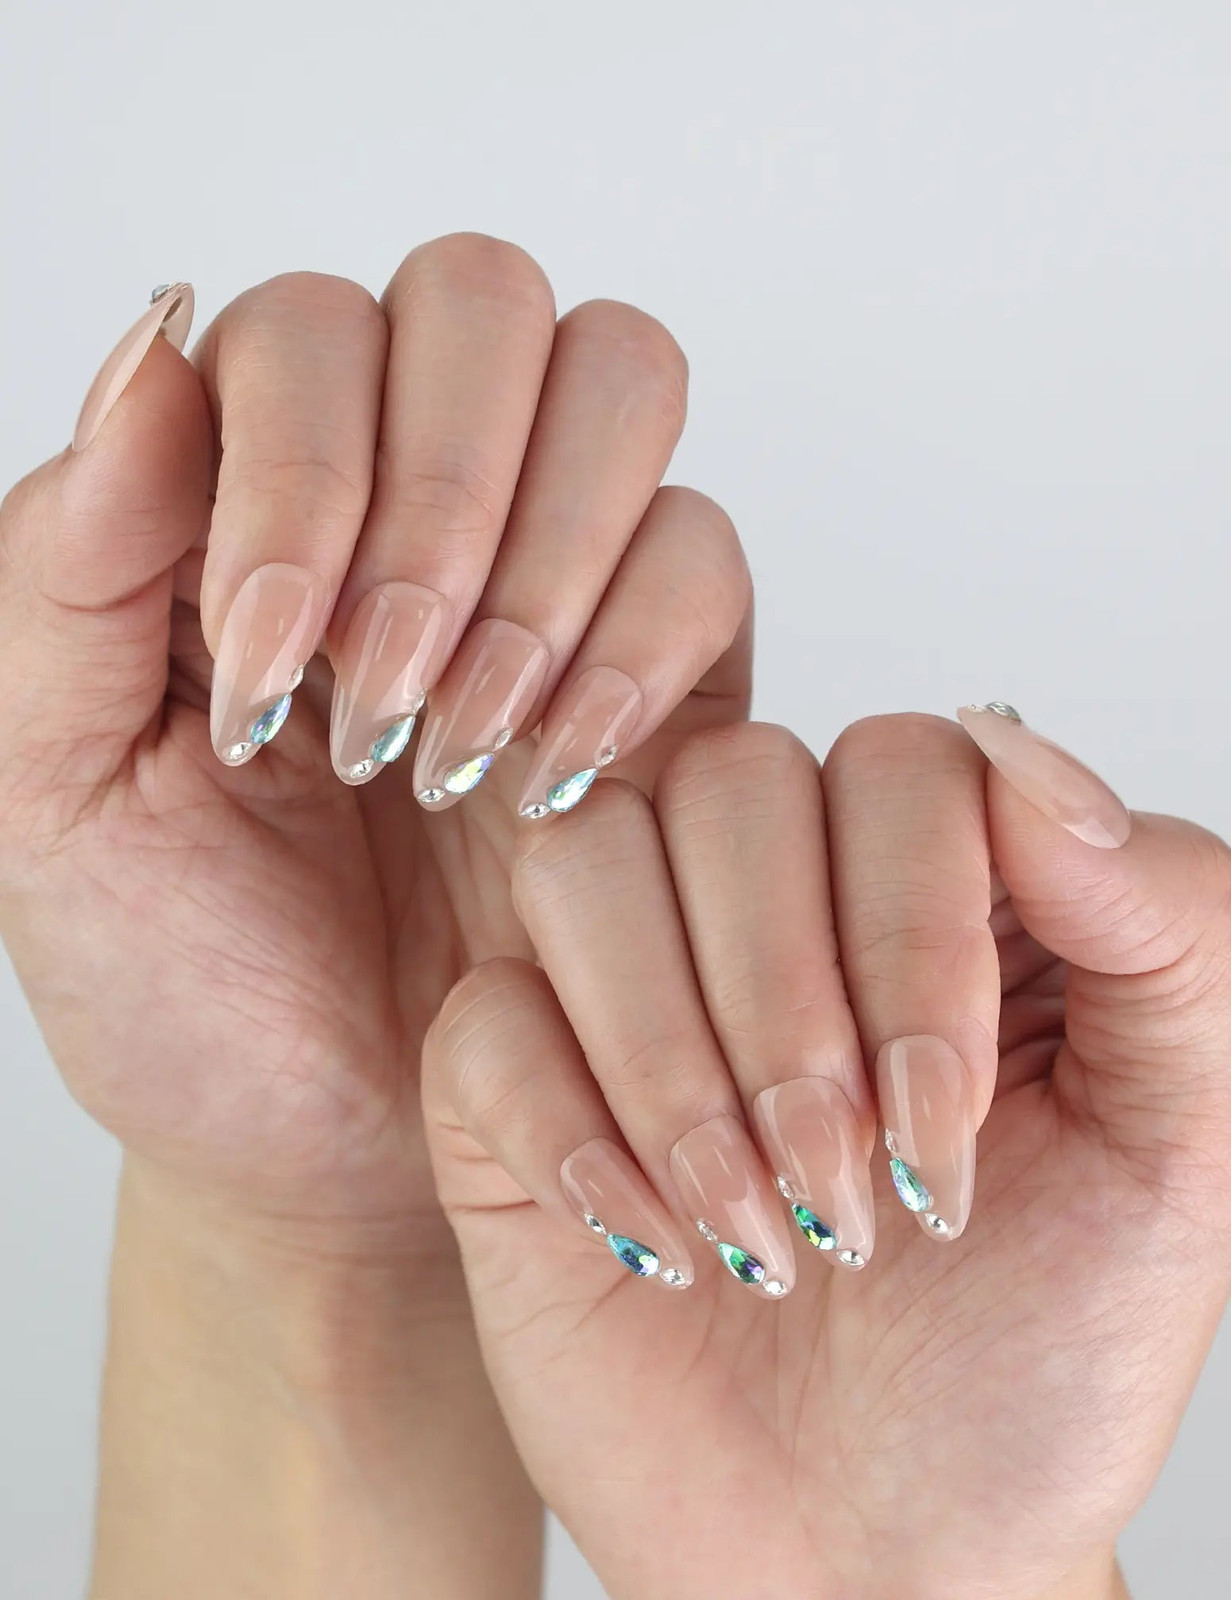
This is the one you can actually do at home without crying. The cuticle accent rhinestone nails use a sheer nude base that hides application mistakes, and the gems are placed so sparingly that even if your tweezers slip, no one notices. I used nail glue and a dotting tool to place each stone, let them cure under a lamp for extra hold, and sealed the edges with a thin layer of top coat. The nude base grows out invisibly for three weeks, so you are not racing to the salon at day ten. For upkeep, just avoid soaking your hands in hot water for the first 24 hours. Removal is a quick soak-off, no filing required.
Short Square French Tip 3D Flower Nails
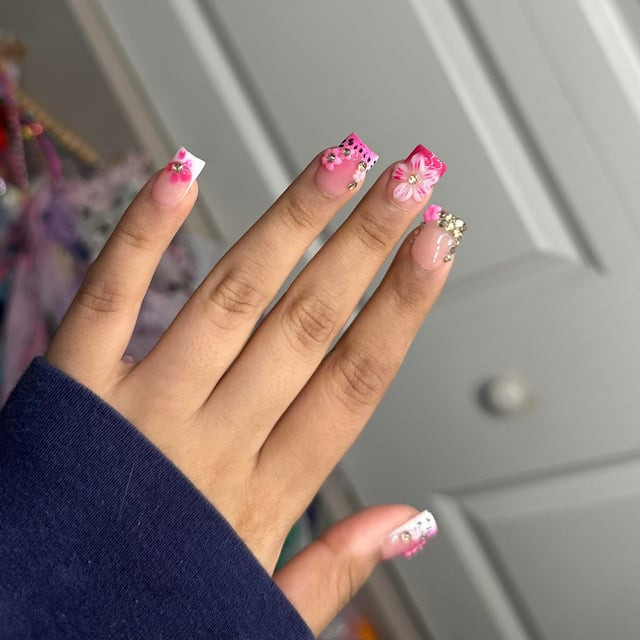
The tech starts with a clean white French tip on short square nails, then builds the 3d flower french tip with a gel that holds its shape under the lamp. Each petal is sculpted individually, not pressed from a mold, which gives the flower a translucent edge that catches light differently than a flat decal. The butterfly on the accent nail is also hand-sculpted, with a thin wire core so the wings sit slightly above the nail surface. That lift is beautiful. It also catches on sweater loops by hour two. The square shape keeps the tip durable, and the pink base is forgiving if the flower shifts during curing. This is a two-hour salon appointment, minimum.
Glitter Moon Crystal Oval Nails
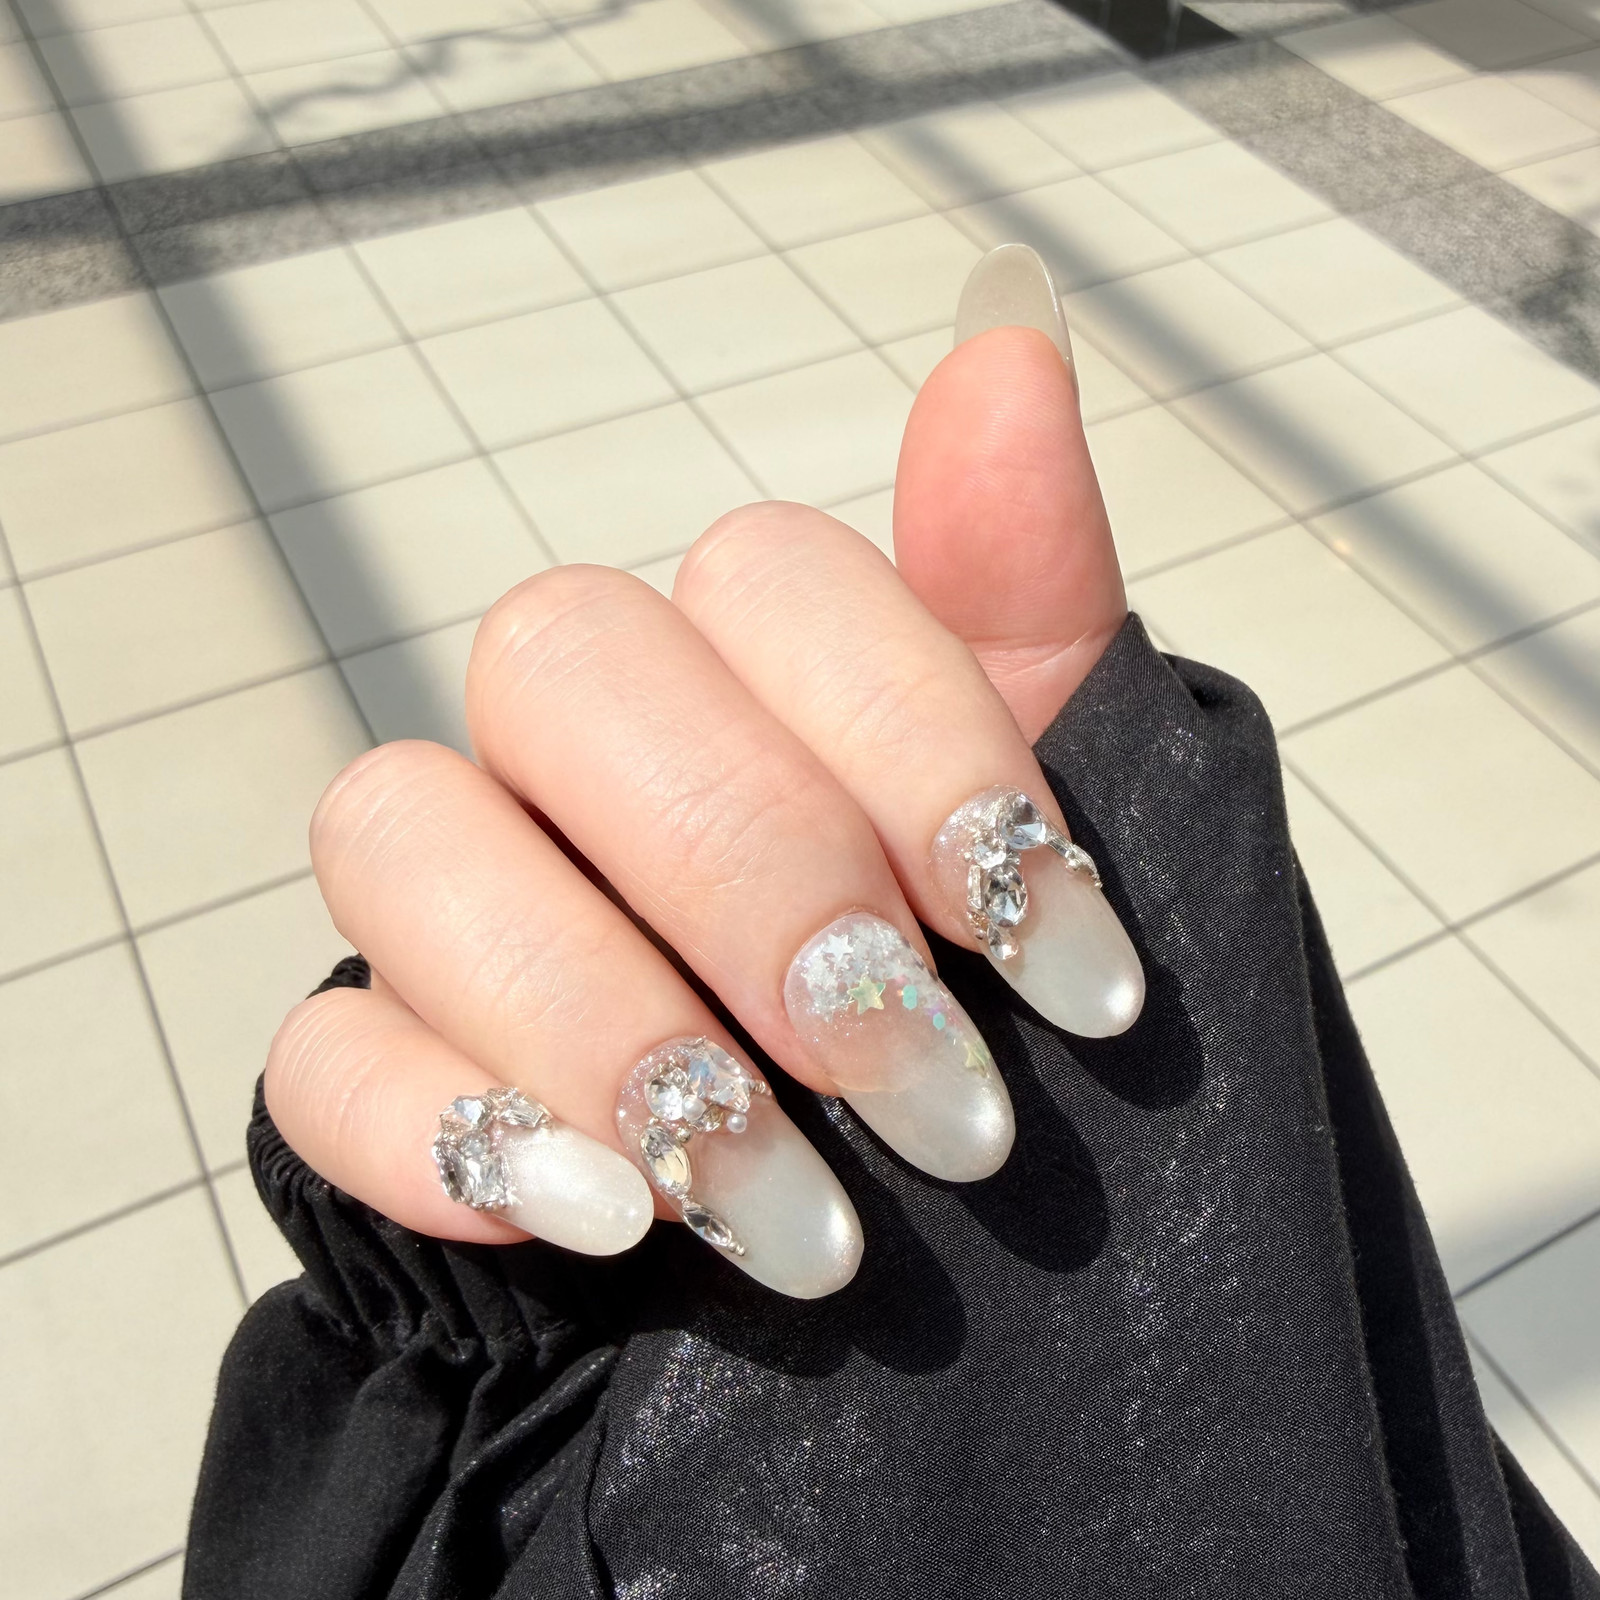
The moon shape is painted in a soft silver glitter that shifts from white to pale blue depending on the light, and the crystal moon sits right in the center of the negative space. The glitter accents are layered under a clear gel so the sparkle is embedded, not dusted on top, which means no fallout. The crystals are small enough that they do not catch on hair or fabric, but they are not glued flush, so one did pop off on day four. The oval shape keeps the design balanced, and the sheer base means regrowth is barely visible. For the honest downside: the moon shape requires a steady hand, and if the glitter layer is too thick, the crystal sits unevenly.
Colorful Scattered Gem Oval Nails
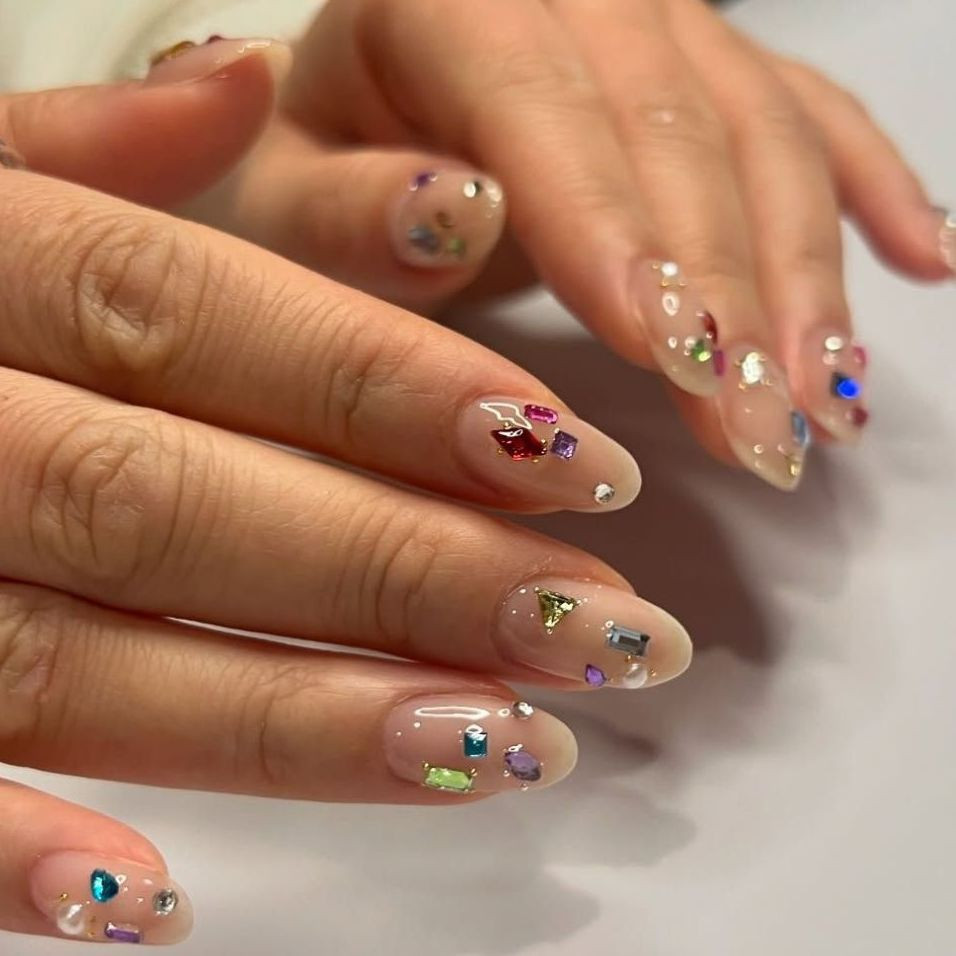
Do you have a drawer of nail art supplies you never use? This is the design for you. The colorful rhinestone nails use scattered gems in red, blue, green, yellow, and clear, placed randomly across a clear base so no two nails match. The oval shape keeps the gems from looking cluttered because the tapered sides create breathing room. This works best on someone who likes asymmetry and does not mind when a gem goes missing, because one will. The clear base makes reapplication easy, just glue a new stone and seal. Skip this if you prefer symmetry or if your daily life involves tight gloves or heavy lifting. The gems sit proud and they will catch.
Visual Idea
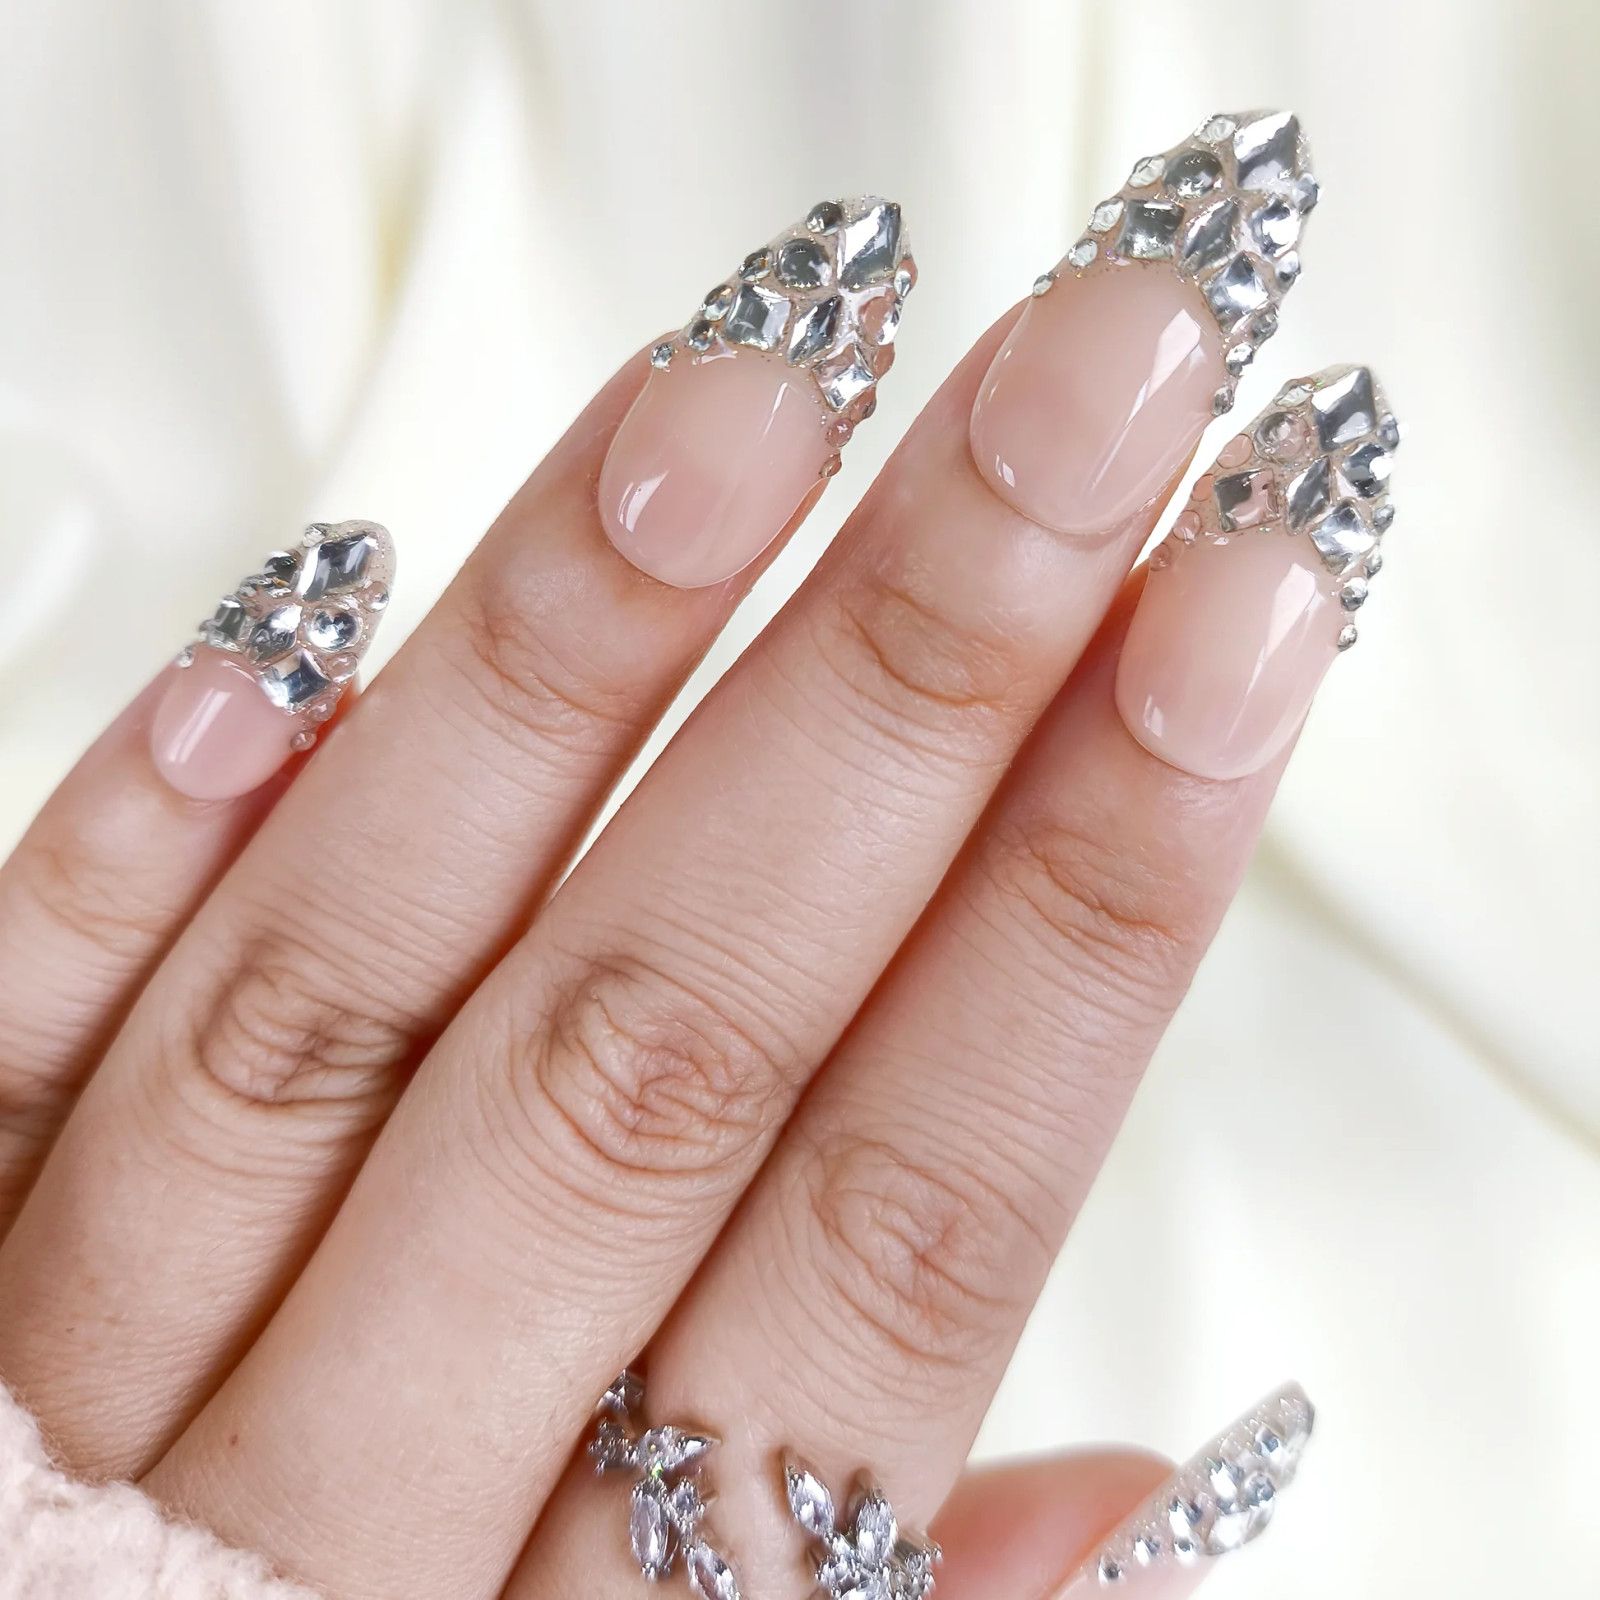
I’ll admit it: I underestimated how heavy full crystal tips would feel. The first hour I kept tapping things just to hear the sound. By day three I was typing emails with my knuckles, and by removal I understood why salons charge extra for soak-off. The stiletto shape makes the weight worse, every door handle is a threat. But the light refraction is ridiculous, like wearing tiny disco balls. If you go for it, book a fill at week two and brace for one stone to pop off around day five. It’s not a practical look. It’s a commitment.
The real trick is removal. Standard acetone soak takes forever because the crystals block the liquid. My tech filed the top layer off first, then wrapped each nail individually. Still took 40 minutes. Go in knowing that, or plan for a fresh set entirely.
Matte Glitter High Gloss Visual Idea
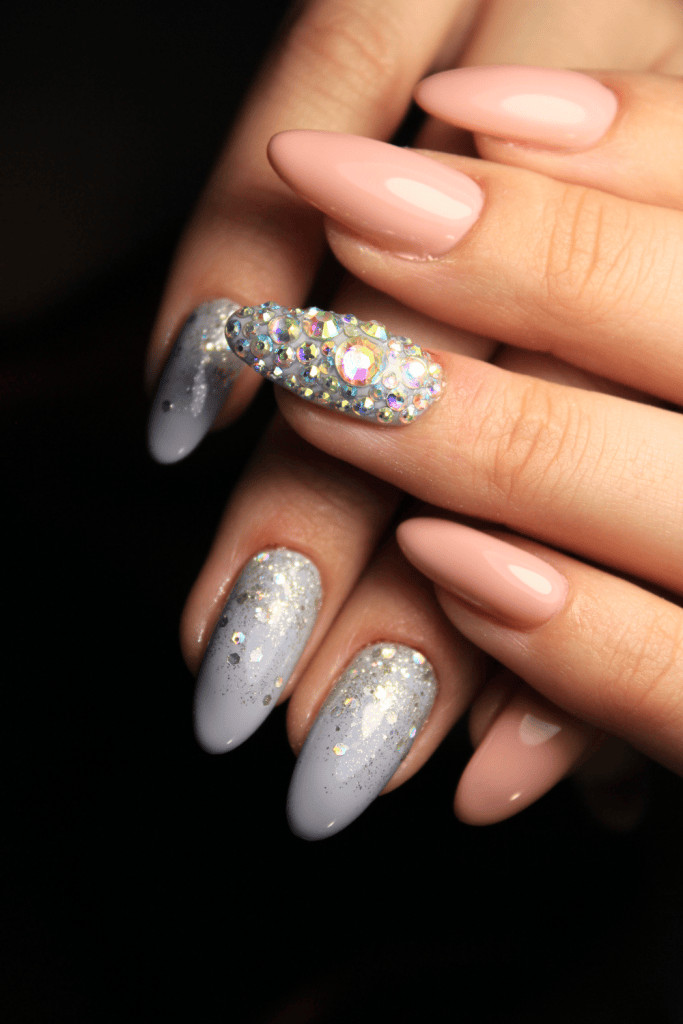
This is the one you screenshot and send to your tech with a prayer. The matte base with a high-gloss glitter gradient and a single rhinestone cluster on the ring finger requires precision that most home kits cannot deliver. I tried a version with a matte top coat over a glitter polish and it looked like a craft project. The real deal uses a separate matte finish on the nude nails, a layered glitter fade on the accent, and a large multi-faceted stone placed with gel. If you attempt it yourself, use a dotting tool for the stone and cure each layer separately. For a wedding or a holiday party, book the salon and bring a reference photo. The mixed finish is what makes it, and that is hard to fake.
Glossy Visual Idea
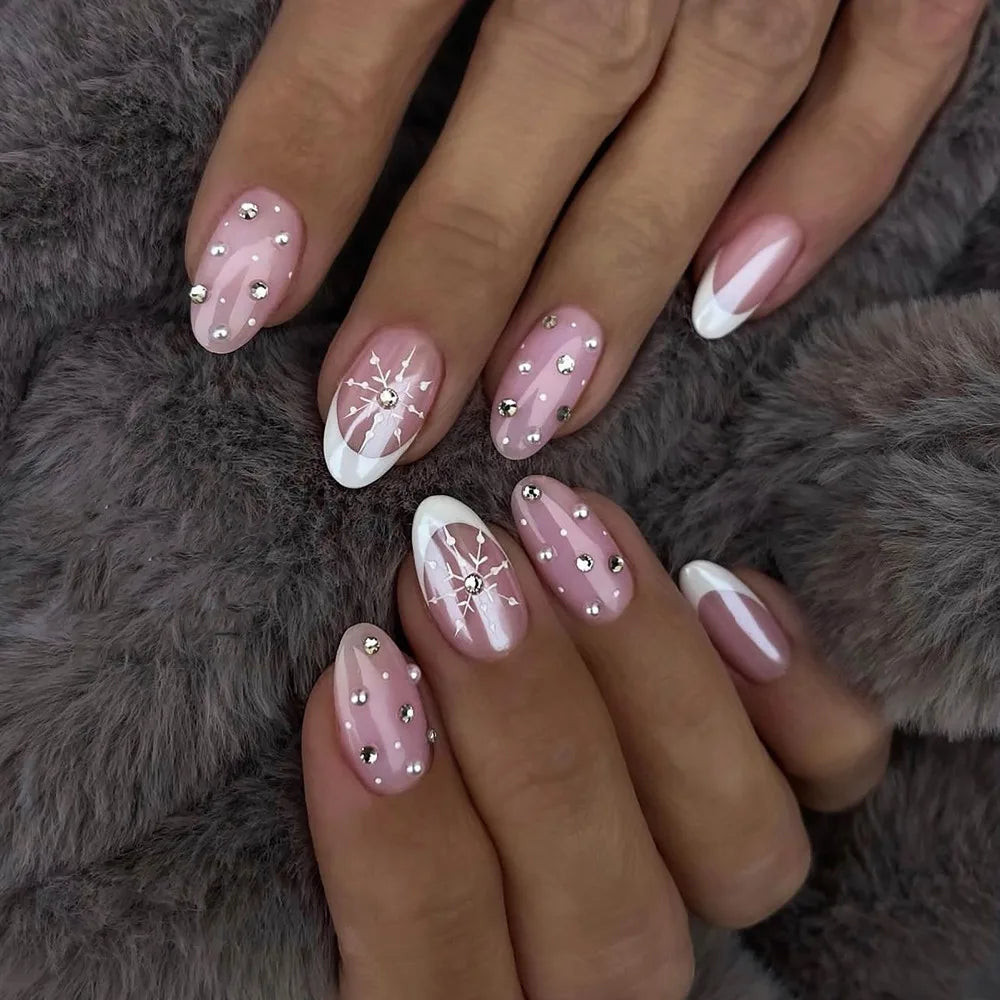
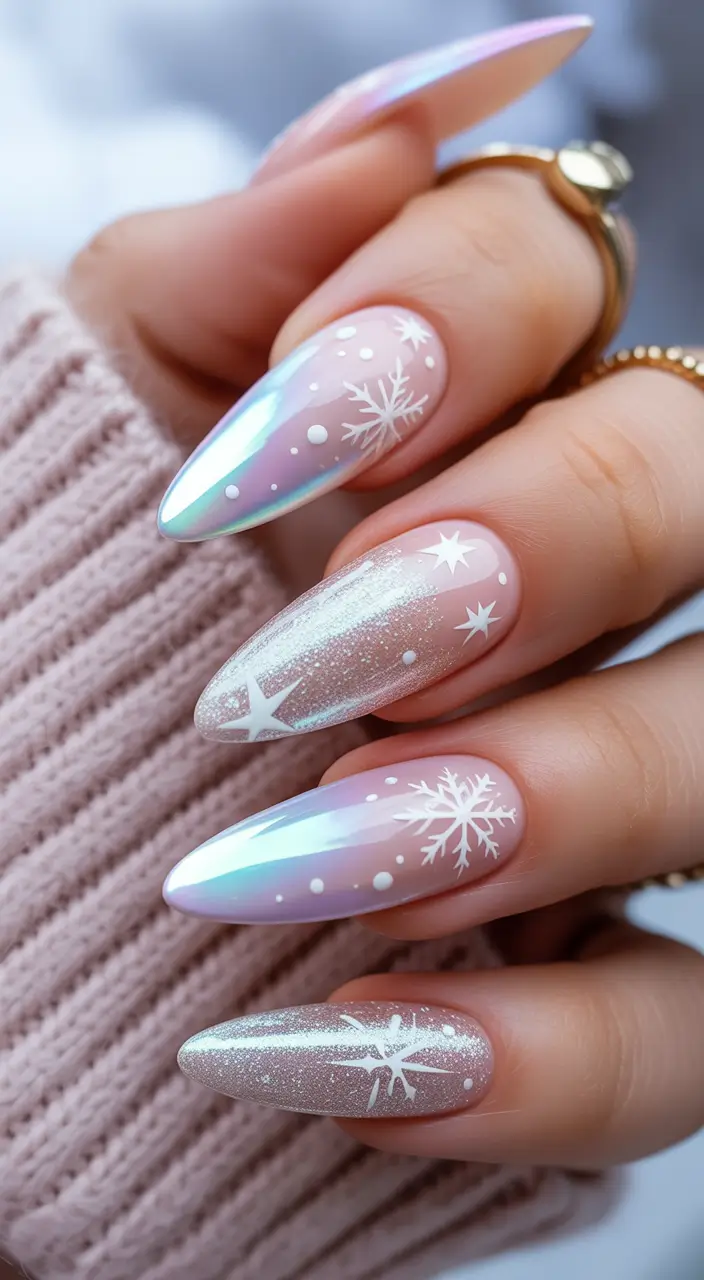
The snowflake design is built with a thin white gel line for the branches and small clear rhinestones at the center, all sealed under a glossy top coat. It looks delicate because it is. The stones sit flush against the nail, which helps, but the white tips show every chip and the snowflake branches lift at the edges by day four. For a winter event, it is beautiful. For a week of typing, it is a gamble. I would save this one for a single night out and accept that the accent nails might need a touch-up before the week ends.
Final Thoughts
After writing all of these, I’m still not over that sapphire ombre. It’s the one I keep staring at on my own nails, the one that made me book a fill before I even finished the draft.
- Cuticle oil twice a day, especially around stones.
- Top coat refresh on day 7 to keep gems seated.
- Gloves for dishes, always, no exceptions.
- Book a fill at week 3 to avoid lifting.
- Skip the gym the day after application.
Pick the design that makes you smile when you catch your hand mid-typing. That’s the one.