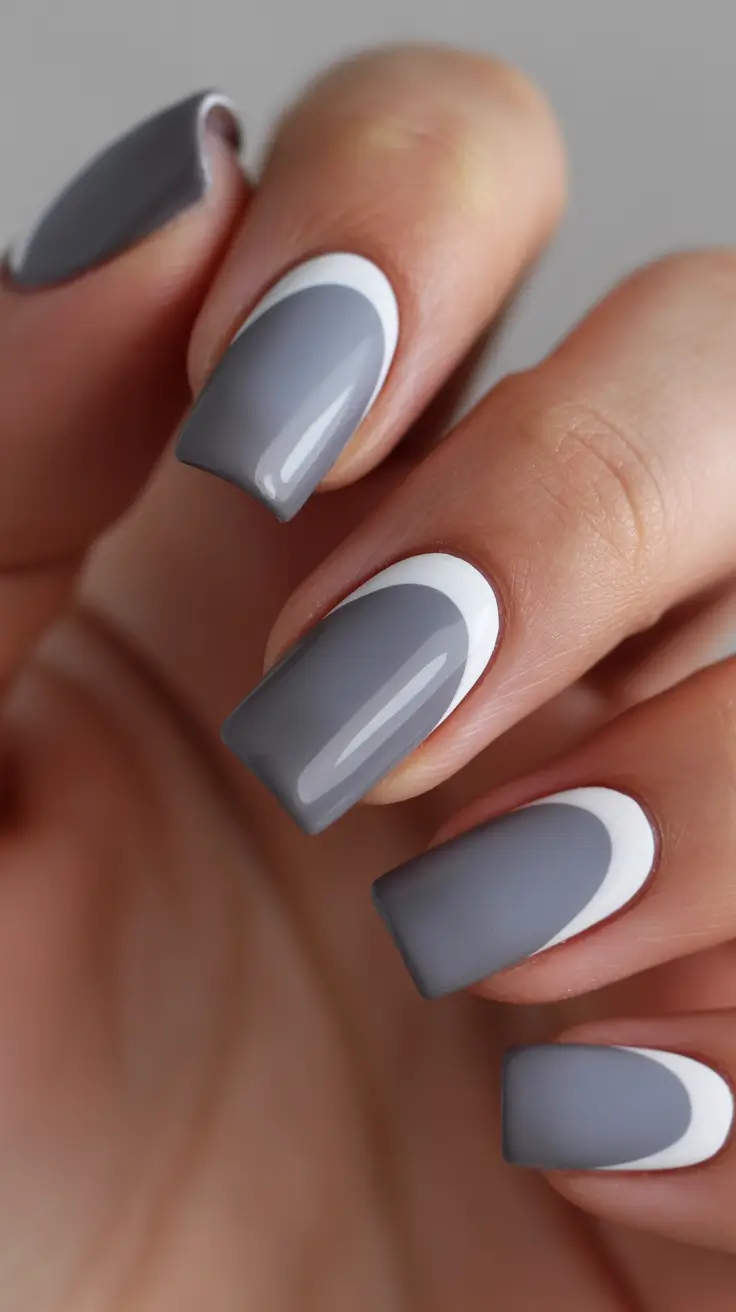
Every November I tell myself I’m done with nail art. By December first, I’m bookmarking snowflake patterns and convincing myself I need another chrome shade. This winter, the line between simple and statement got blurrier.
Here are 39 designs that actually work for Medium Length Winter Nails 2027. Some take an hour at the salon, others are doable on a Sunday. I’ve tested these through typing, sweater season, and the inevitable chip at day five. If you’ve got short nail beds, a few of these play tricks with the eye.
Luminous Pale Blue Chrome Oval Nails
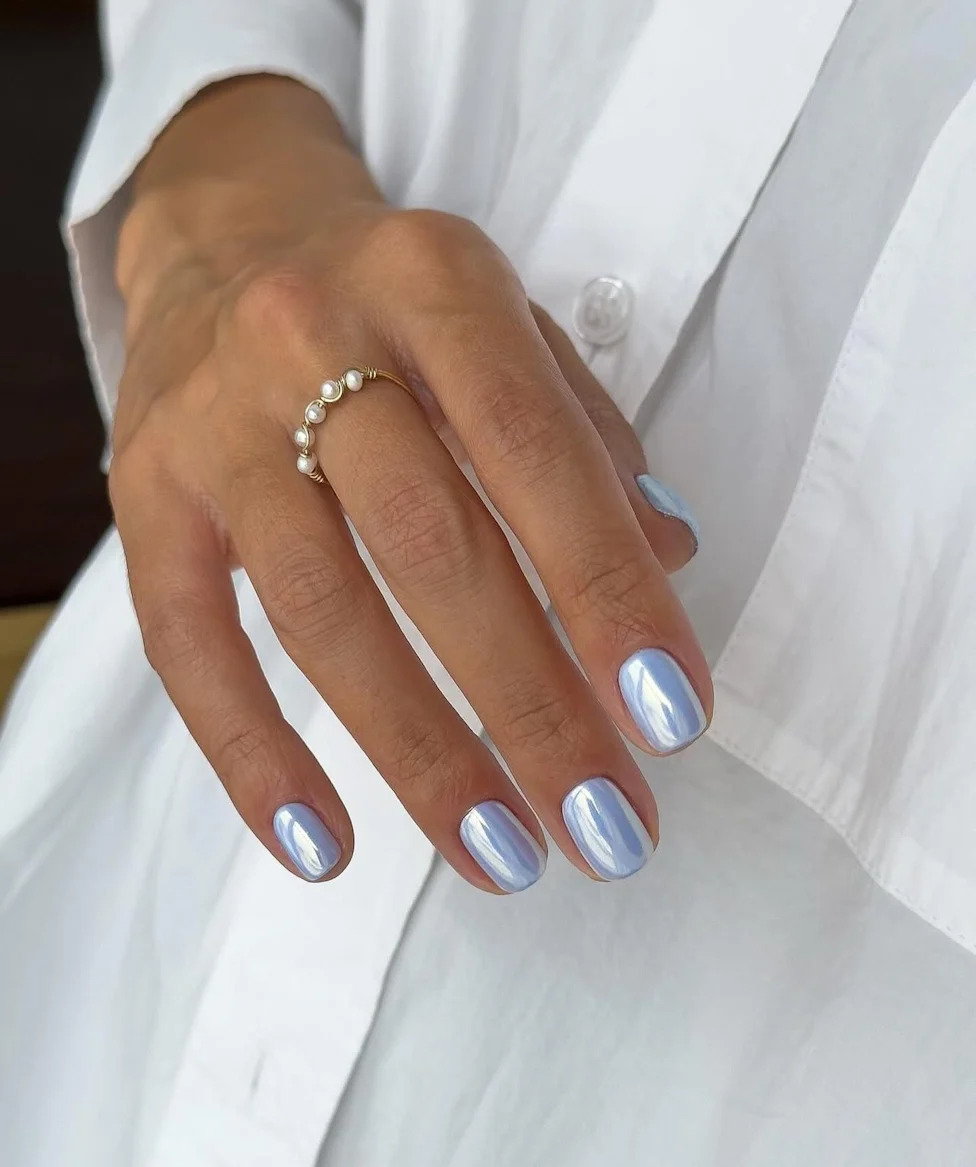
This pale blue chrome reads less like a color and more like frozen light. The iridescent finish shifts from icy blue to pearl white in different angles, giving each medium oval nail a separate personality. It’s the kind of finish that looks deliberate without trying hard, perfect for winter when you want something that catches the low sun without screaming. The pearlescent undertone keeps it from reading as a standard metallic, and the flawless application here means no brush strokes or cloudy patches. This is a salon-only look, but the effect is worth the appointment. And it photographs like a dream, which is always a bonus.
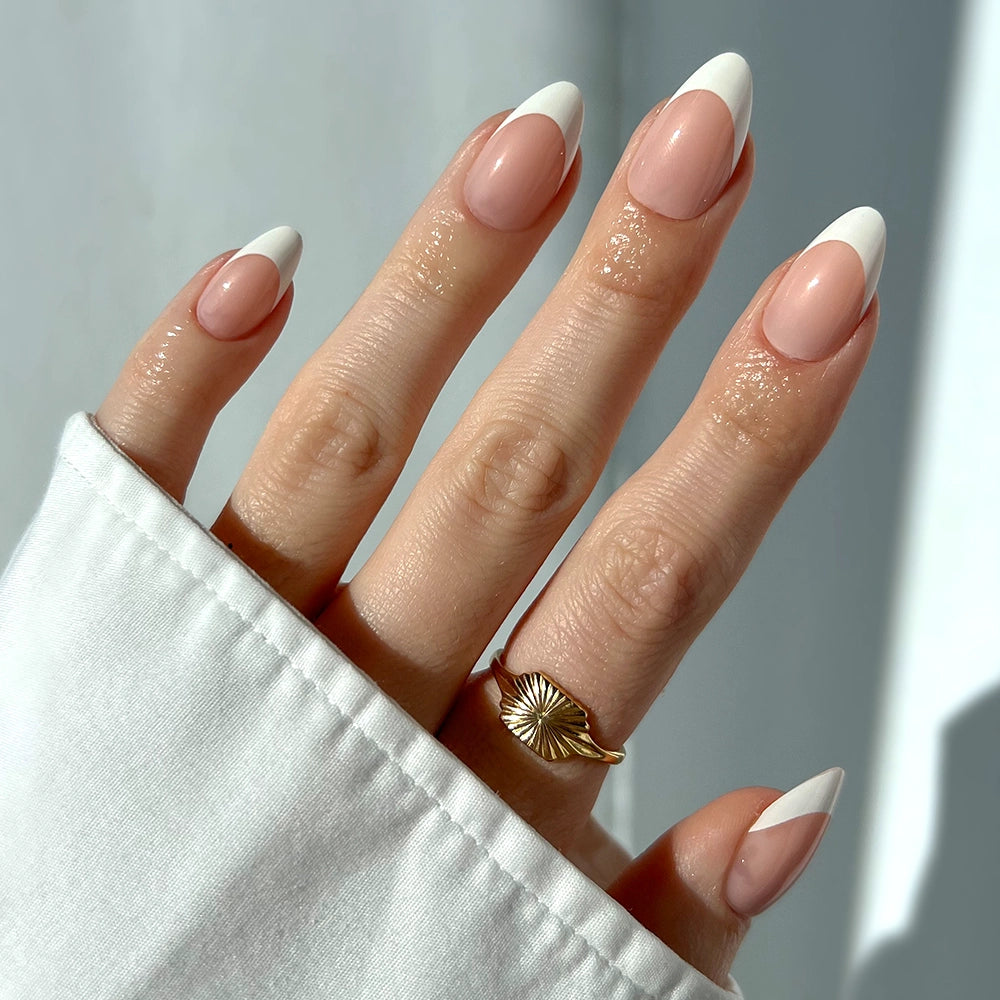
Glossy Nude Brown Gold French Tip
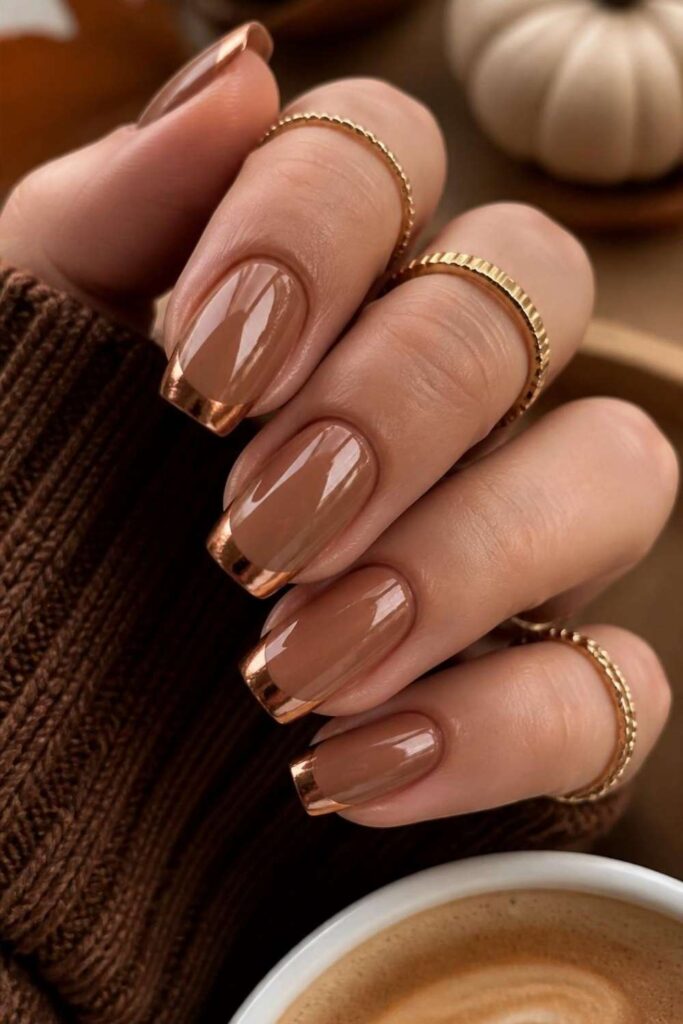
If you’re still doing white tips, it’s time to upgrade. This nude brown base with metallic gold tips is the modern update that feels both warm and expensive. The glossy finish lets the gold pop without looking cheap, and the square shape keeps it grounded. Traditional French tips can feel dated, but swapping white for gold and a nude brown base makes it current. The metallic gold here is applied as a thin strip, not a thick line, which gives it a refined edge. This is a salon look, but the payoff is a manicure that works for any winter occasion. And the contrast is subtle enough that it doesn’t scream for attention, just quietly earns it.
Deep Navy Glossy Edge Line Nails
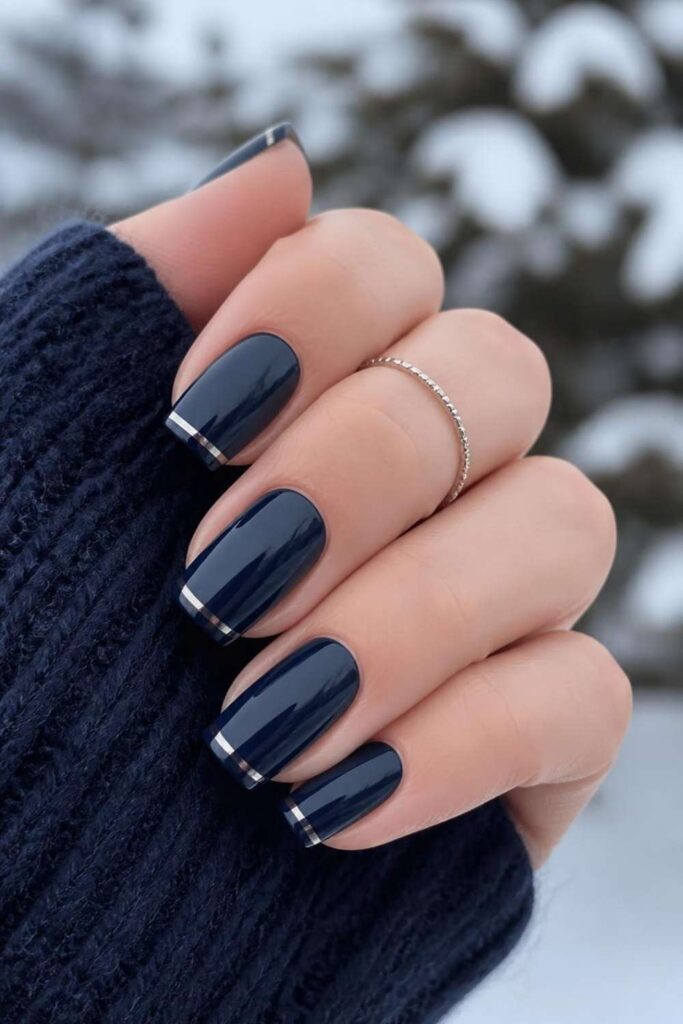
A thin metallic silver line hugs the free edge of each deep navy square nail with surgical precision. The high gloss background makes the silver stand out without competing, and the navy provides a dramatic backdrop that feels both sleek and modern for winter. It’s a design that reads as intentional and minimal, perfect for when you want your nails to look put together without a lot of fuss.
The technique here requires a steady hand and a fine brush, because any wobble in the line becomes instantly visible against the dark polish. The metallic silver line is applied after the navy base, and a careful top coat seals everything without smudging. The result is a clean, architectural look that works for those who want something more than a solid color but less than full nail art. And because the line is at the free edge, it doesn’t interfere with nail growth as much as a full tip design. The deep navy color itself is a winter staple, but the silver edge gives it a fresh twist.
Deep Teal Magnetic Shimmer Oval Nails
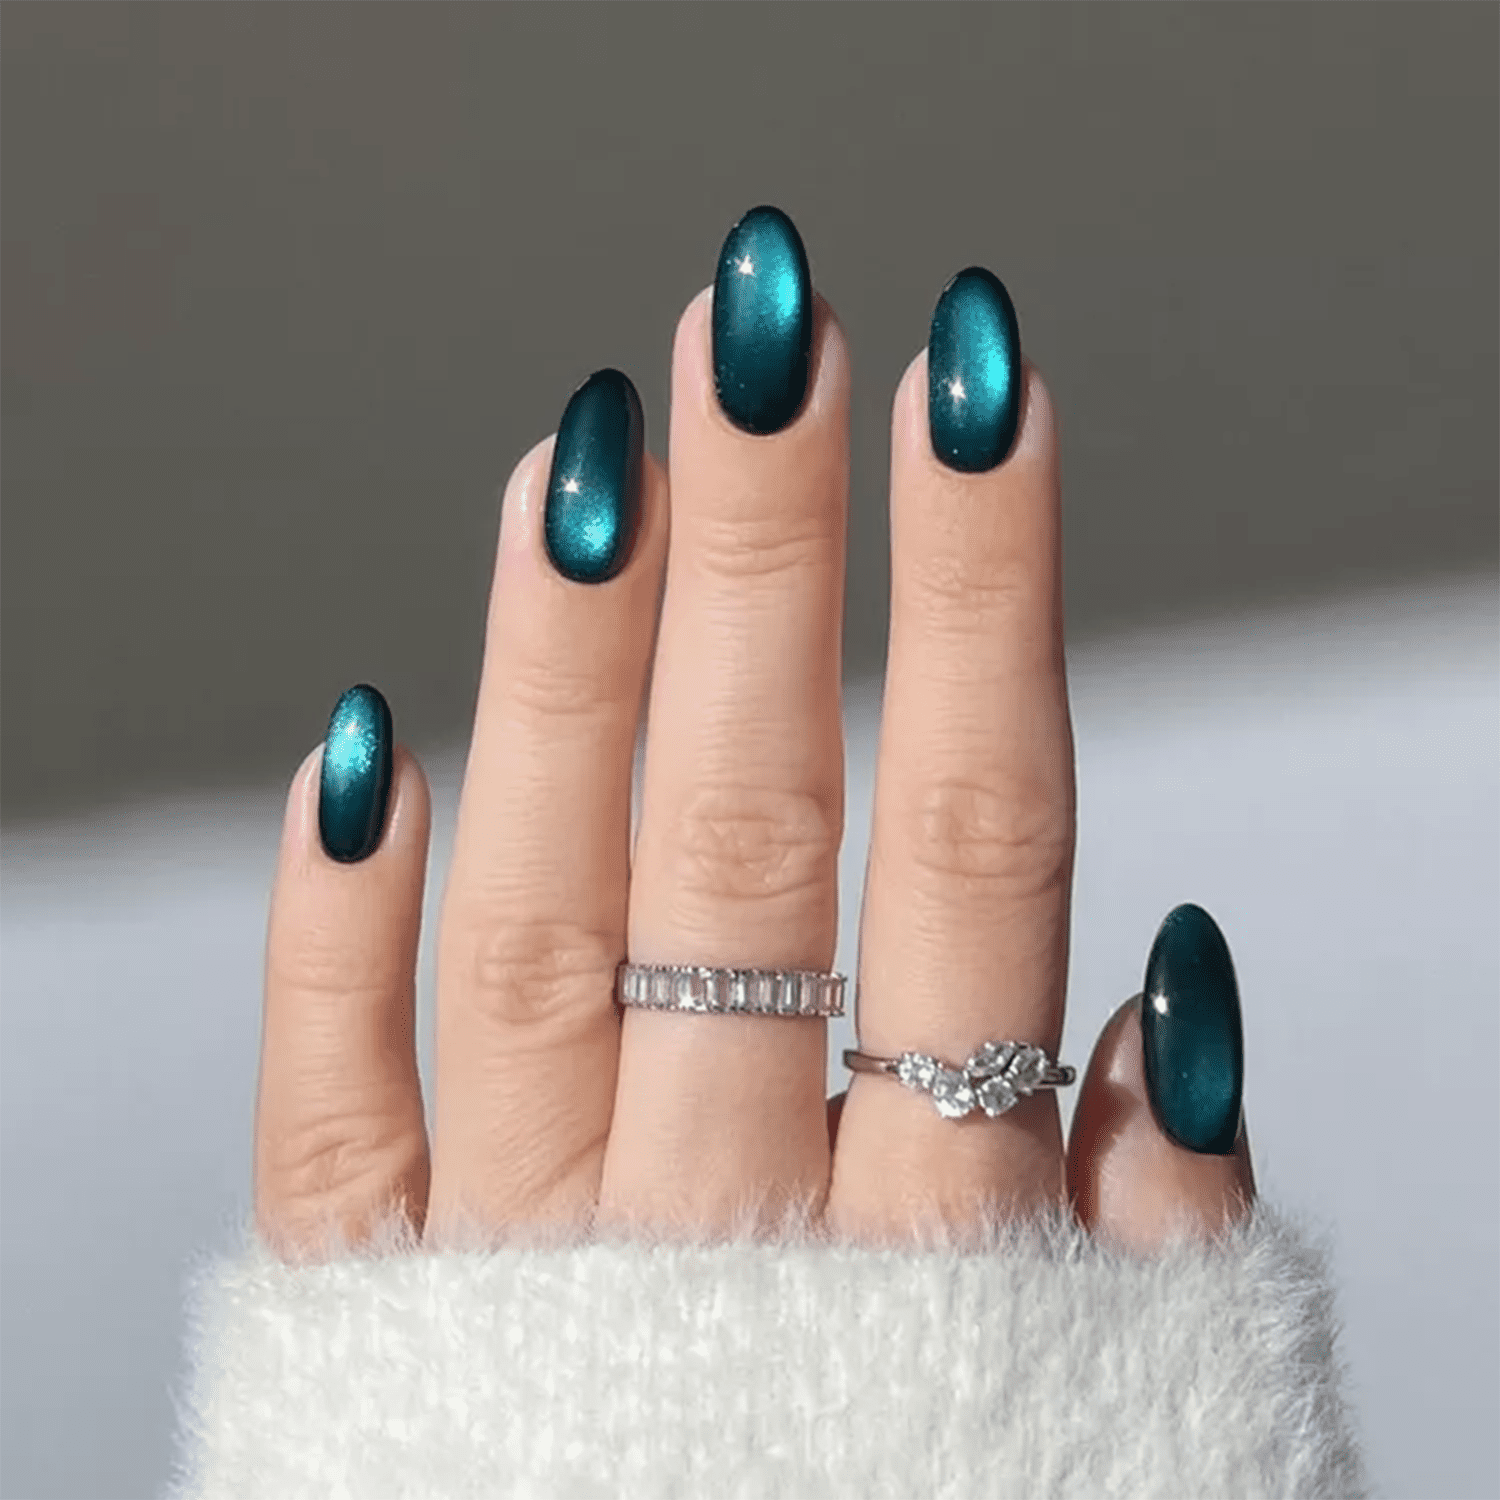
Can a magnetic effect really stay mesmerizing past the first day? The deep teal base here shifts and catches light in a way that’s genuinely dynamic, but I’m skeptical about how long that novelty lasts. The magnetic polish creates a shifting pattern that looks almost alive in the bottle, but on the nail, it can settle into a static line if not applied perfectly. For a one-time event, it’s stunning. For daily wear, you might find yourself checking for the effect more than enjoying it.
Berry Red Glossy Reverse French
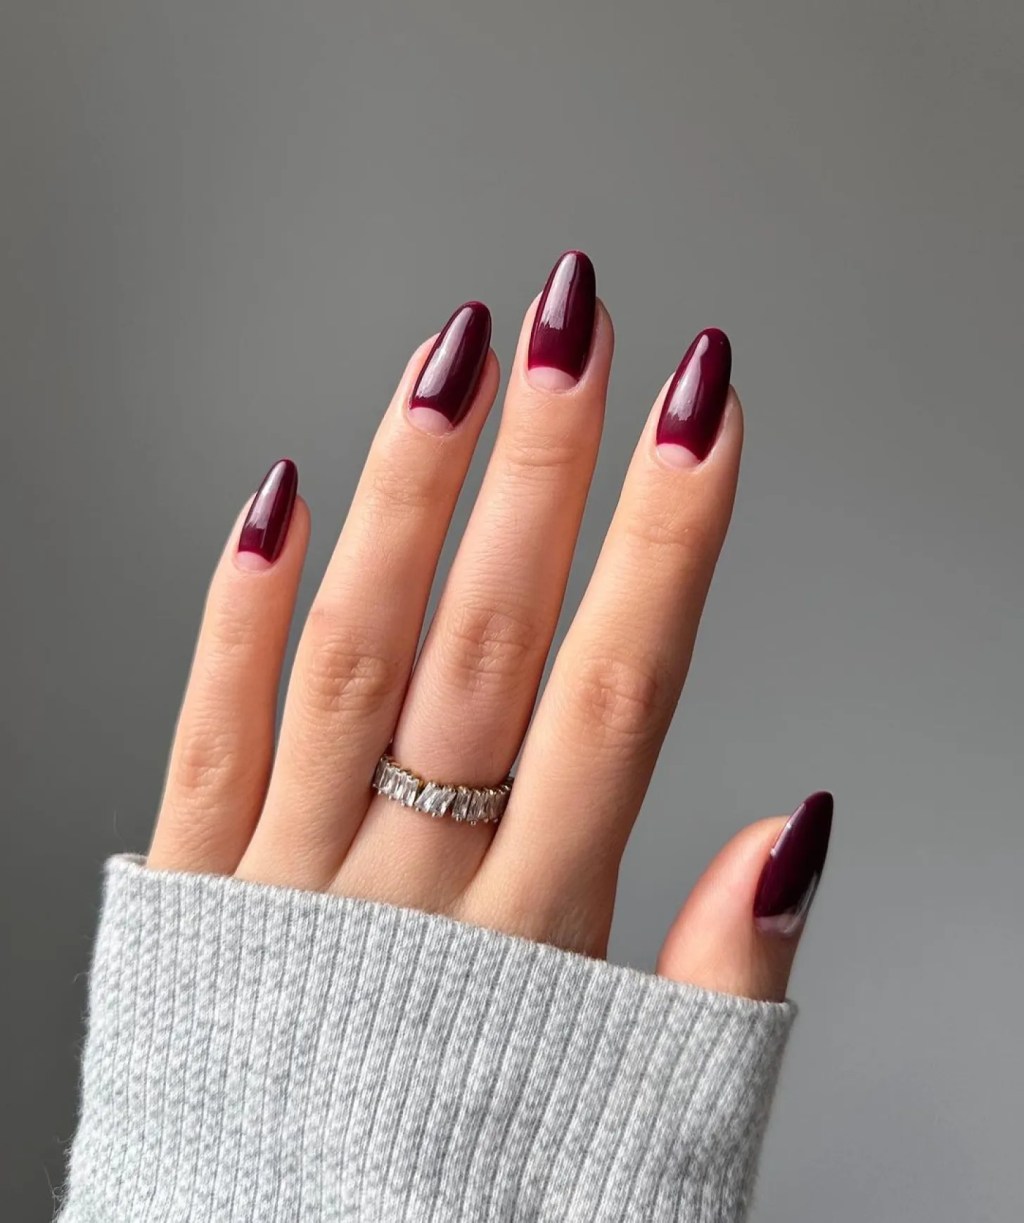
I’ll admit, I was skeptical about reverse French. But the grow-out is surprisingly forgiving. Instead of a dark tip that shows regrowth, the sheer nude base at the cuticle blends with new growth, so you get an extra week before needing a fill. The deep berry red at the cuticle edge stays bold and glossy, and the reverse placement means the color is where the nail meets the skin, not where it ends. This design lasts well through a winter week of typing and hand washing, though the contrast at the cuticle means any chips near the base are more noticeable. A careful top coat every few days helps keep the edge crisp.
Icy Blue Cat-Eye Snowflake Nails
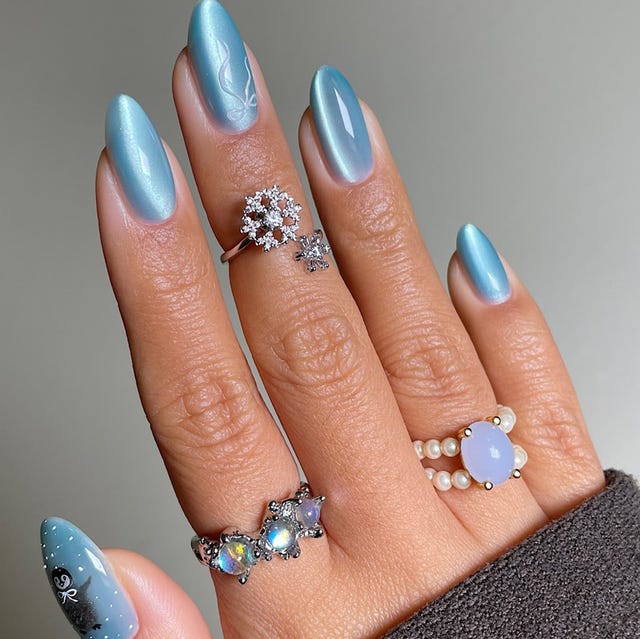
Icy blue cat eye nails usually feel like a party trick, but this version is quiet about it. The magnetic pigment gathers into a soft shimmer line that shifts as the light moves, and the pearlescent finish keeps it from looking flat or frosty. A delicate white snowflake decal anchors the middle finger, while the index carries subtle swirling lines, so the whole set reads like a winter sky instead of a holiday display. On medium almond nails, it’s festive without shouting, exactly the energy a December dinner needs.
What makes it work is the restraint. The cat-eye effect gives the base movement, the snowflake decal provides the story, and those swirling lines tie the accent back to the gloss of the rest. There’s a lot happening, but every element earns its place. For a winter wedding or a long season of parties, this is the design you stop noticing on yourself, then get annoyed no one compliments.
Sheer Nude Ombre Stiletto Nails
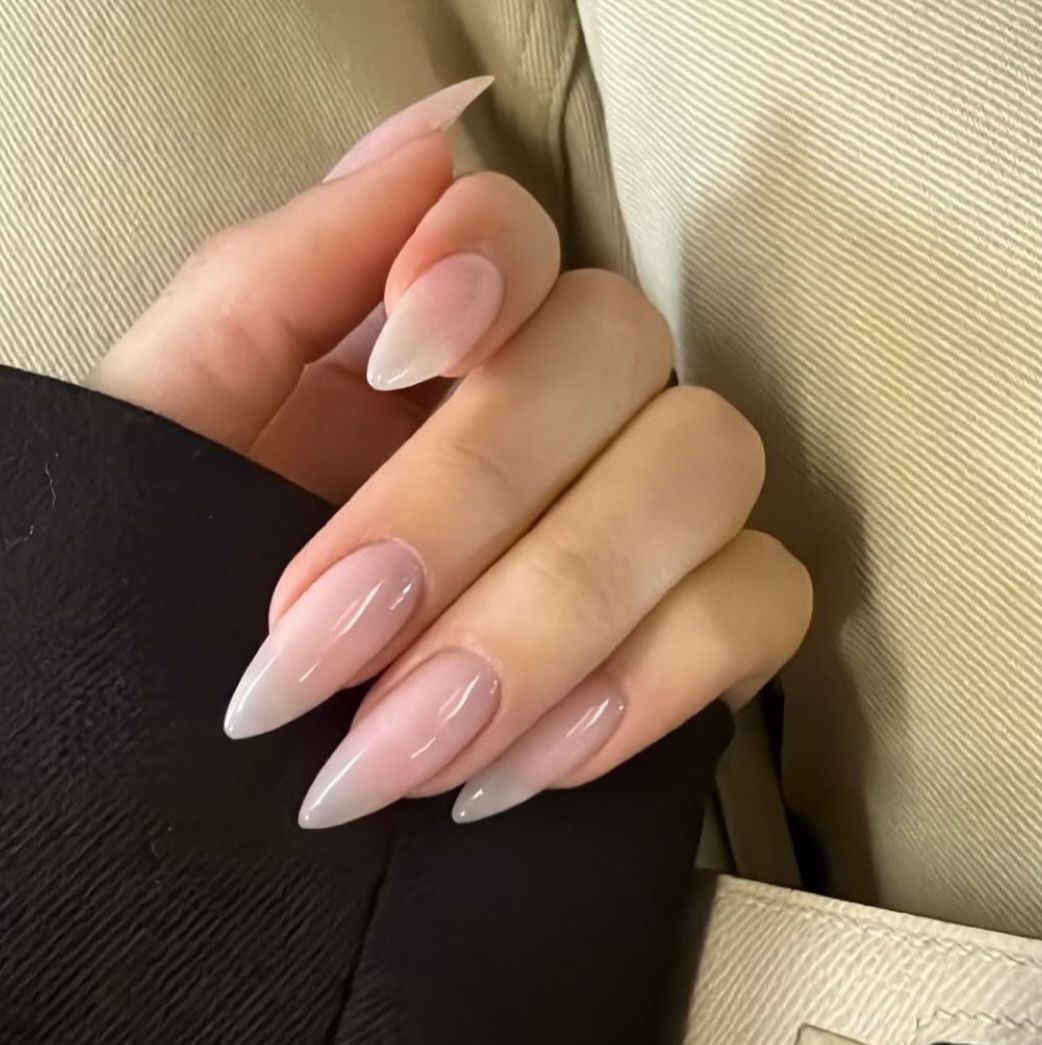
Nude white ombre nails make the stiletto shape look soft, which is the only way I’ll wear a point that dramatic. The gradient starts sheer nude at the cuticle and fades to white at the tip, so the point looks planned instead of aggressive. It genuinely flatters anyone who wants length without bulk, but the ombre has a hard downside: the white tip draws attention to regrowth, so you’ll see the gap at week two. If you can’t stand visible grow-out, pick a solid color and pass. On medium length, the stiletto stays wearable, but the gradient is what makes the whole thing feel deliberate. It’s a look for people who plan ahead, not for anyone who waits until the last minute to book.
Black Cat Eye Glossy Nails
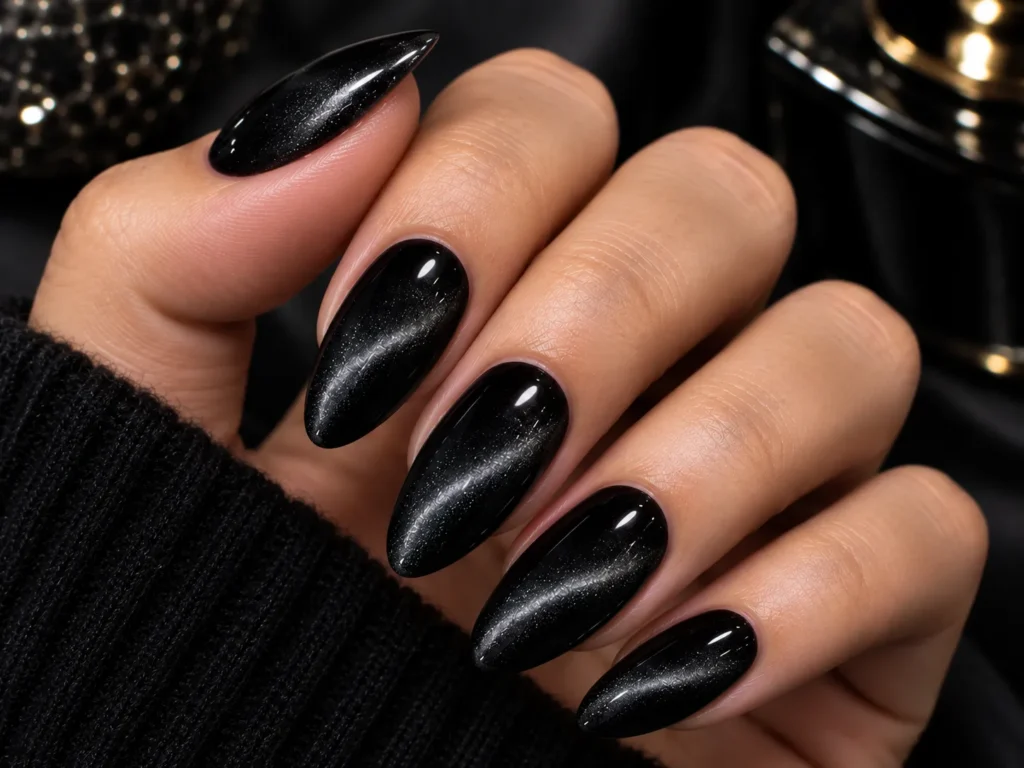
Can black cat eye nails ever be a regular-Thursday thing, or are they reserved for holiday parties and after-dark plans? The glassy black base with its subtle shifting effect is closer to a mood ring than a solid color, which is exactly why it feels like a special occasion finish. For winter evenings, it’s hard to beat; for an office full of neutral-lovers, it might be too much. I keep coming back to it because the depth is undeniable, but I’m not convinced I’d wear it to brunch.
Sheer Pink Glitter French Almond
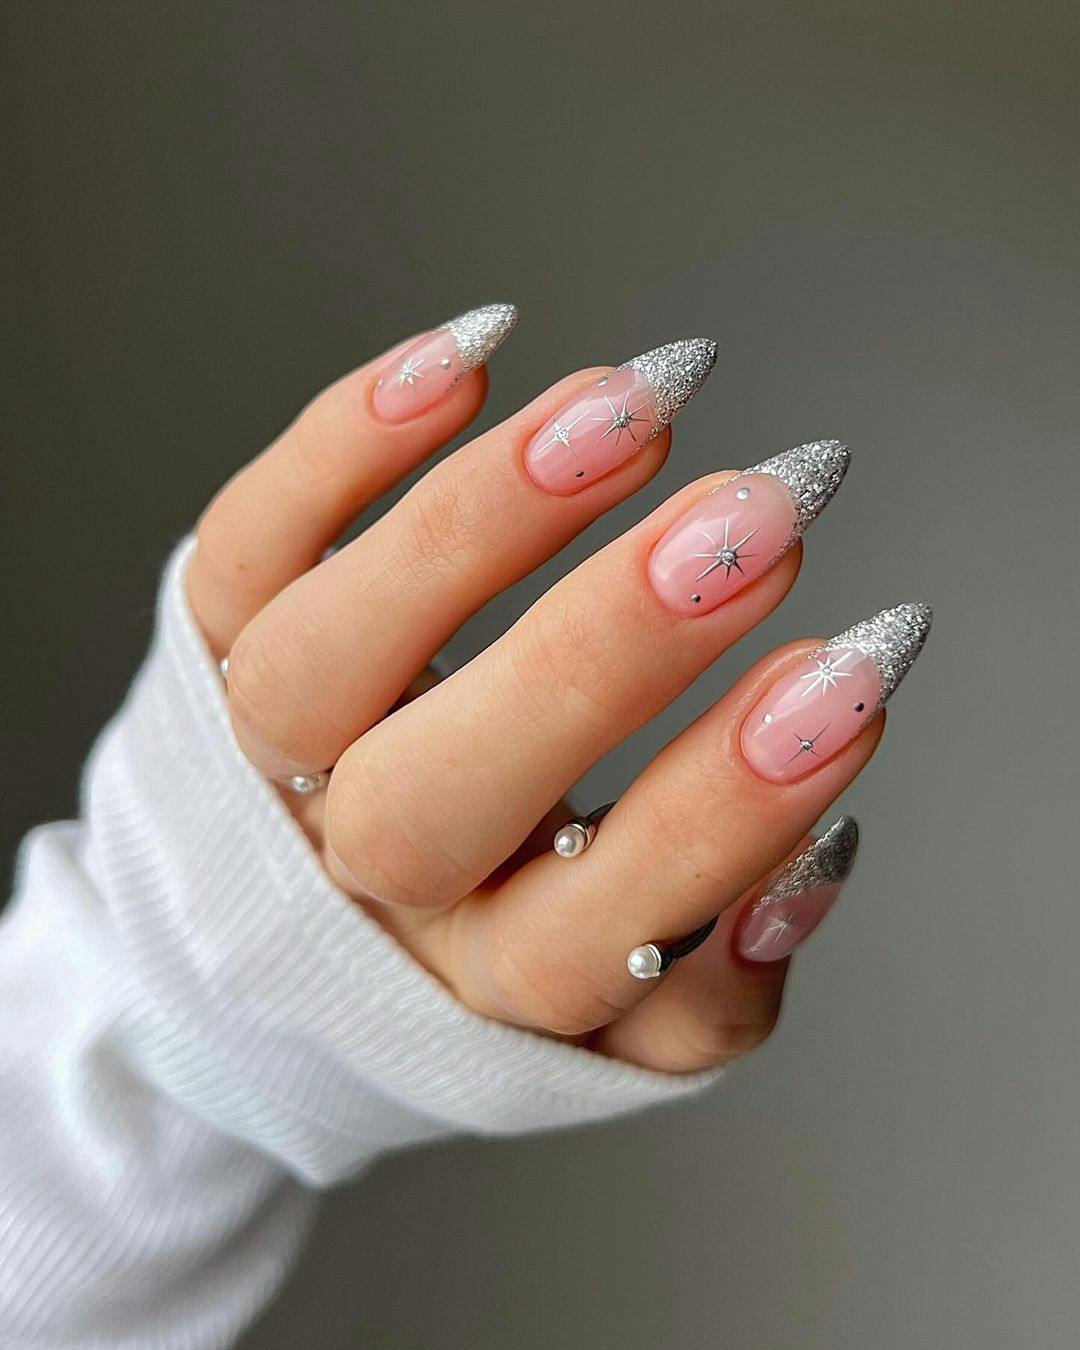
The trick is the order. Paint your dominant hand first, because it’s going to take twice as long. Tape guides the smile line if your freehand wobbles, just peel it off while it’s wet. This is a two-hour Sunday DIY, not a quick after-work project, and it will look convincingly salon-made if you let each layer dry before touching it. Expect the first hand to be messy and the second to be great.
Sheer Pink Classic French with Art
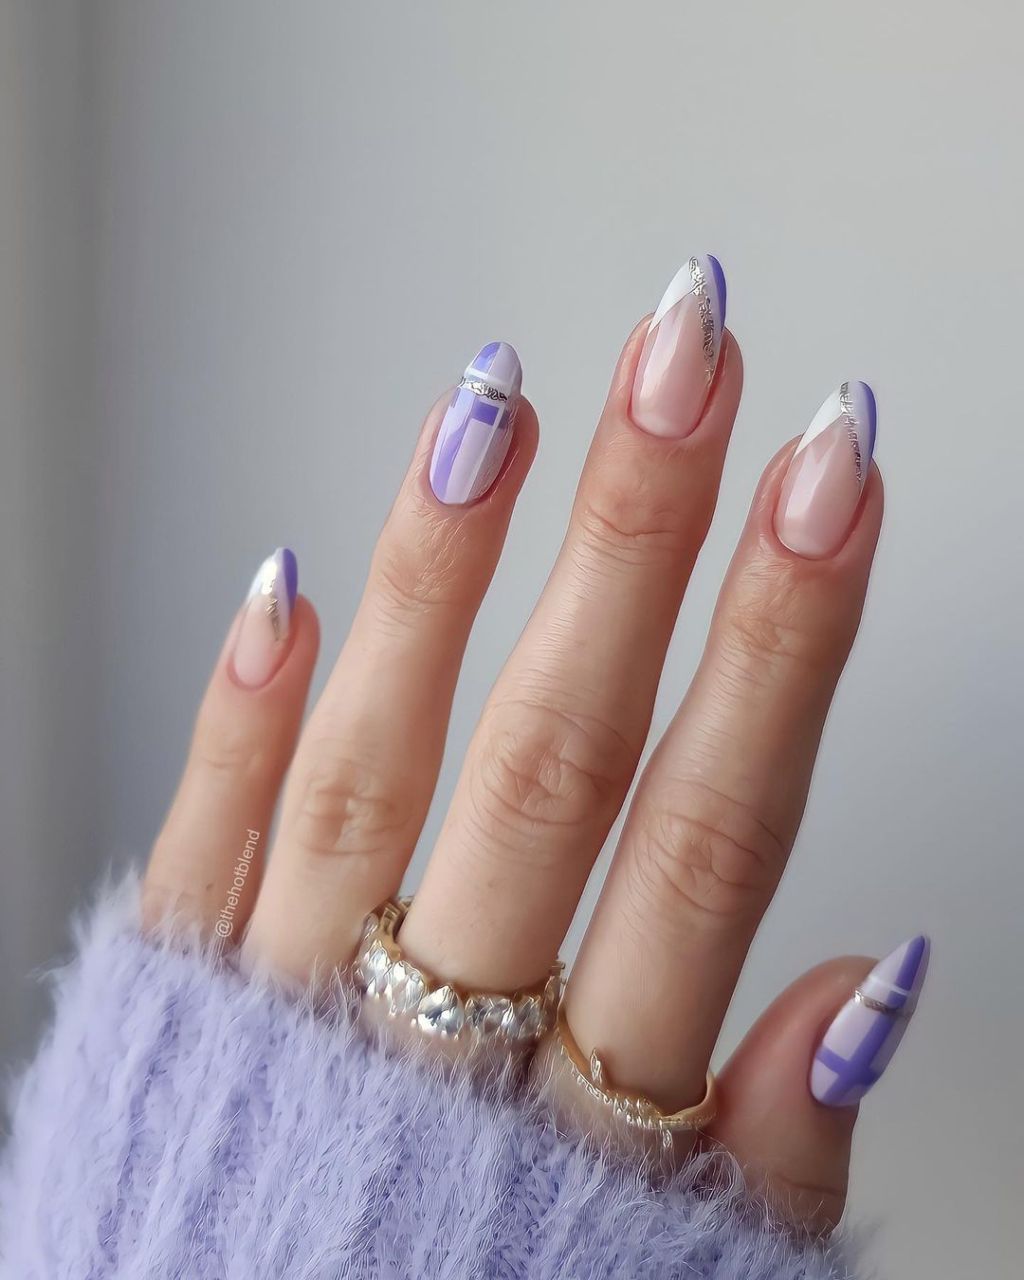
I’ll take the classic French tip over a heavily decorated one nine times out of ten, but this is the tenth. Pink white french tip art is just the usual tidy smile line, then a few purple geometric shapes and a dusting of silver glitter decide to join the party. The comparison is simple: a plain French tip is elegant and forgettable, while this version has a real personality. The downside is real too. Those little art accents sit on top of the nail, so they chip before the base does, and you’ll be touching them up by day four if you’re rough with your hands. But I’d still pick this one, because the charm outweighs the wear. On medium almond nails, the art feels like a choice, not an accident.
Pink Polka Dot French Almond
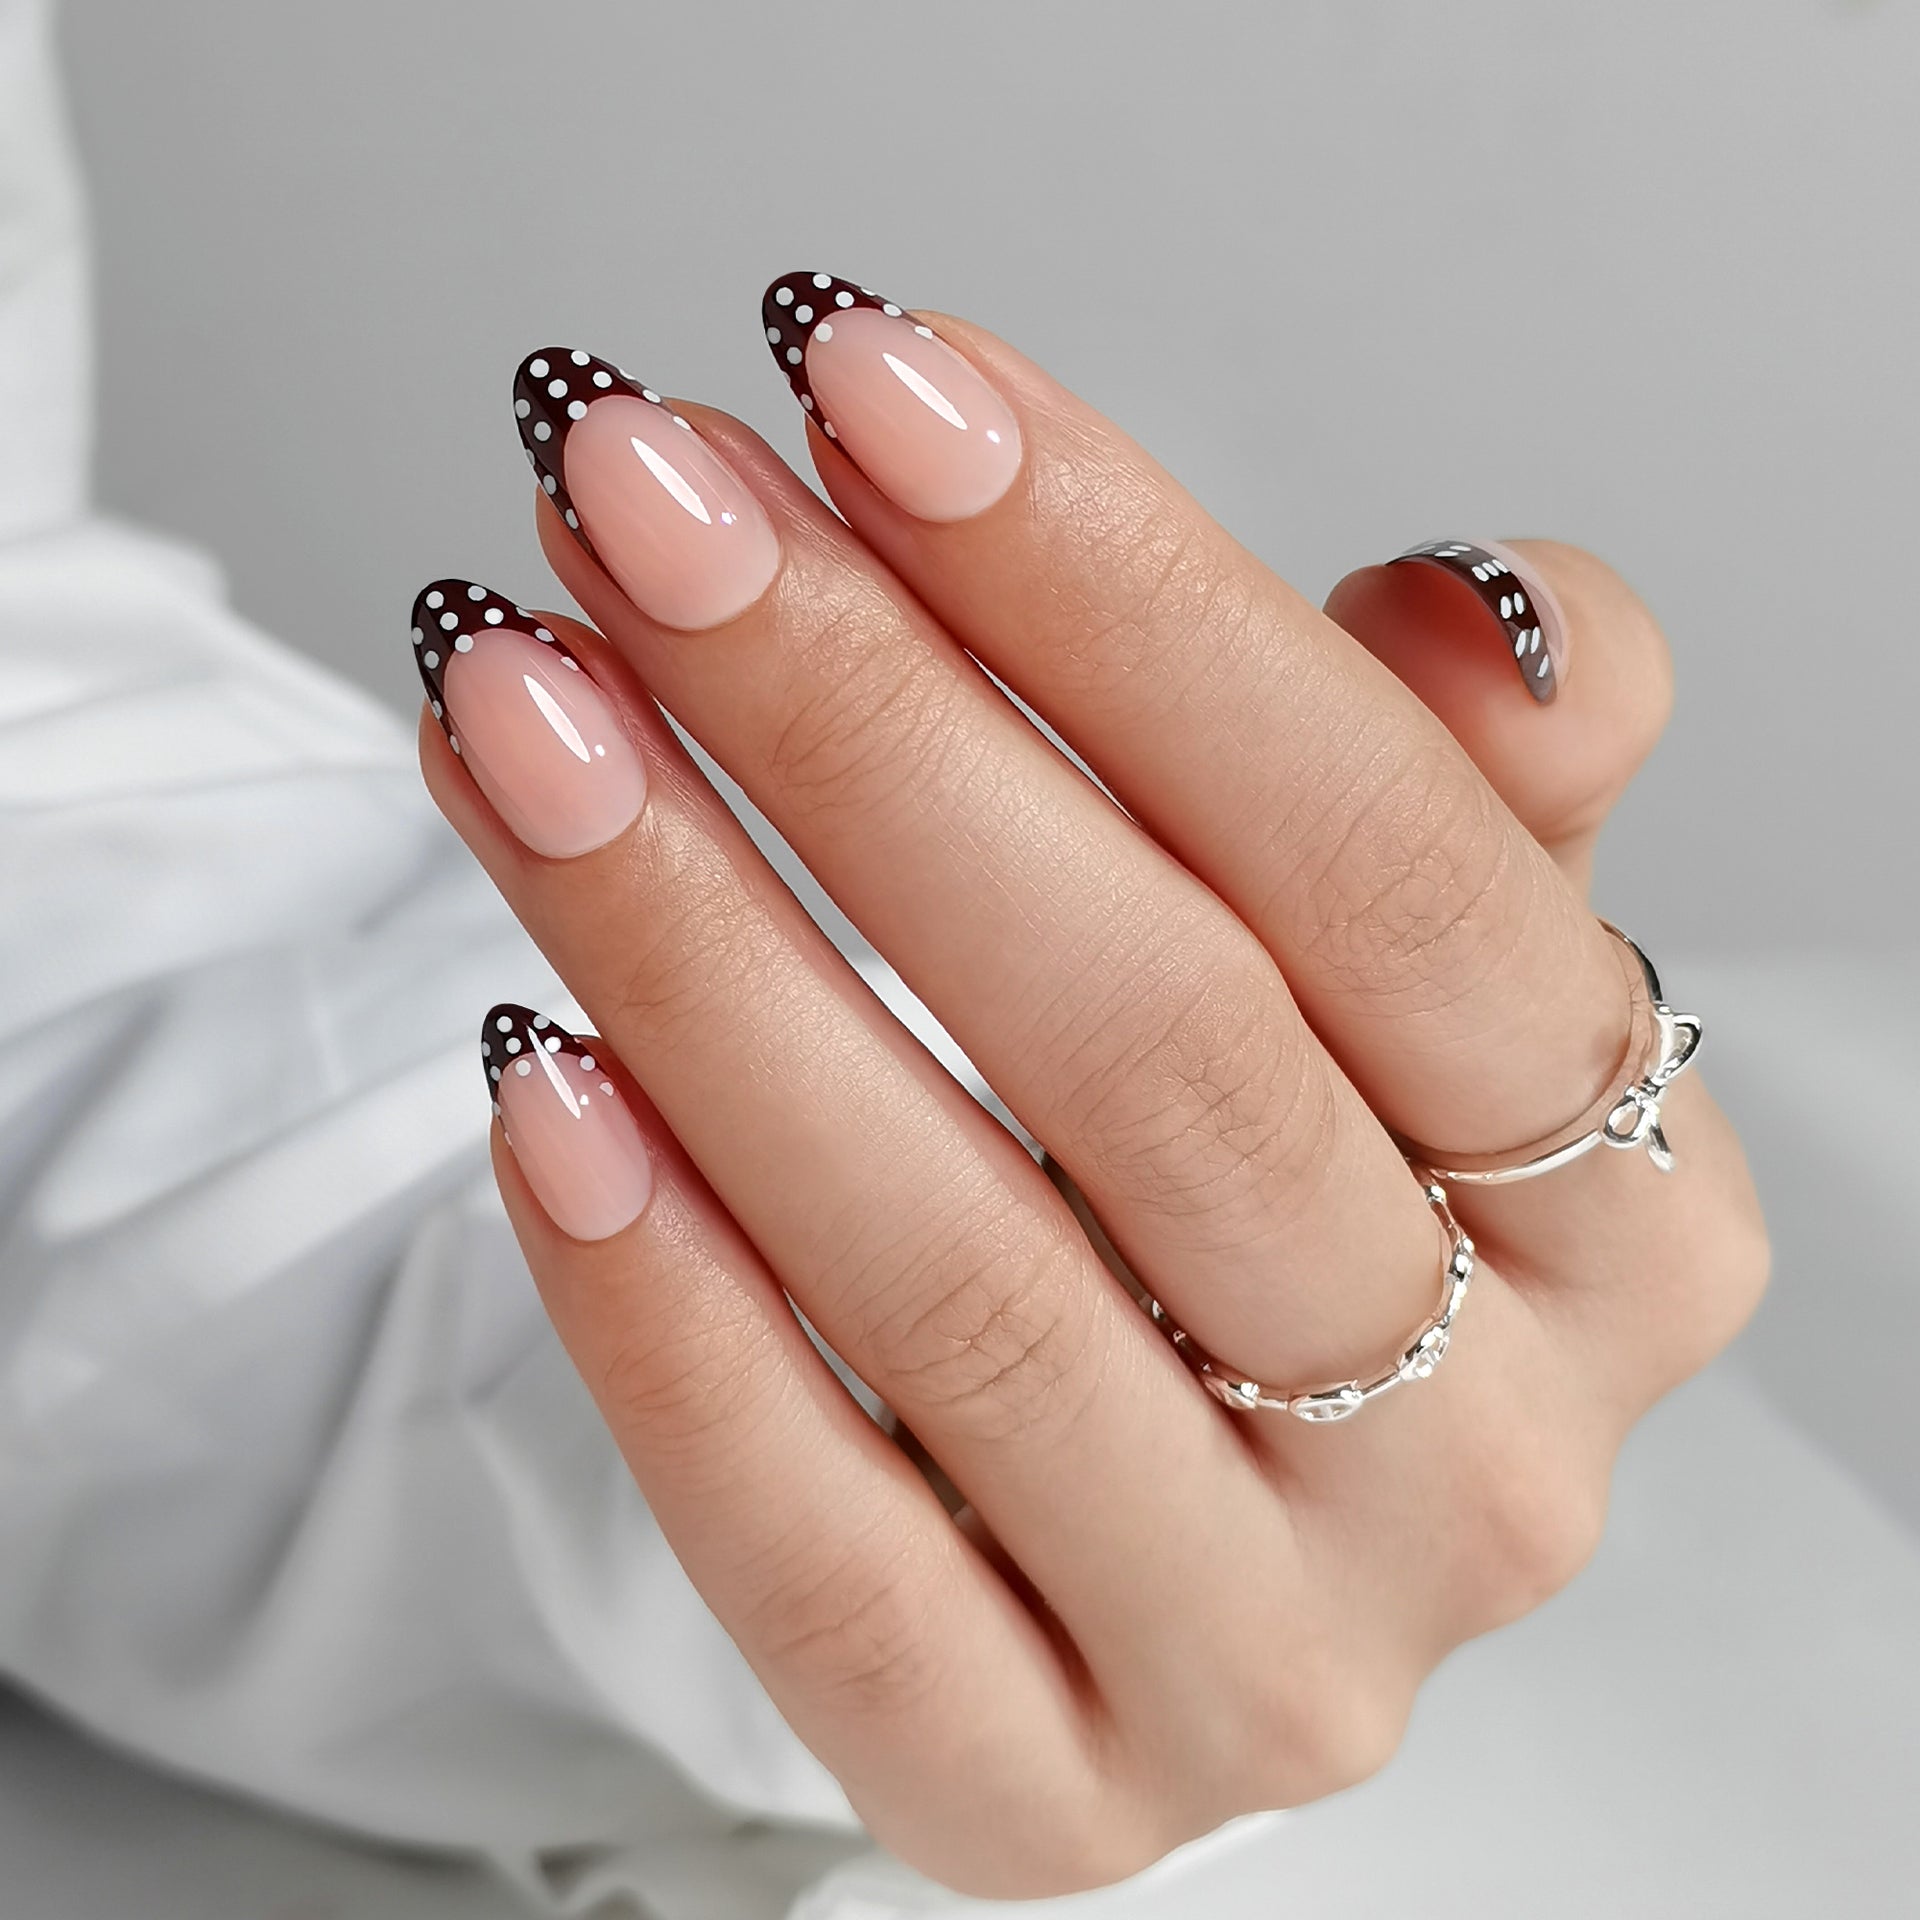
Polka dots look playful on day one. By day five, the white ones start collecting lint if you don’t seal the edges well. The polka dot french tip on this set uses tiny black and white dots over a sheer pink base, and the scale matters: small dots catch less than big ones. The top coat is key here. Without a thick final layer, the white dots can start to look gray by day four. I add a fresh coat on day five and they look new again. The black dots hold up better because they don’t show dirt. I wore these through a week of cooking and typing, and only one dot showed wear by day seven. The sheer base hides regrowth better than opaque, so you get closer to three weeks before a fill feels urgent. Removal is standard soak-off, no drama.
Pale Pink Snowflake Almond Nails
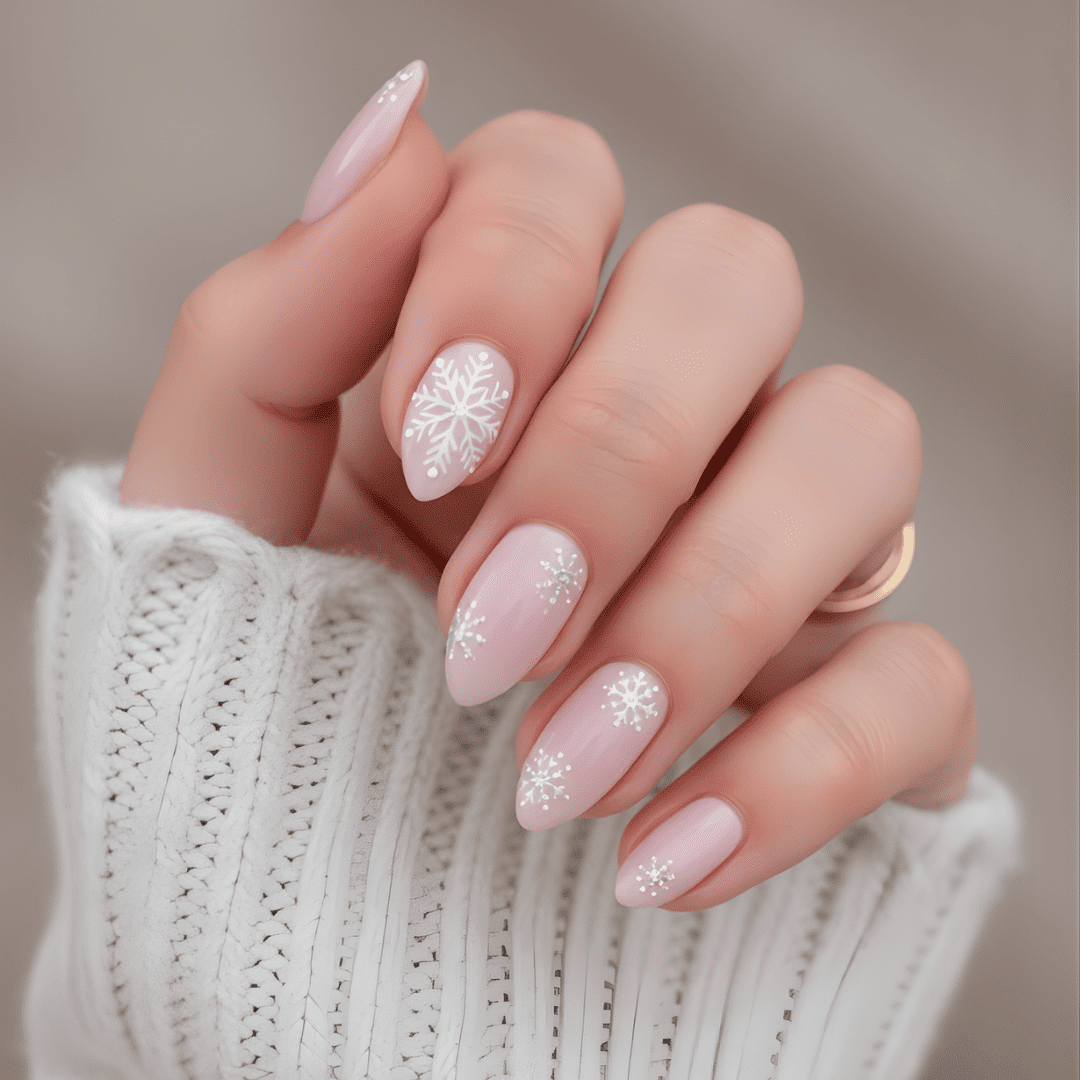
These pale pink snowflake nails are the winter equivalent of a whisper. The white snowflake designs are so fine they look hand-painted, even if they’re decals. The pale pink base keeps it from feeling stark, and the glossy finish adds a wet look that reads fresh. The almond shape helps the snowflakes sit naturally, following the curve of the nail. This is the set you wear to a holiday brunch, not a New Year’s party. It’s subtle enough to last through January without feeling dated.
Milky Pale Pink Snowflake Accent
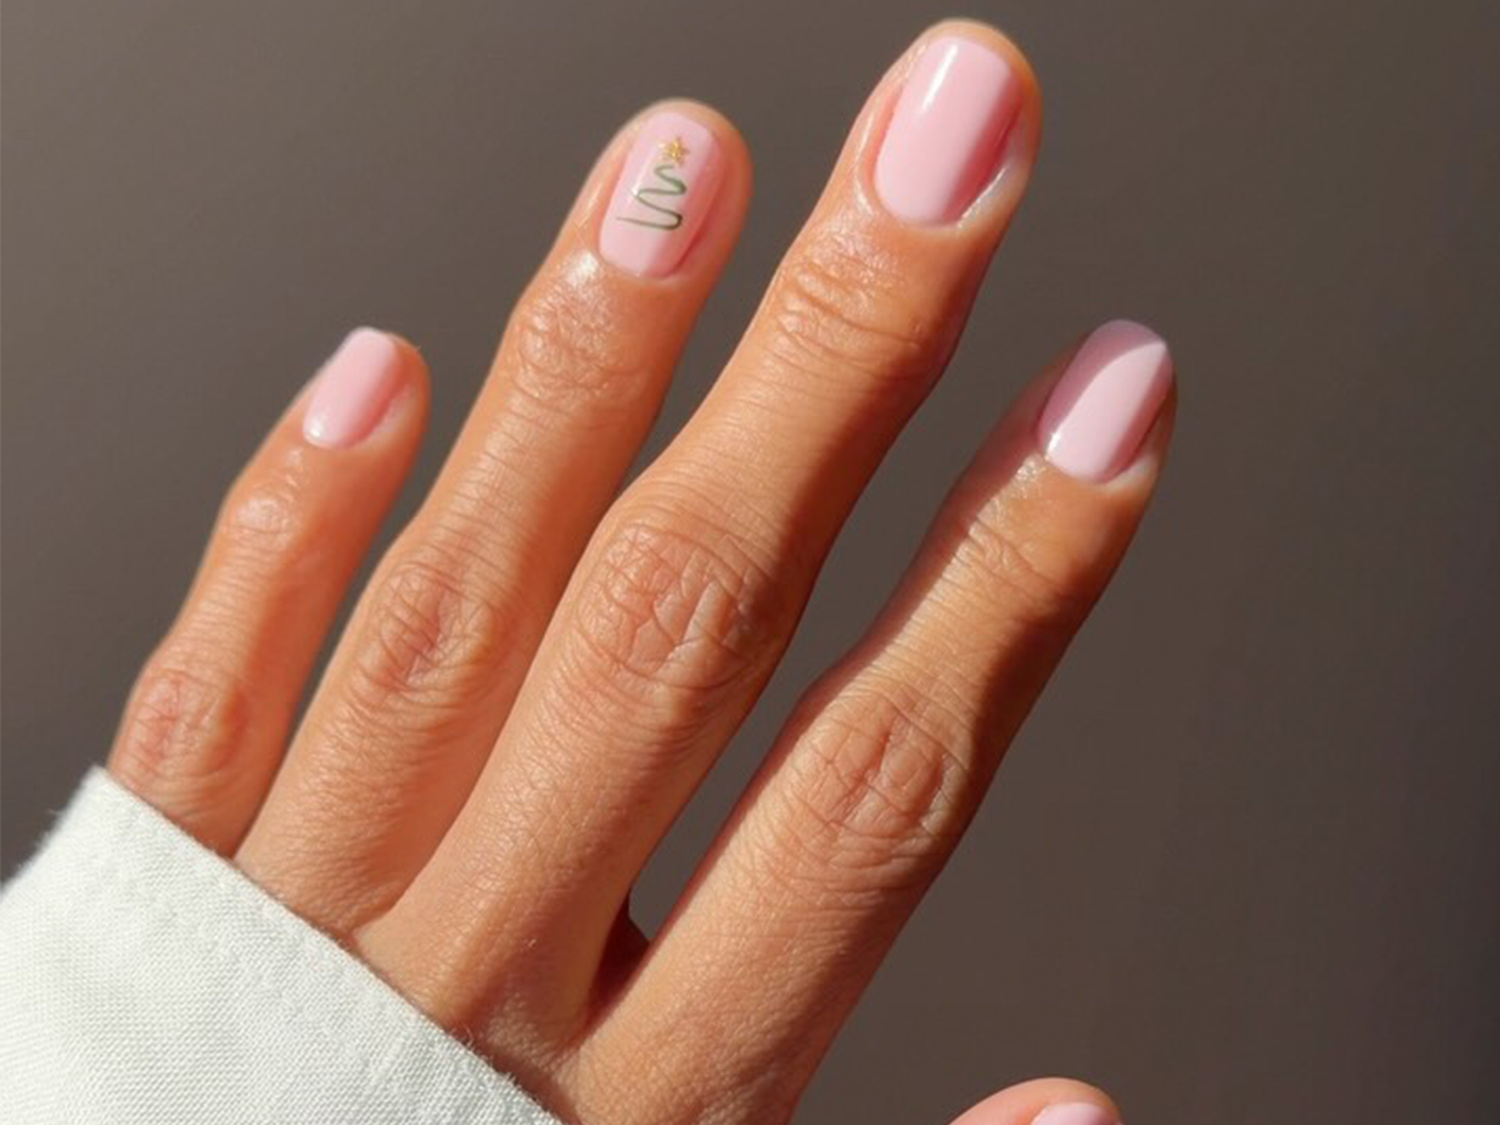
Are you someone who prefers your winter nails understated? The milky pale pink nails with a single minimalist snowflake on the accent nail are for you. The milky finish softens the look, making it work on short nails and pale skin without washing out. The subtle shimmer in the base catches light without competing with the snowflake. But here’s the catch: milky finishes show chips faster than opaque. One nick at the tip and it’s noticeable. If you’re hard on your nails, skip this and go for a creamier base. The snowflake placement is precise, so this is a salon request, not a rush job at home.
Nude French Tips with Snowflakes
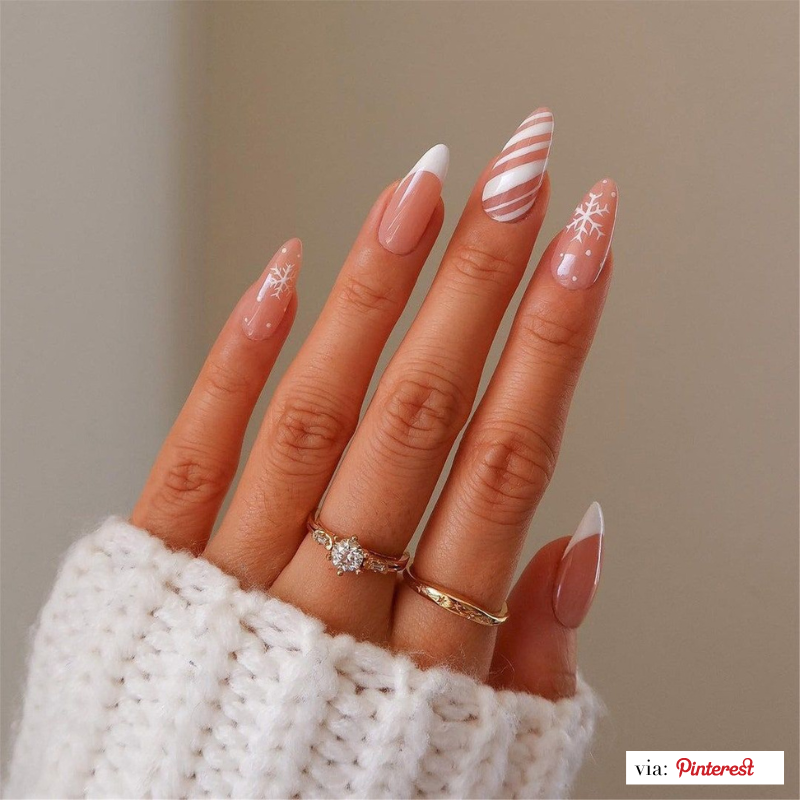
The white French tips are painted first, thin and clean, two coats max. Then the snowflake decals go on while the top coat is still tacky, so they sink in and don’t catch. The subtle glitter accents are dusted on before the final seal, embedded into the layer. The sheer nude base keeps the nail visible, which prevents the heavy look some winter sets get. The key is the order: base, tip, decal, glitter, top coat. Each layer must be fully cured before the next, or the decal wrinkles.
These nude french tips snowflakes are a holiday set that works through January. The white tip and snowflake read as frost, not tinsel. This works for holiday parties and casual winter weekends. The nude base means regrowth isn’t obvious, so you can stretch wear to three weeks if you’re careful. Expect the decals to hold well if sealed properly, but a top coat refresh at day ten keeps edges from lifting. This is a salon build, not a DIY, because the decal placement needs precision.
Deep Red Jelly Ombre Nails
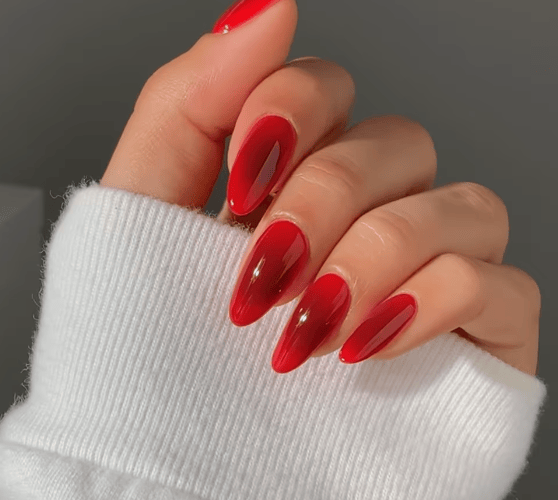
The red jelly ombre nails are a gamble. The jelly-like finish is translucent, which means it shows every imperfection underneath. If your nail has ridges or a stain, it’ll peek through. The ombre fade from deep red to lighter is pretty on day one, but the jelly effect can look dated if the color isn’t saturated enough. I’ve seen these chip faster than opaque reds because the layers are thinner. Skip if you want a solid, long-wearing red.
Silver Cat-Eye Cross Detail Nails
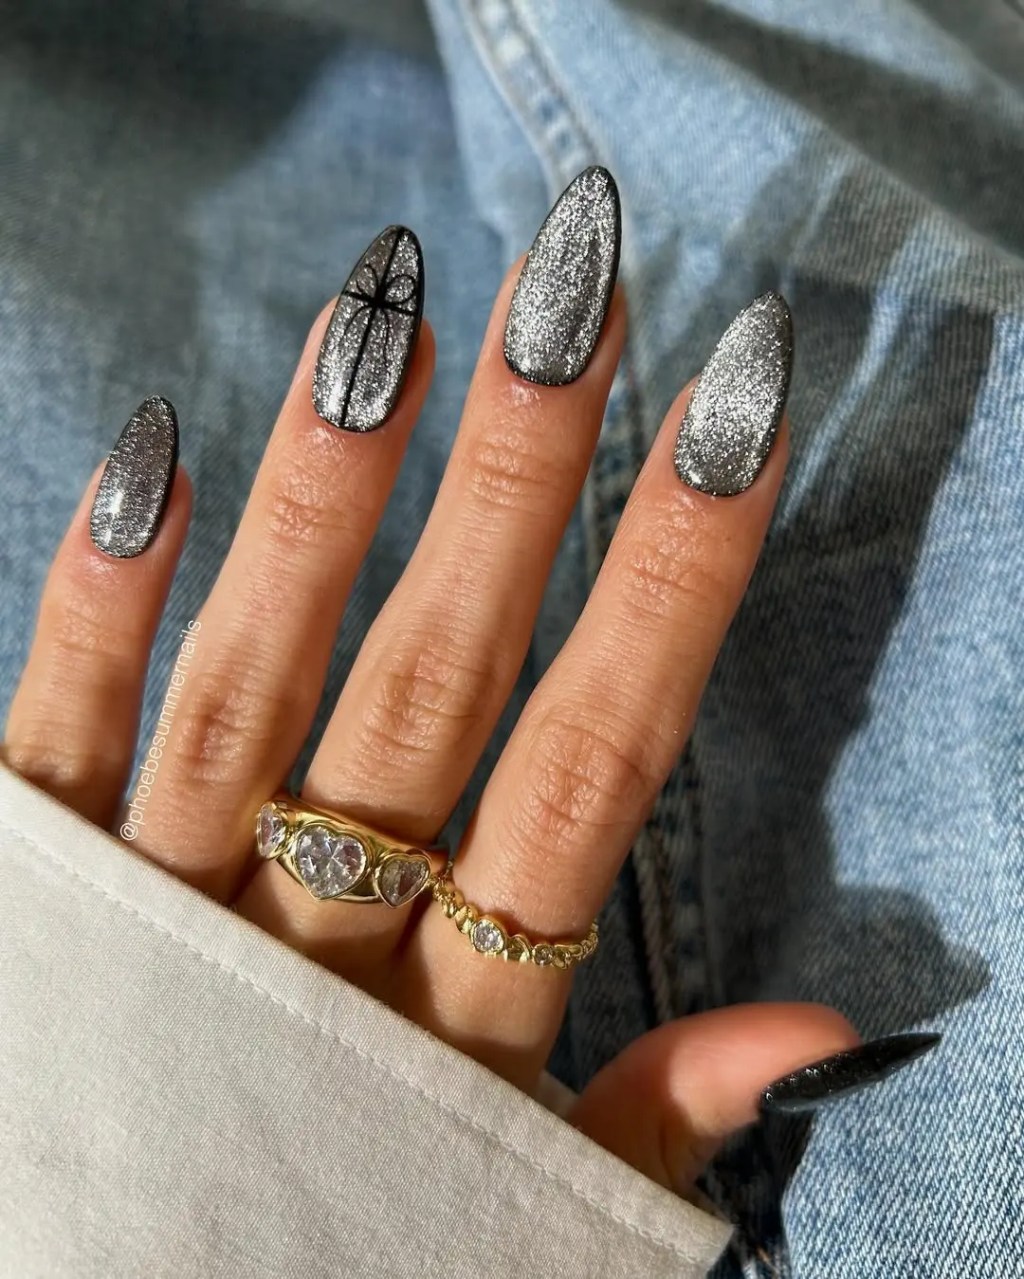
The cat-eye shimmer pulls light like a liquid mercury spill, and then the black cross lines cut straight through it on two accent nails. That contrast is the whole trick: the silver shifts and glows underneath, but the geometry keeps it from reading as too soft or romantic. On the remaining nails, the silver cat-eye alone is enough to catch attention. On medium coffin nails, the elongated shape gives the cross lines room to breathe without crowding the cuticle. This is a winter nail that works for holiday parties or a night out where you want something striking but not literal. No snowflakes, no red, just a metallic pulse with a graphic interruption.
Matte Beige Abstract Line Nails
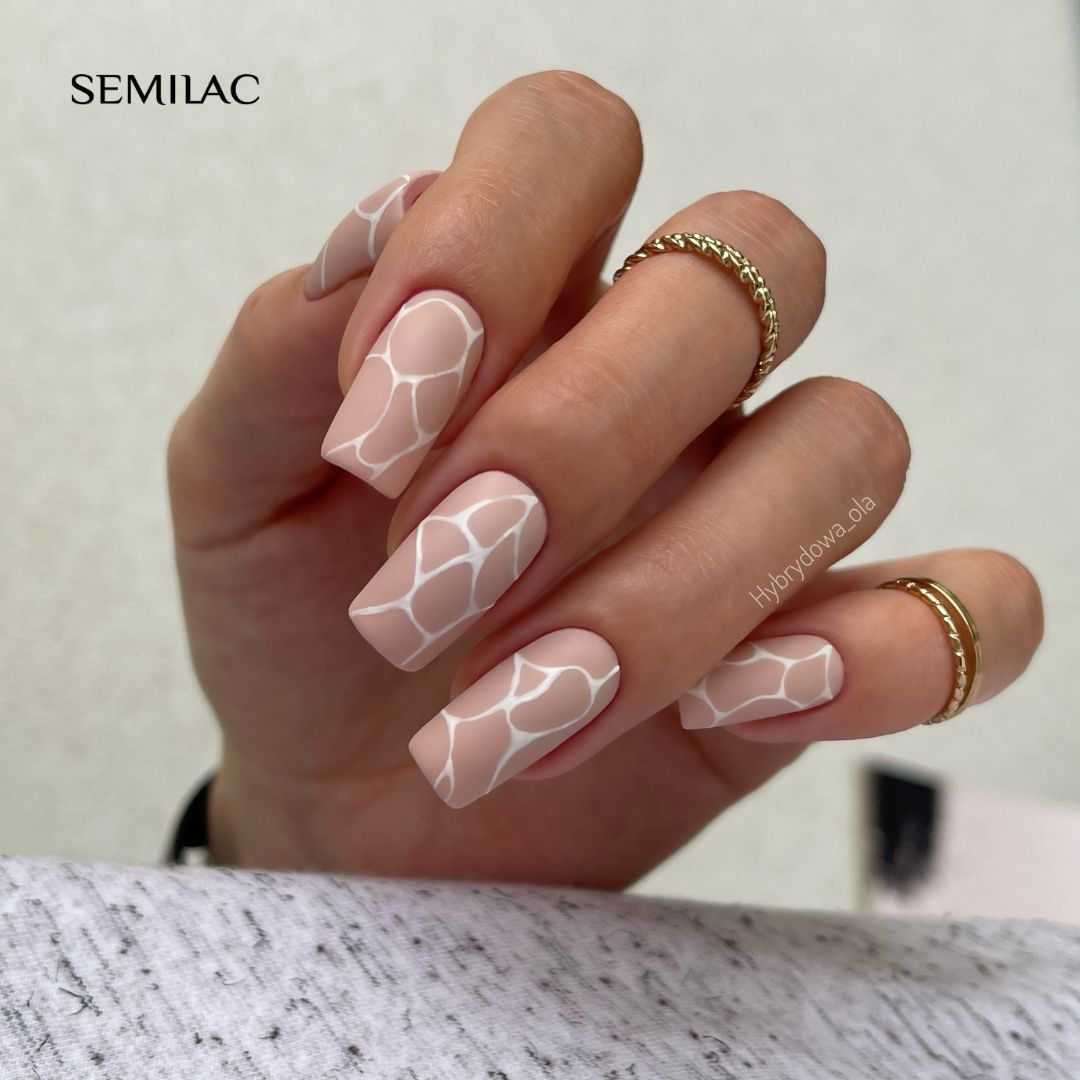
I will admit I was skeptical about matte beige lasting through a work week. The matte finish shows every tiny smudge and oil transfer, and by day three the beige base had picked up a faint yellow from my coffee cup grip. The white abstract lines stayed crisp, though, because they are painted on top of a sealed layer. On medium square nails, the corners started to lose their matte finish first from typing. To keep the look alive, I had to reapply a matte top coat on day four. It is not a set-and-forget design, but the clean lines and soft neutral base make the upkeep worth it if you are willing to touch up.
Bronze Glitter French Almond Nails
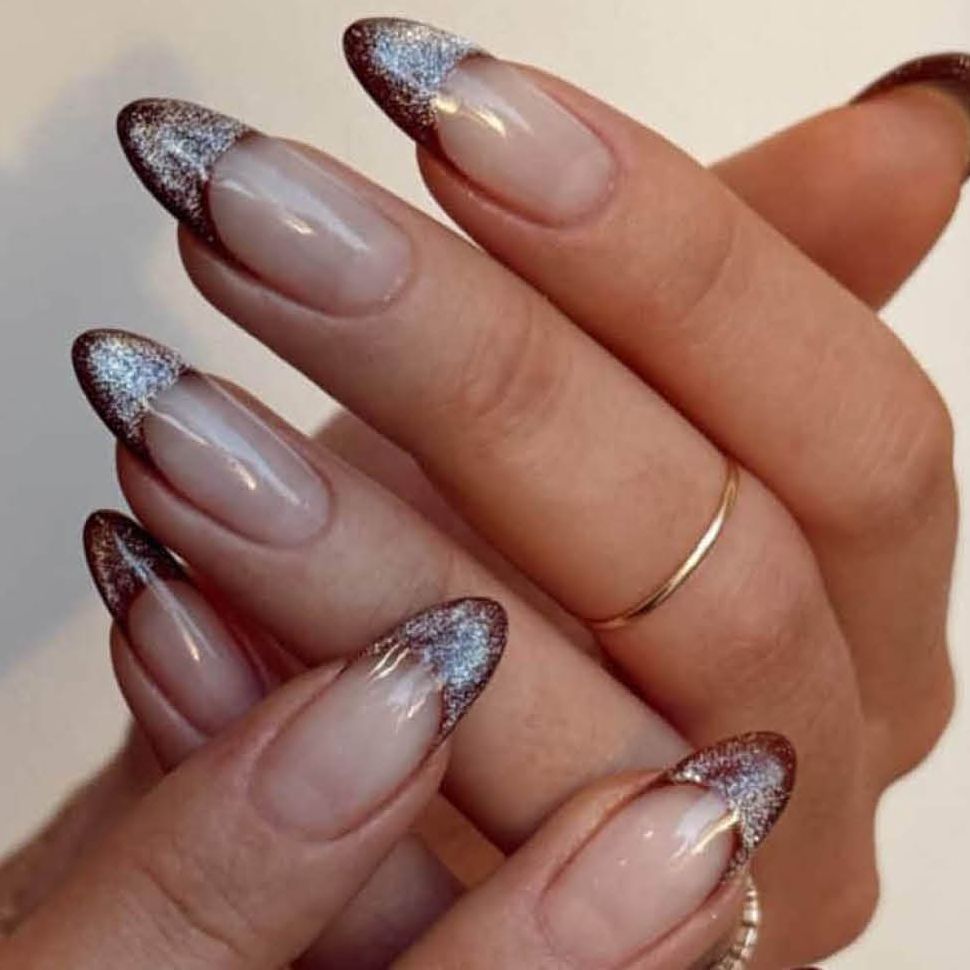
Bronze beats gold and silver for winter nails. Gold reads too gilded, silver too icy, but bronze lands somewhere warm and grounded. On medium almond nails, the metallic bronze glitter tips catch the light without screaming for attention. The sheer pinkish nude base keeps the whole thing from feeling heavy, so the glitter stays festive without crossing into costume territory.
This is the French tip for holiday dinners and New Year’s parties where you want something that photographs well but does not compete with your outfit. The almond shape elongates the fingers and the bronze has a depth that shifts from copper to champagne depending on the light. It is elegant without being precious, and that is a hard balance to strike. Compared to silver, which can read as cool and distant, bronze feels approachable and rich. Compared to gold, it is less expected and more modern. The bronze glitter picks up the warm tones in a burgundy sweater or a camel coat, making it a versatile choice for the season.
Glossy With Glitter Pale Pink Glitter French Almond
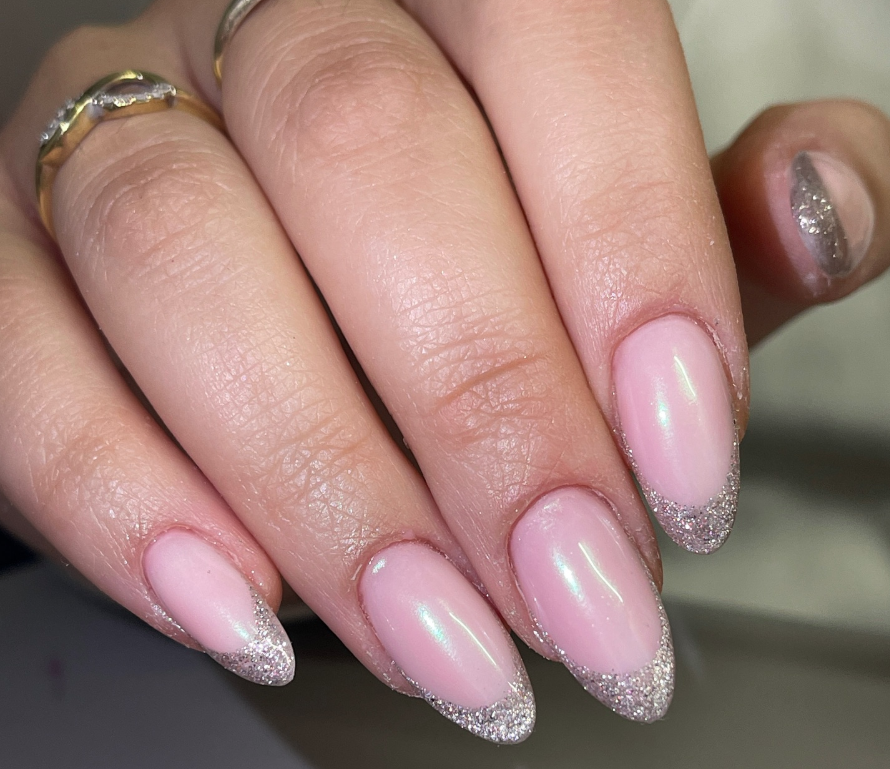
Glitter on every tip instead of just one accent nail changes the whole math. This pale pink glitter french reads like a classic french dipped in confetti, the silver glitter catching light from every angle. The medium almond shape keeps it from tipping into costume territory; it sits right at the line between party and everyday. The catch? That full glitter coverage means removal takes longer, and you will notice a tiny fleck of glitter on your desk three days after you take them off. Still, for the two weeks they last, they earn every compliment.
Nude Glitter Scatter Oval Nails
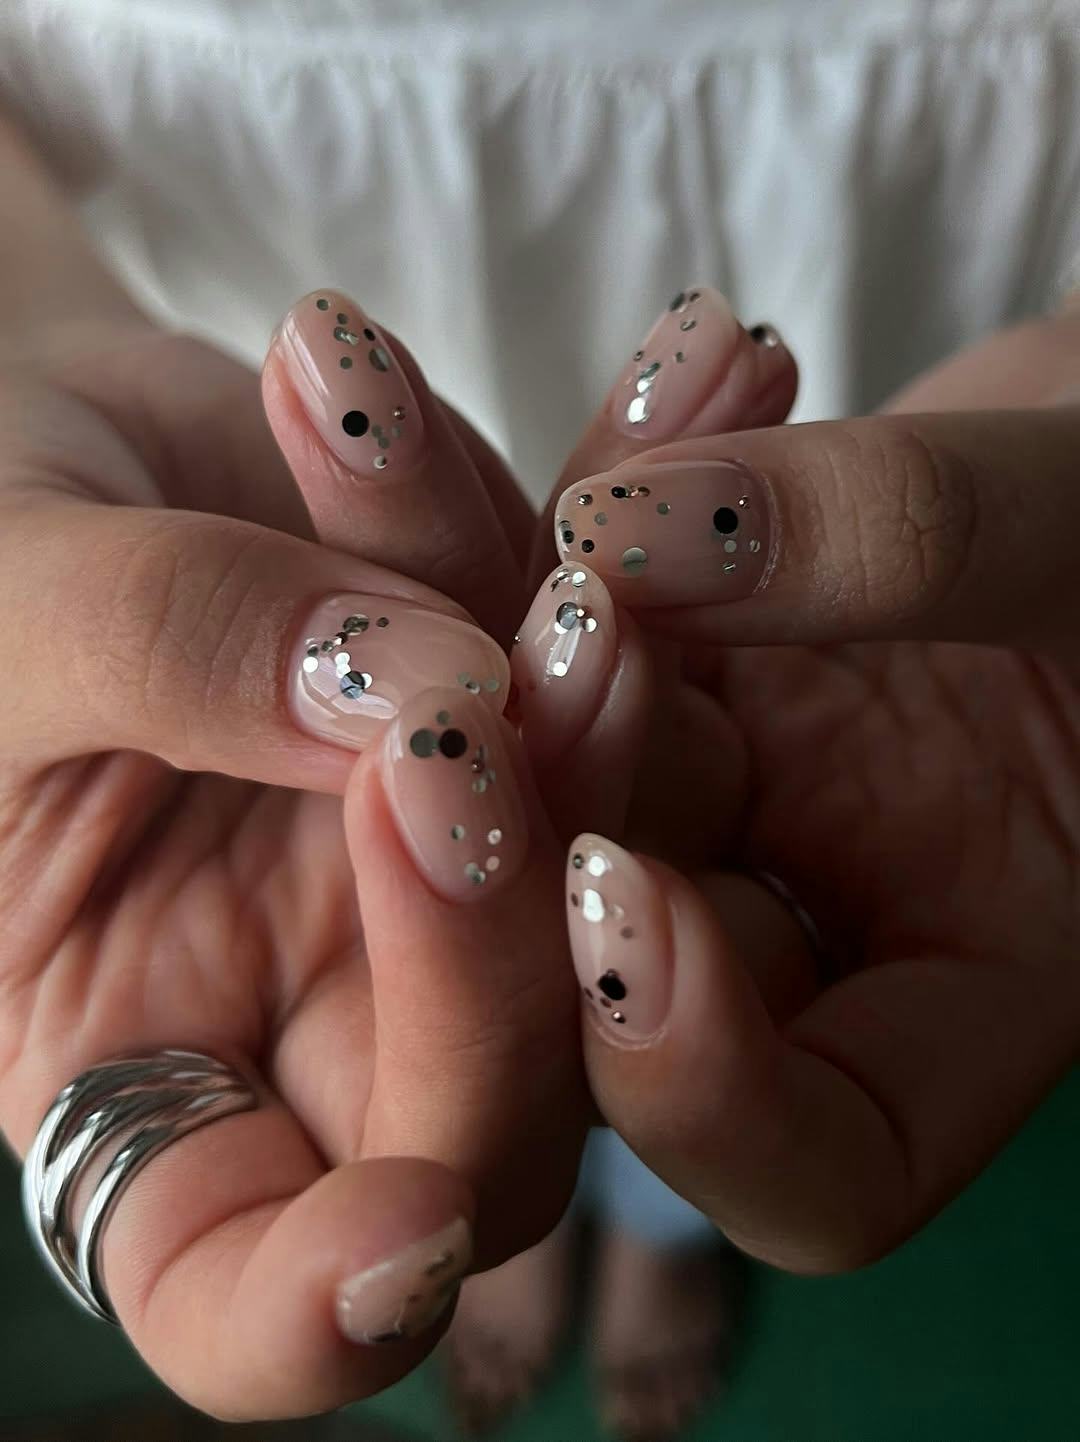
Who actually pulls off scattered glitter without it looking like a craft project? The answer is the person who wants a nod to winter sparkle without the full-on blizzard. Sheer nude base, a few silver and black glitter flecks, one tiny silver circle per nail — that’s it. This nude glitter nails design works for anyone who has to type all day, attend casual holiday gatherings, or simply prefers her nails to say something quiet. The medium oval shape keeps the scatter grounded, not random. It is the winter nail for the minimalist who does not do Christmas sweaters.
Pink Glitter Gradient Round Nails
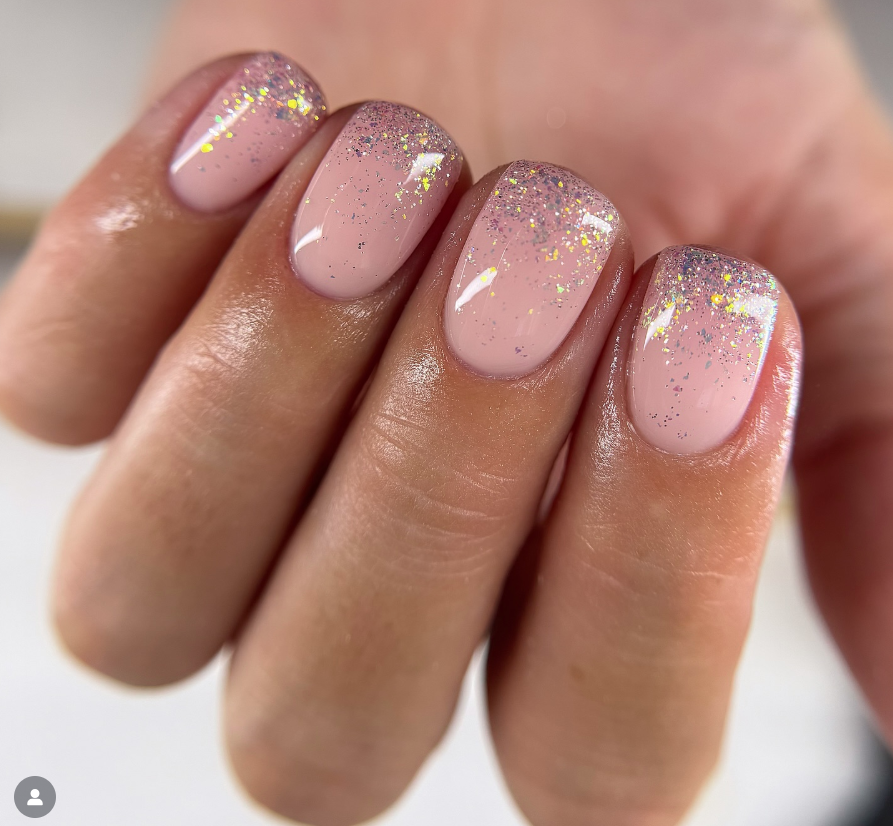
The trick to a smooth pink glitter gradient nails finish is building the density in layers, not one heavy coat. Start with a sheer pink base, then apply a fine mix of silver and iridescent glitter at the tip, fading it down with a dry brush before curing. The density shift is the hardest part: one coat too many and it is a solid block, one too few and it looks patchy. The payoff is a diffused, glowing tip. The downside is the precision it demands. This is not a quick design.
Deep Red Glossy Coffin Nails
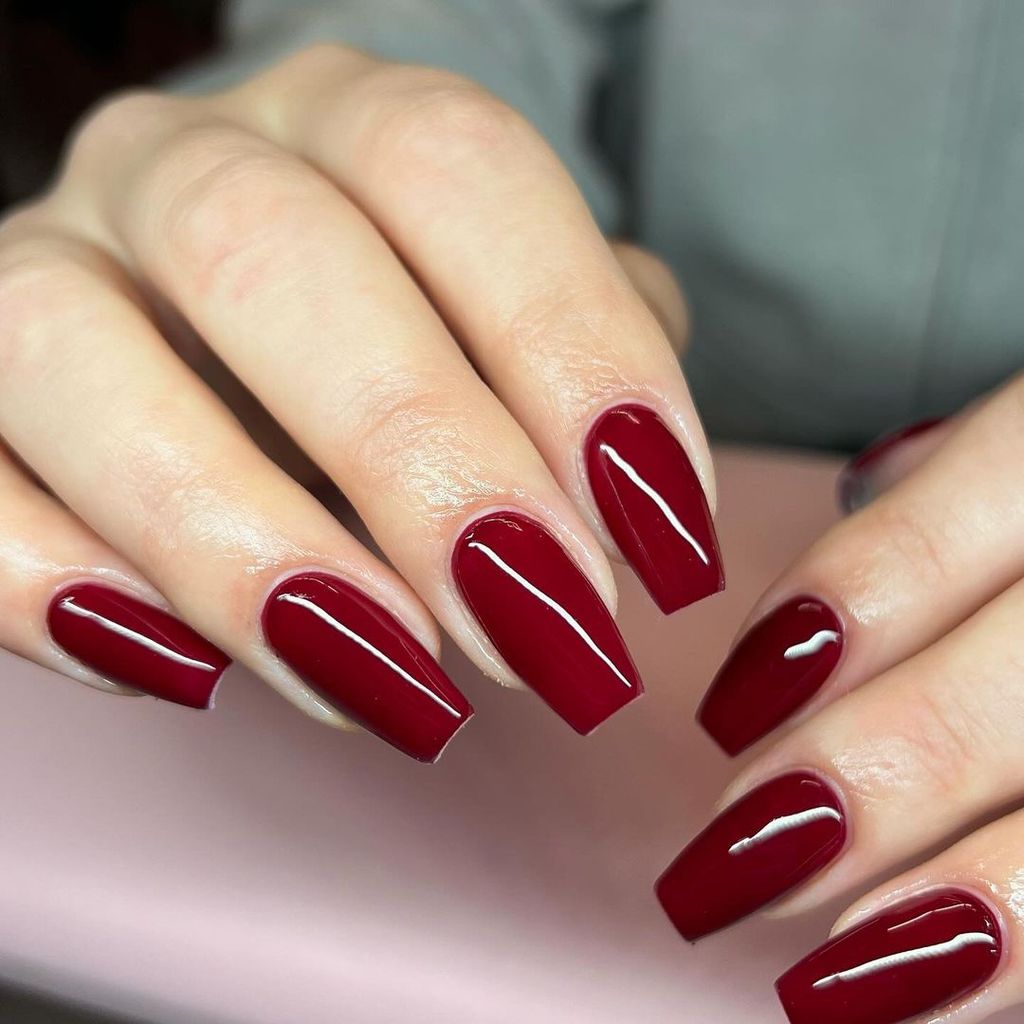
I was ready to write off deep red coffin nails as the default winter choice. Then I saw this gloss. The rich color is one thing, but the high-shine finish on a medium coffin shape gives it a precision that a matte or creme finish just does not. This glossy red works for winter occasions because it reads as intentional without needing any art. It is the set that looks good in candlelight and office fluorescents equally.
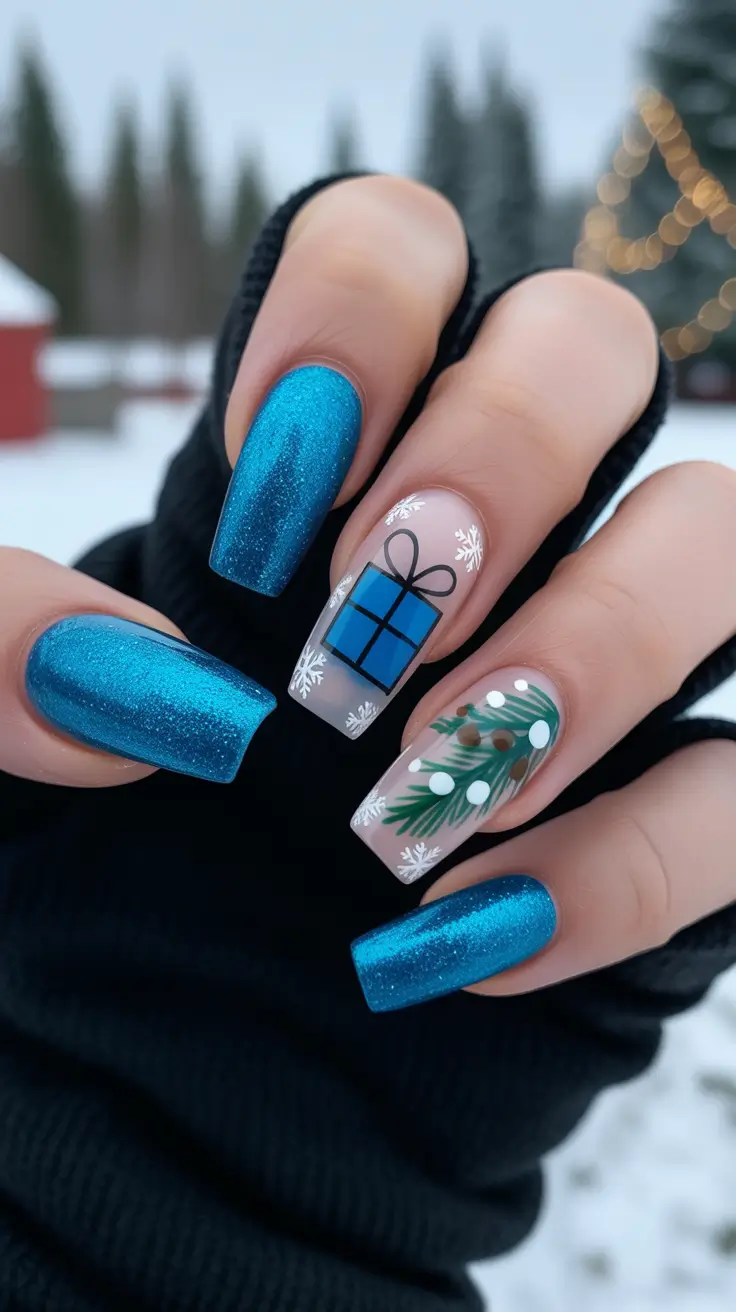
Shimmery Blue Snowflake Nails
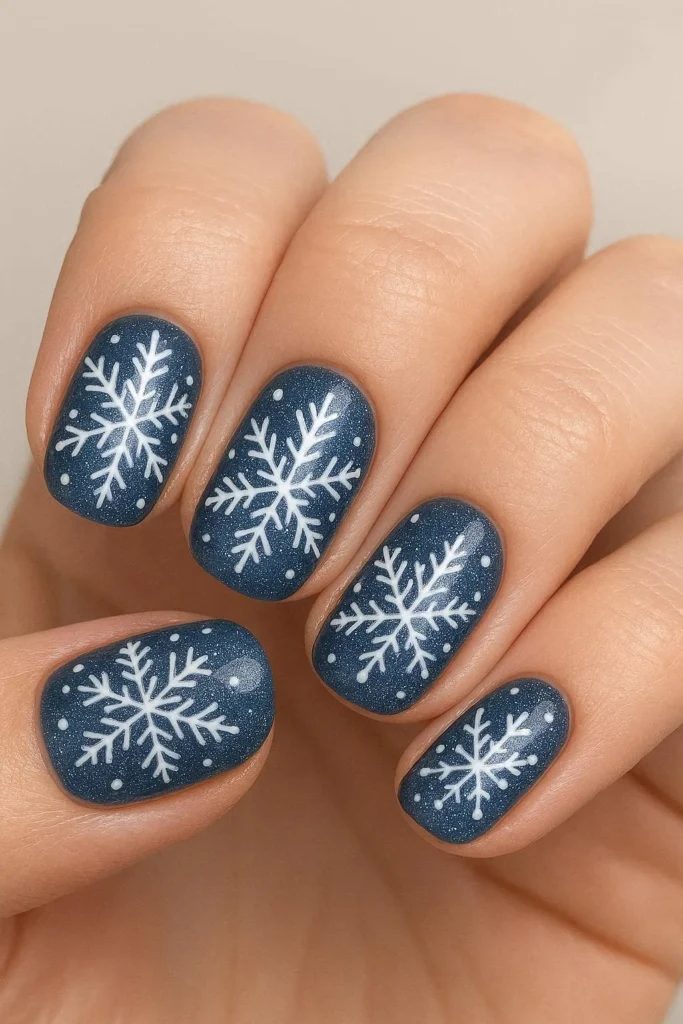
My first reaction to blue snowflake nails was that the art would overwhelm the short oval shape. It does not. The deep blue shimmer base provides a dark, moody backdrop that makes the white snowflake design pop without looking busy. Each snowflake is fine-lined, not chunky, which keeps the festive feel without tipping into craft territory. The charm is the restraint: one or two snowflakes per nail, placed off-center, leaving the shimmer base to do the rest of the work.
Nude Lace Rhinestone Almonds
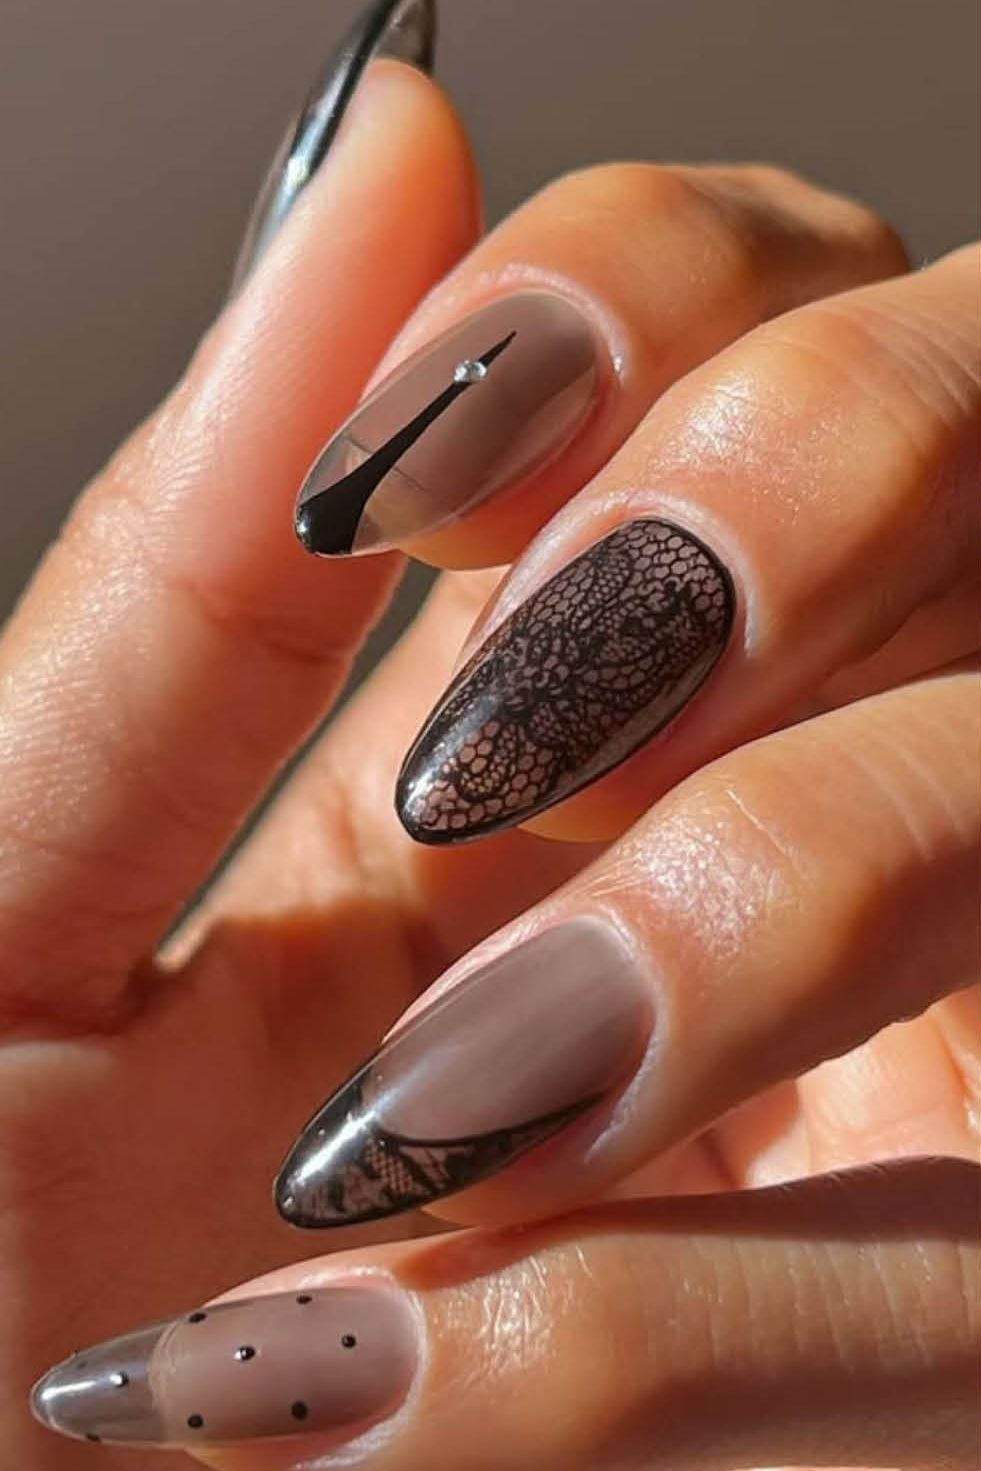
You sit down with a sheer nude base, a pot of black gel, and a dream. The black lace designs look intricate because they are. For the accent nails, a stamping plate with a fine lace pattern is your best friend. Freehanding lace at home is a recipe for frustration. For the thin black lines and single rhinestone on the other nails, a dotting tool and a steady hand are non-negotiable.
This is a salon-leaning design. Nude lace nails require a clean, streak-free nude base. The rhinestone needs to be fully encased in top coat to prevent snagging on sweater knits. If you have the patience for stamping and the time for careful cleanup, it is achievable at home. If you want it perfect in under two hours, book the appointment.
Silver Glitter Pink Snowflake Nails
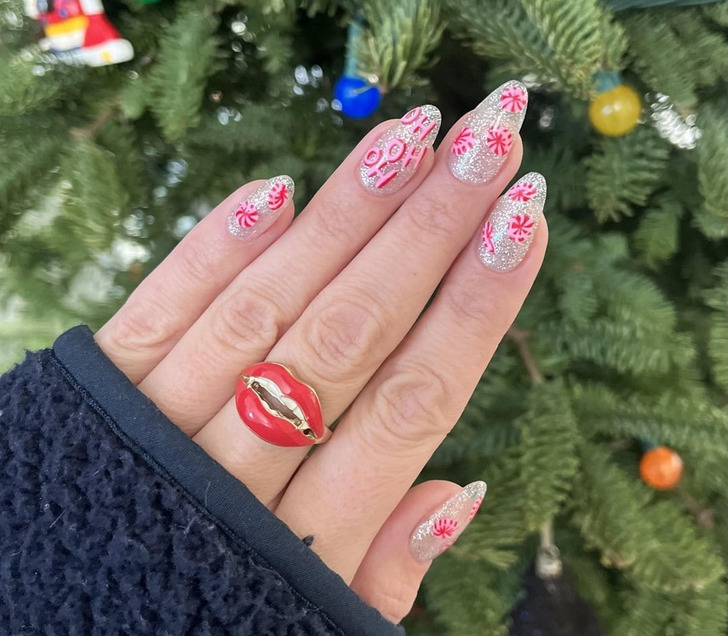
If the deep blue snowflakes are a winter night, the silver glitter snowflake nails are a winter morning. The silver glitter base catches every bit of light, making the pink snowflake motifs read as soft and whimsical rather than sweet. The honest downside is the removal: glitter and soak-off are not friends, expect extra time in foil wraps. For holiday parties, this is the set that gets noticed. It reads festive without needing a single red accent.
Mosaic Chrome Glitter Square Nails
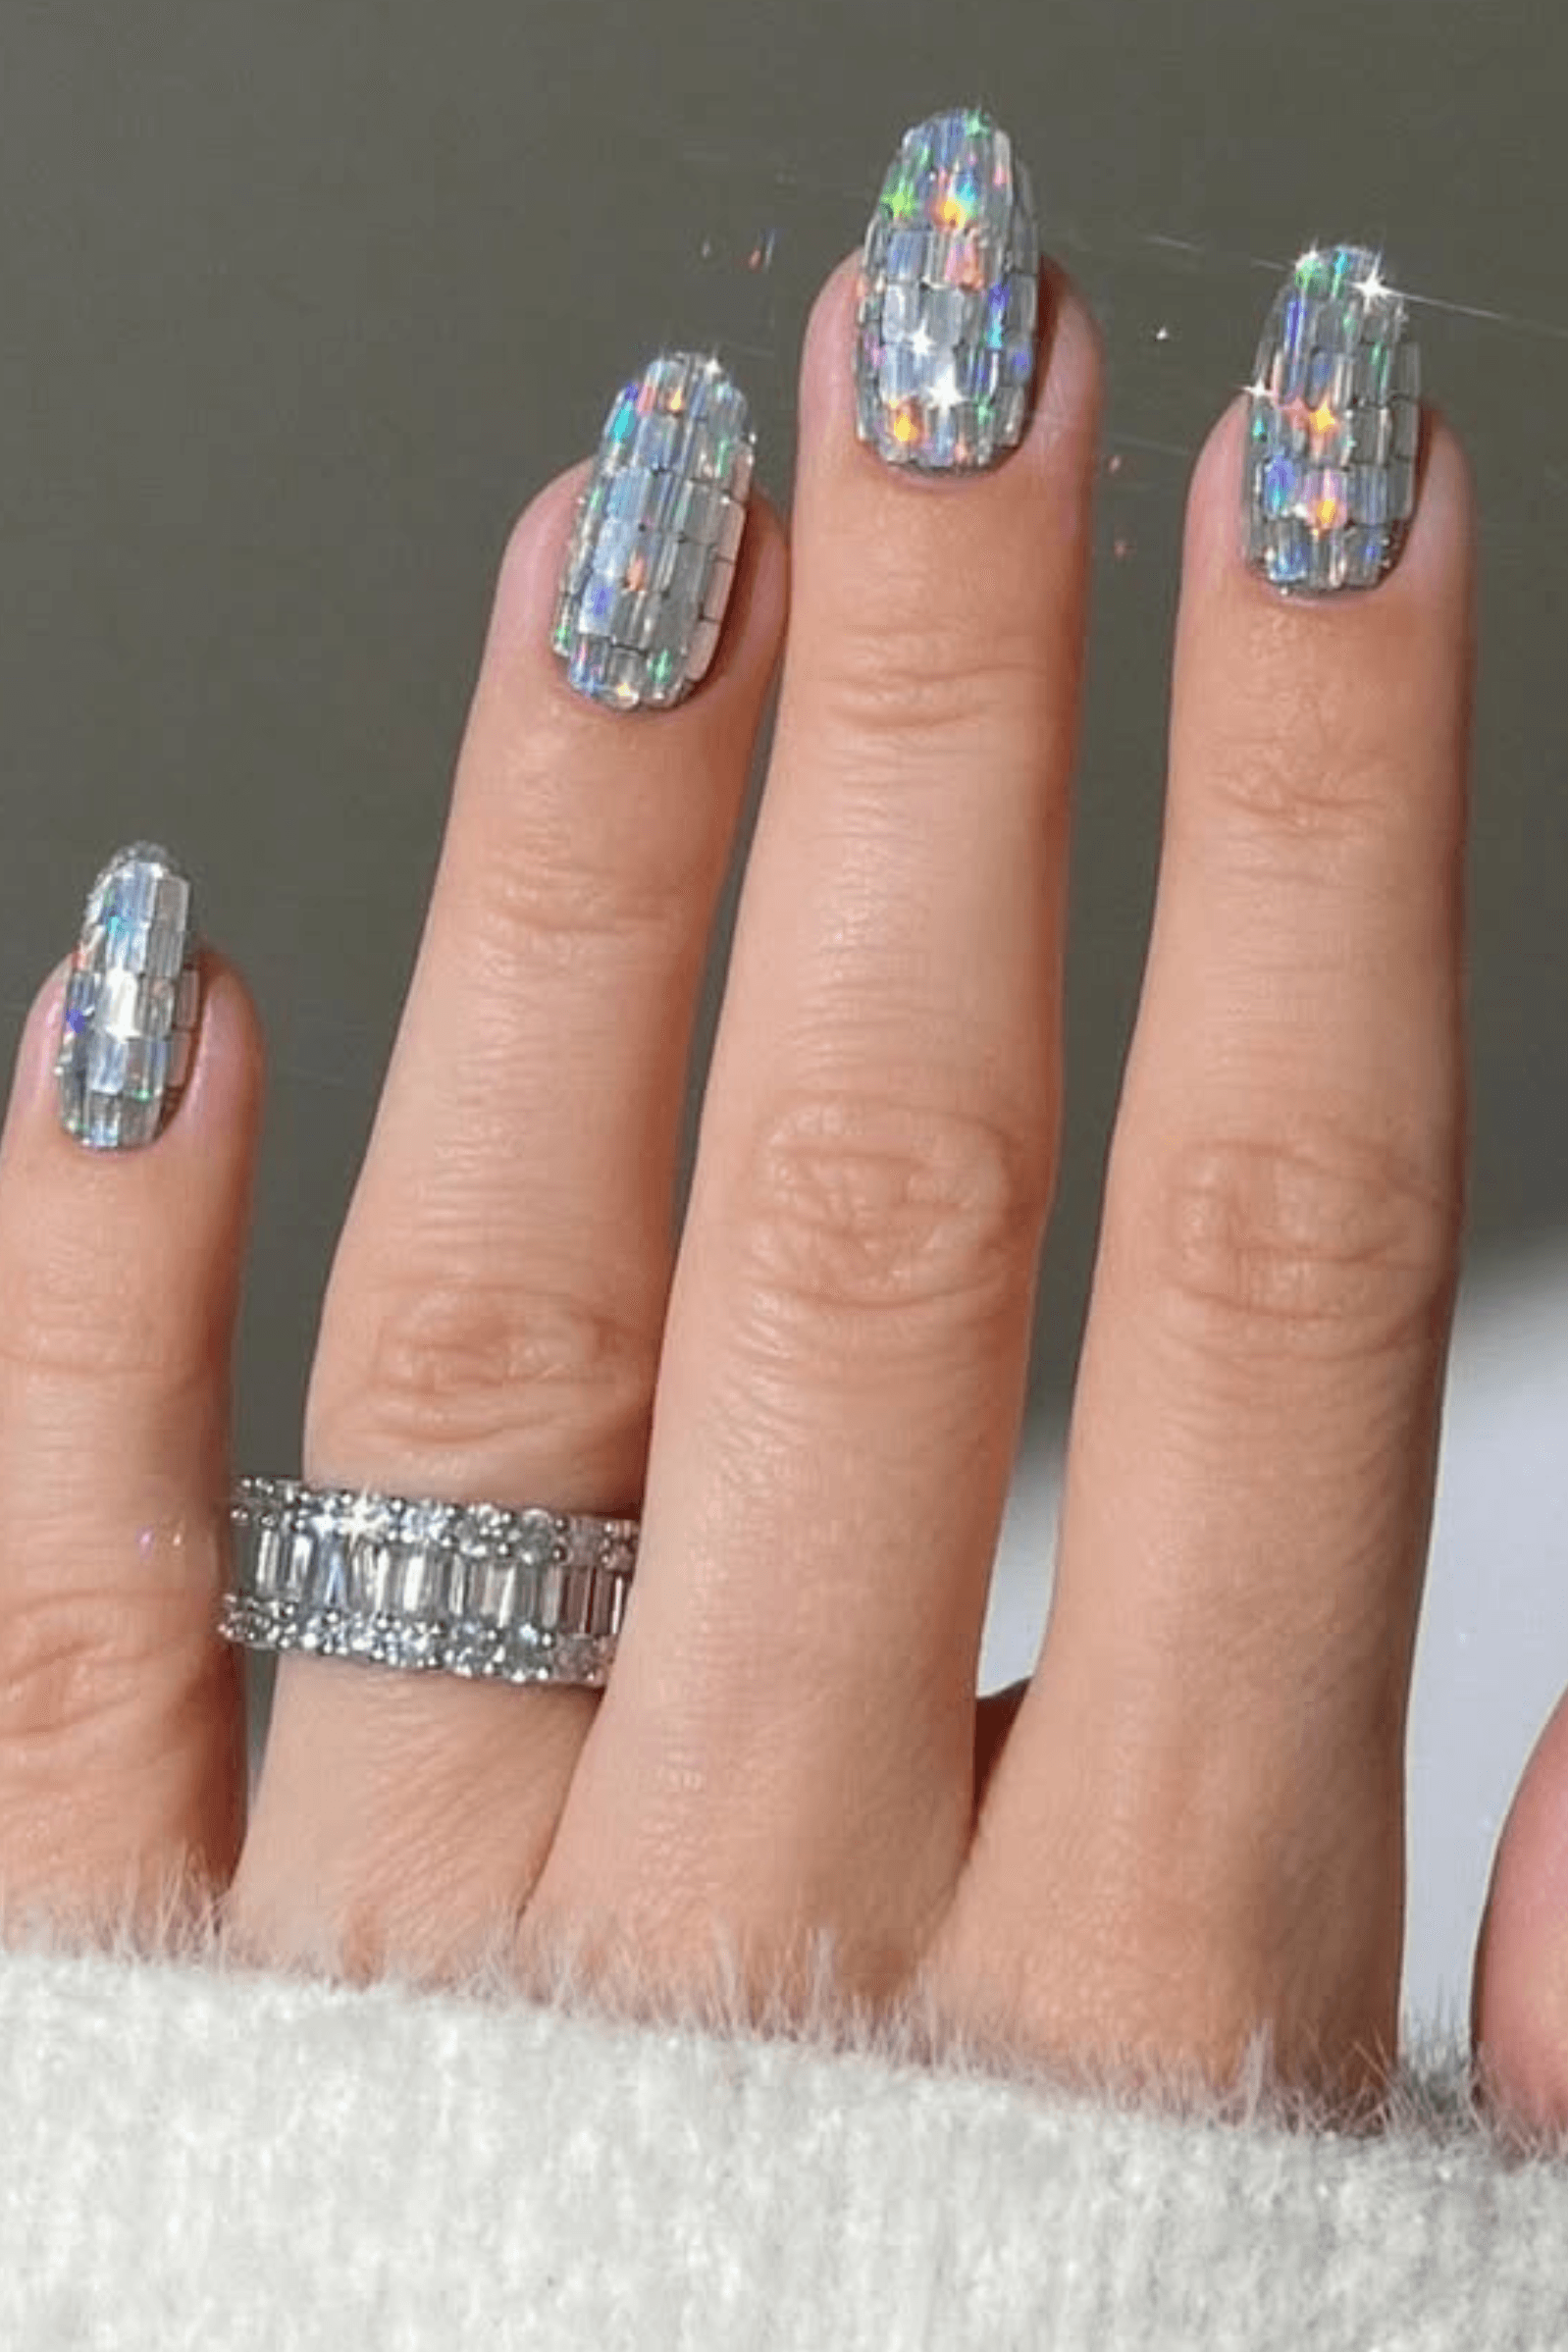
The mosaic chrome nails use a reflective pattern that shifts from silver to holographic in different light. It’s a disco-ball effect every time I move my hand. But that textured surface means every sweater cuff is a test of patience. I get a solid two weeks before the edges start catching, and removal is standard with foil wraps. Not a set for daily typing, but for holiday parties it earns its keep.
Light Blue Ombre Snowflake Nails
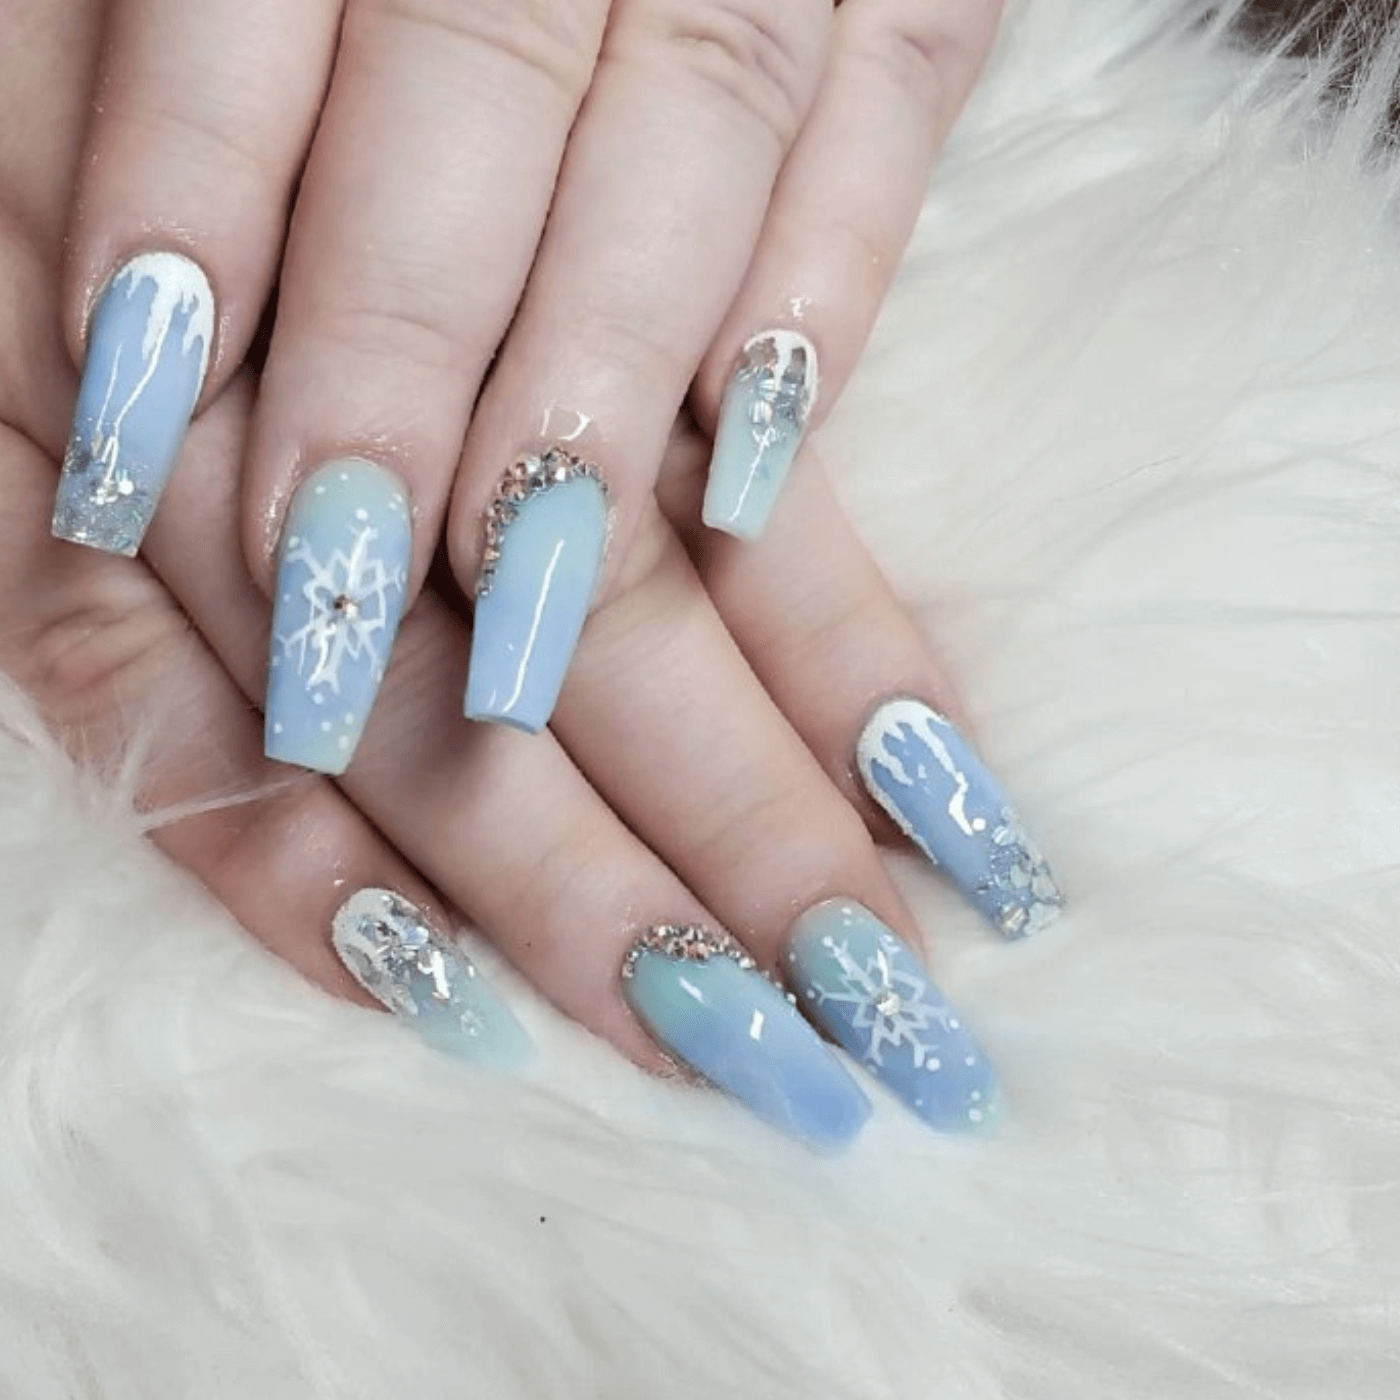
I’m not usually one for rhinestones, but these light blue ombre nails changed my mind. The gradient fades from a pale sky at the cuticle to a deeper blue at the tip, and the snowflake designs on the accent nails are crisp, not clumsy. Tiny rhinestones catch the light without overwhelming the delicate art. The medium coffin shape keeps it elegant, and the glossy finish makes the whole thing look like frozen glass. It’s the kind of set that looks festive without screaming “holiday party.” For winter weddings or New Year’s Eve, this is the one.
Festive Christmas Character Square Nails
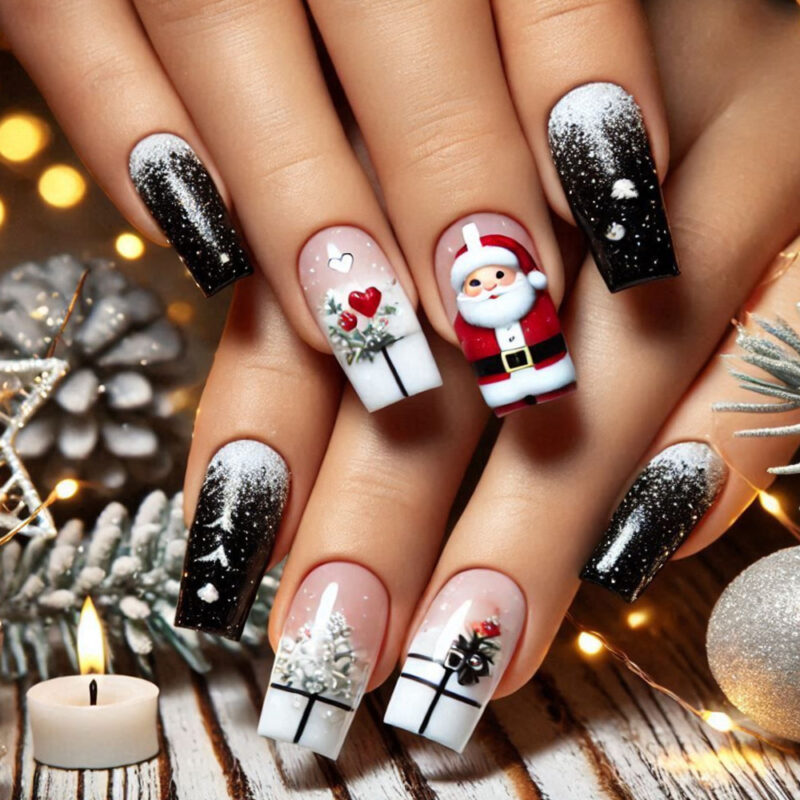
The precision required for these christmas character nails is not something you attempt at home. Each square nail carries a different motif: Santa Claus with a detailed beard, a Christmas tree with ornaments, a heart wrapped in ribbon, and a snow-dusted French tip. The lines are clean, the colors opaque, and the snow effect on the tips looks airbrushed rather than painted. The square shape gives enough canvas for the details without overcrowding.
This is the kind of set that takes a steady hand and a lot of patience. The artist likely used thin brushes and multiple layers to get that depth. The snow effect is achieved by dabbing white polish with a sponge, then sealing with a glossy topcoat. Each character requires a base color, then the details, then highlights. It’s a salon-only design, and it shows. If you want festive nails that are a conversation starter, this is it.
Light Blue Gradient Snowflake Text Nails
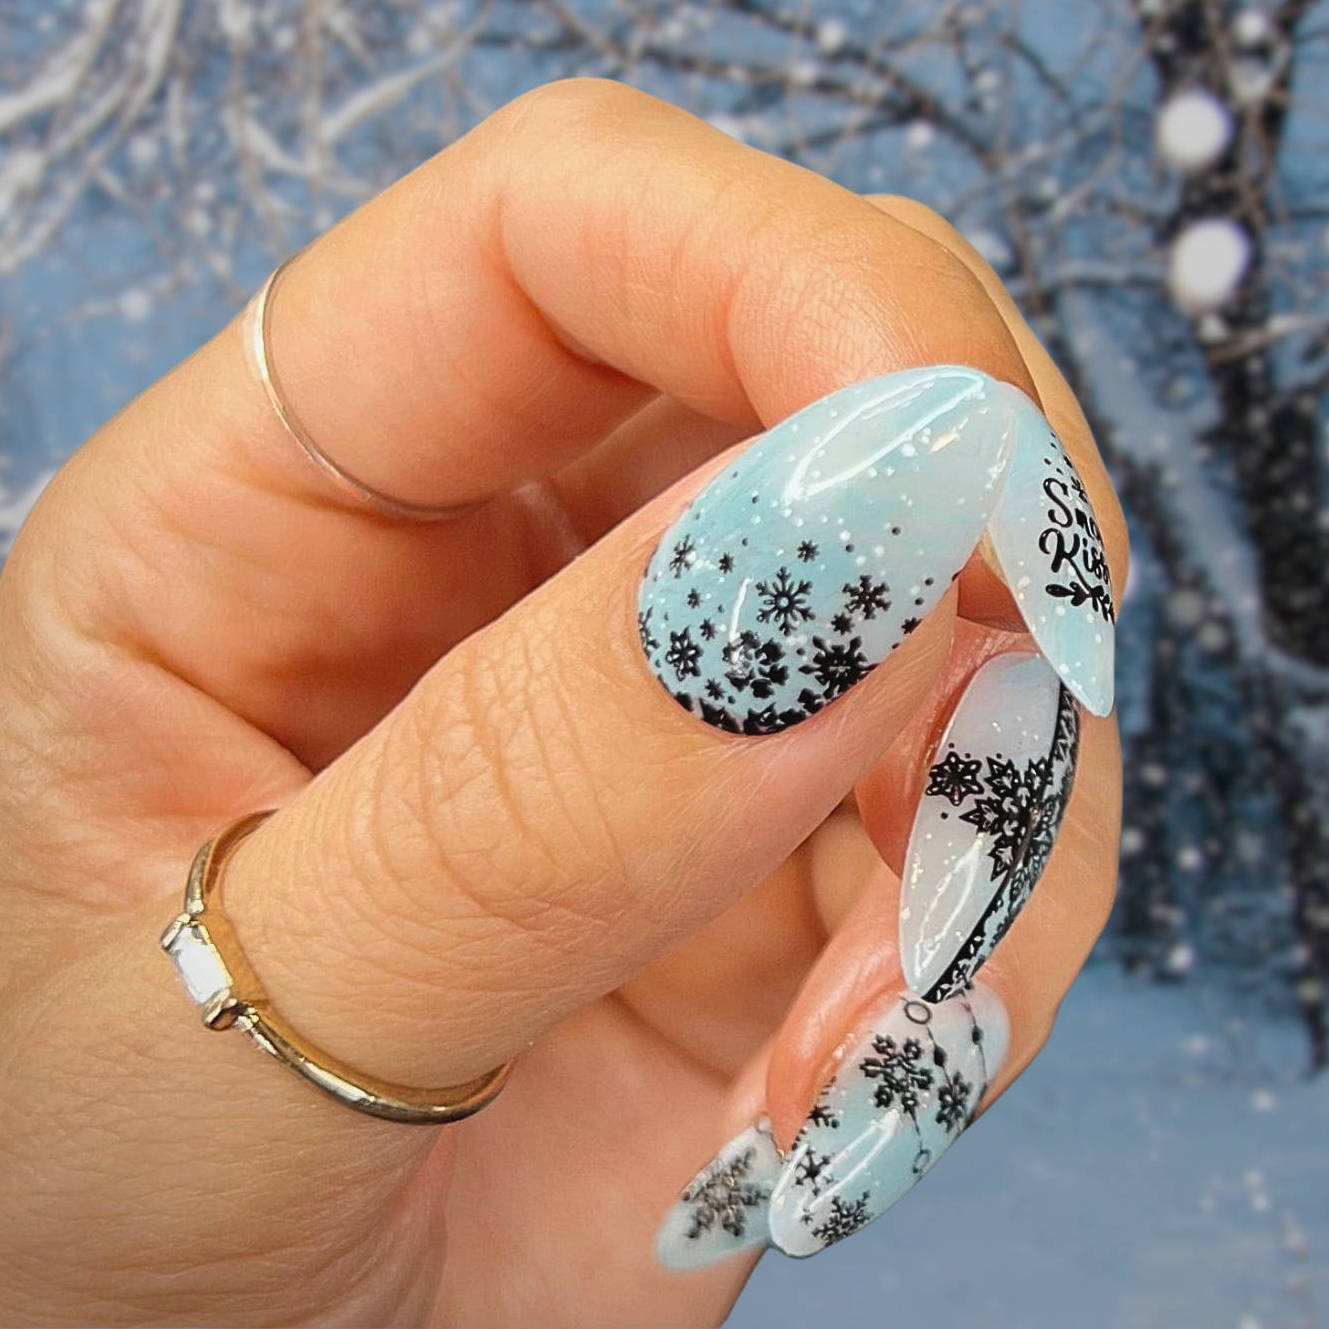
Is text on nails ever a good idea? These light blue gradient nails make a case for it, but I’m not fully convinced. The gradient from light blue to clear is lovely, and the black snowflake decals are crisp. But the “Snow Kiss” text on the accent nail feels a bit much. The letters are small, and on a medium almond shape, they crowd the nail. The stamping is well-executed, but the high contrast means any imperfection shows. It’s a winter look that works for a themed party, but for everyday wear, the text might feel dated by week two.
Nude Deep Red Pearl Cuticle Nails
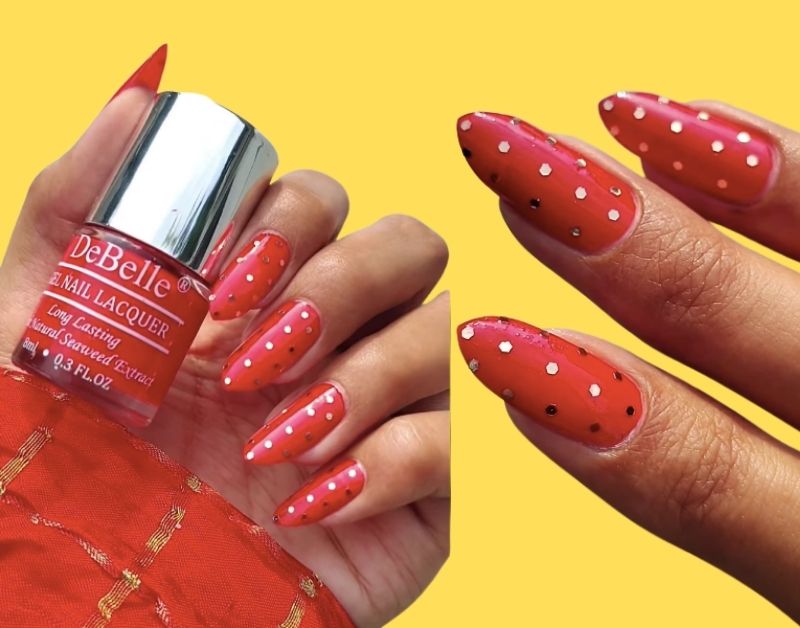
The pearl cuticle nails use iridescent pearls placed right at the cuticle line, a detail that looks elegant but requires a steady hand. This set suits someone who appreciates subtle luxury and doesn’t mind a bit of extra care. It flatters short nail beds by drawing the eye upward, and the deep red French tip adds warmth. Skip if you’re rough on your nails or prefer low-maintenance.
Matte Red Plaid Snowflake Nails
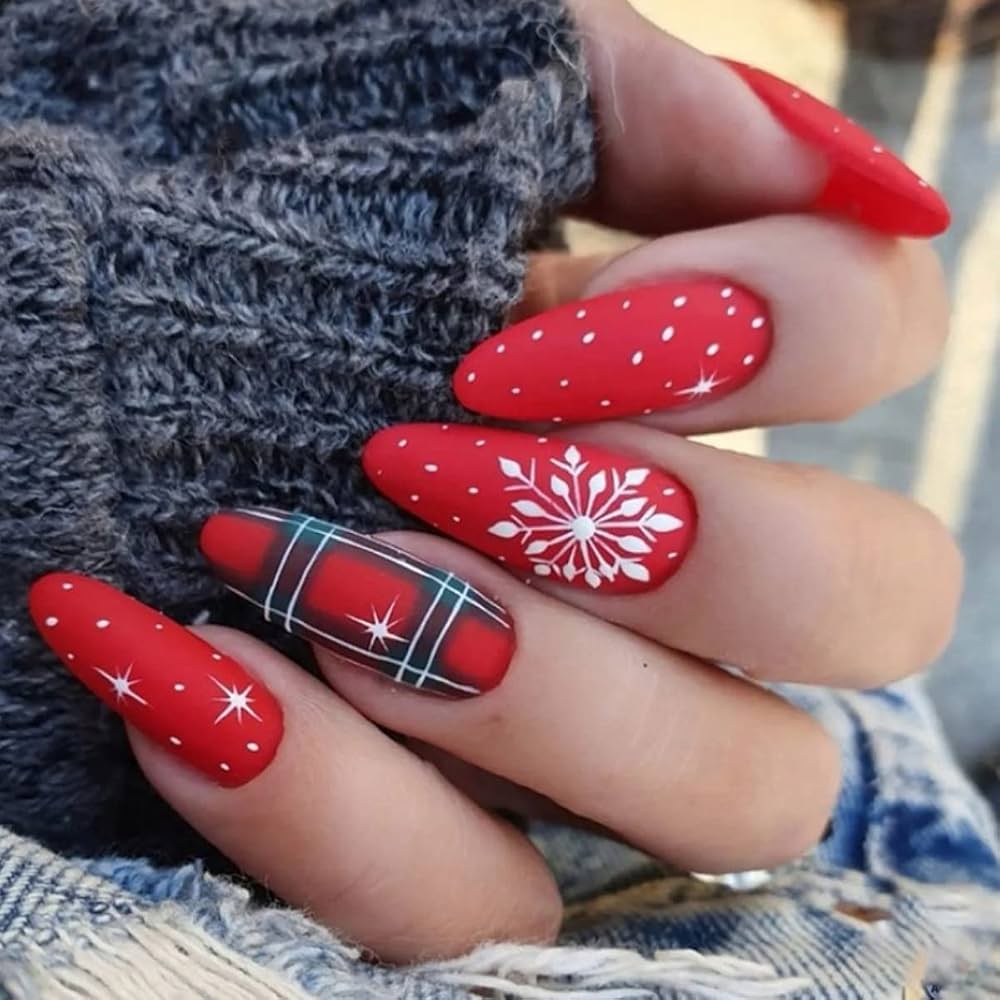
There’s something about a matte red plaid nail that just feels like winter. The matte finish softens the red, and the green and white plaid accent nail brings in the holiday spirit without screaming Christmas. Snowflake details on the other nails tie it together. This is the kind of design that works for a cozy gathering or a festive night out. It’s not trying to be trendy, it’s just comfortable. The almond shape keeps it elegant, and the matte texture makes you want to reach for a warm drink. Simple, yes. Boring, absolutely not.
Pink Glitter Stripe Oval Nails
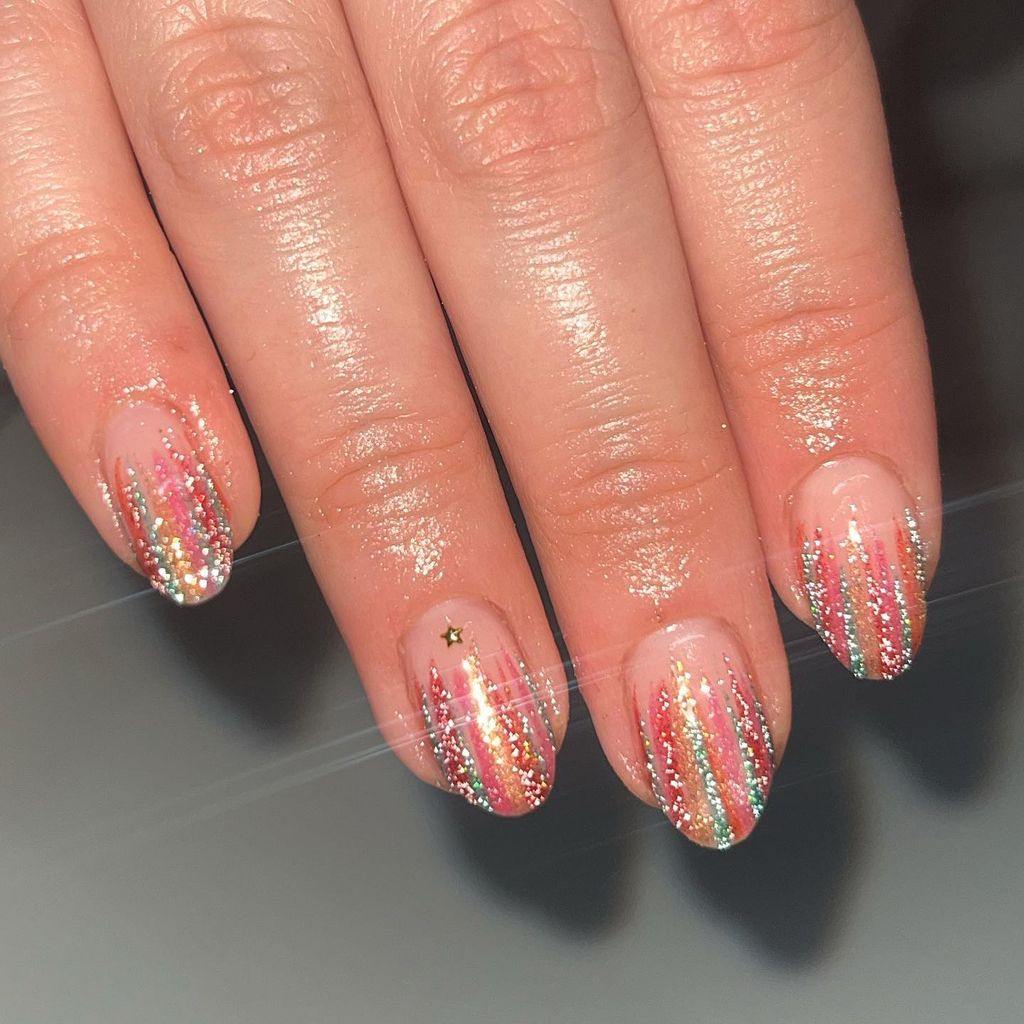
I’ll admit I was skeptical about glitter stripes lasting a full week. But the vertical stripes on a sheer pink base hold up surprisingly well. The multi-colored glitter catches the light, and the small gold star on the ring finger adds a playful touch. Removal is the real challenge, soak-off is a must. The glitter doesn’t budge during daily wear, but it will test your patience at the end. If you want sparkle without constant touch-ups, this is a solid choice. Just plan for a longer removal session.
Sheer Pink Rhinestone Charm Oval Nails
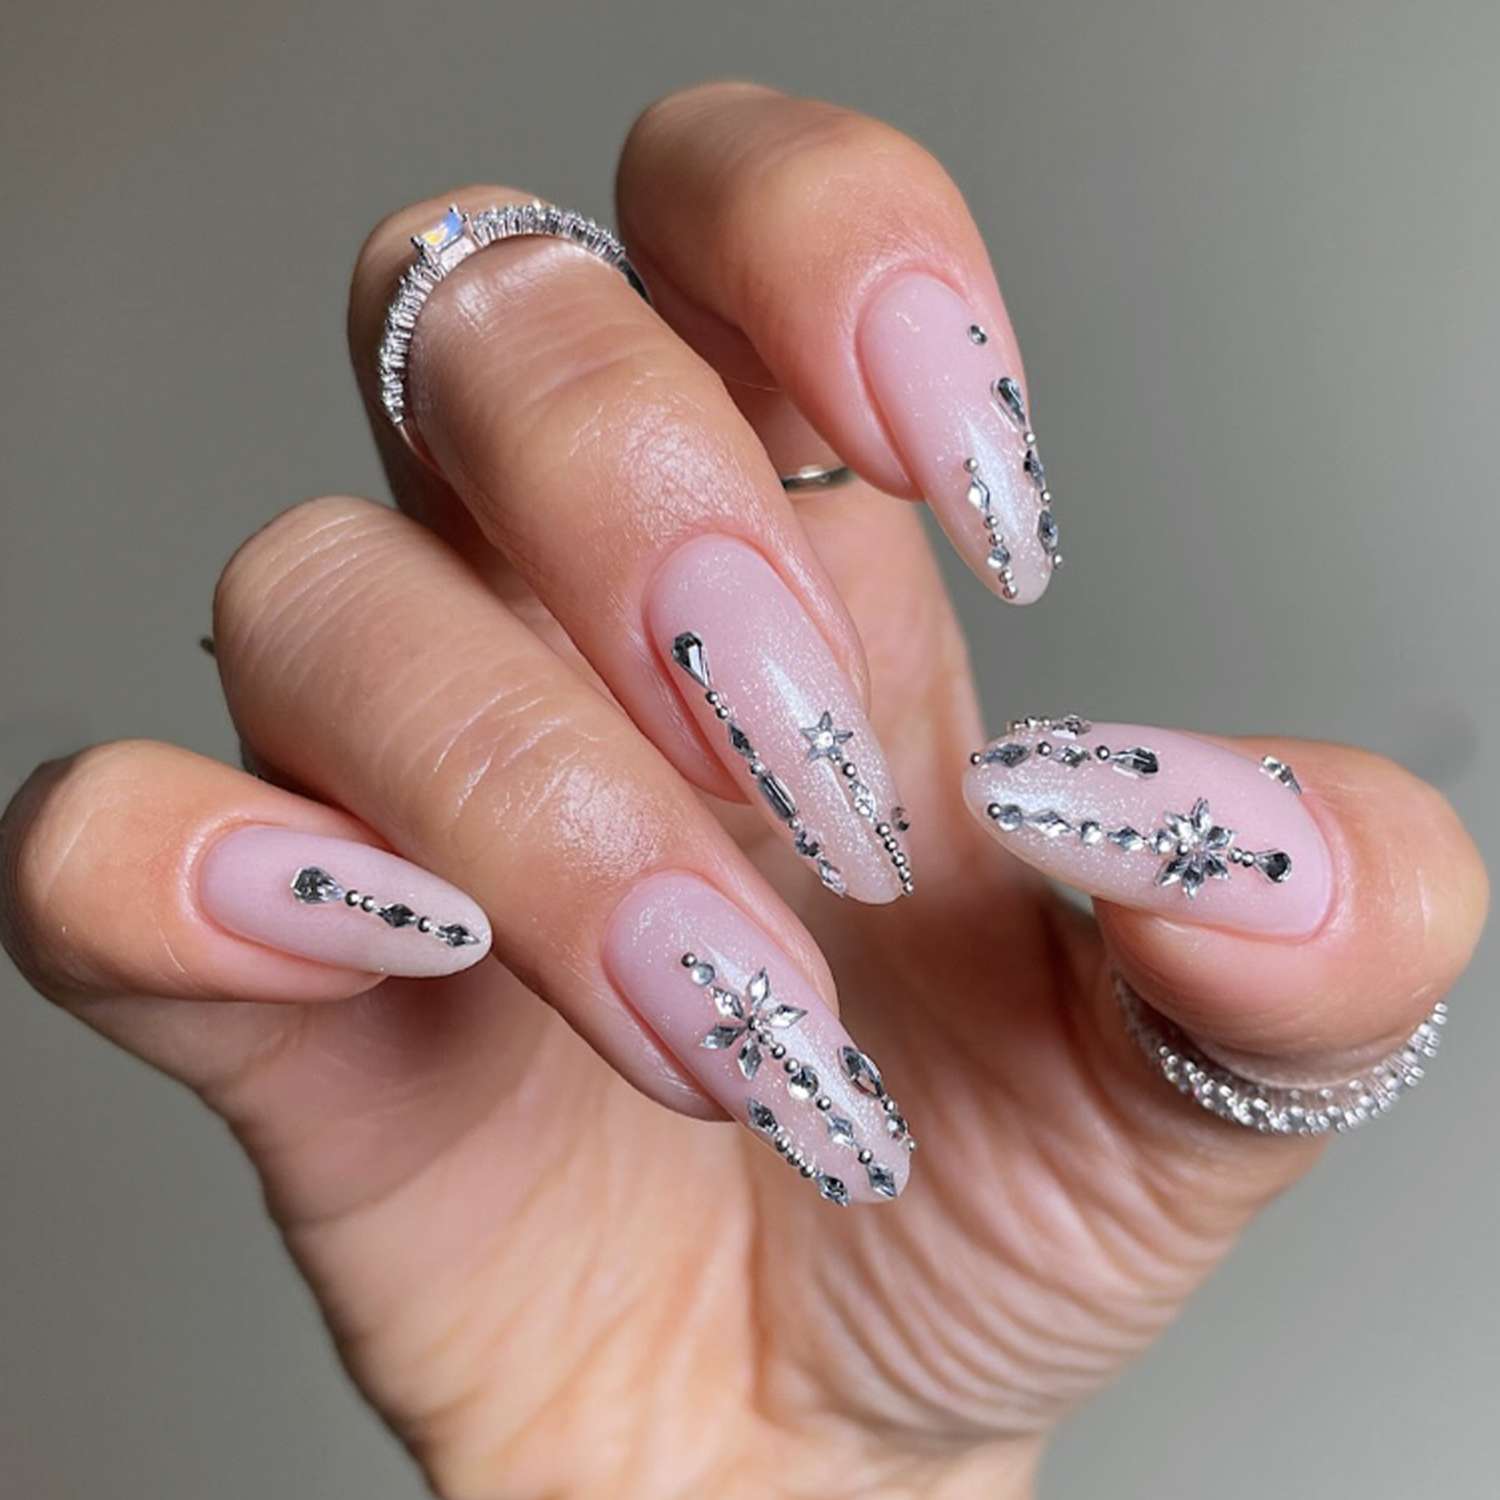
The placement of each rhinestone and charm is deliberate, not random. This design demands precision, every silver rhinestone and tiny charm sits exactly where it should. The sheer pink base lets the details shine without competing.
- Medium oval shape, filed smooth
- Sheer pink base with pearlescent shimmer
- Silver rhinestones clustered at the cuticle
- Small charm accents on the ring finger
- Glossy top coat to secure everything
This is not a quick DIY, it requires a steady hand and patience. The result is a statement that lasts through the season if you treat it gently.
Milky Opalescent White Oval Nails
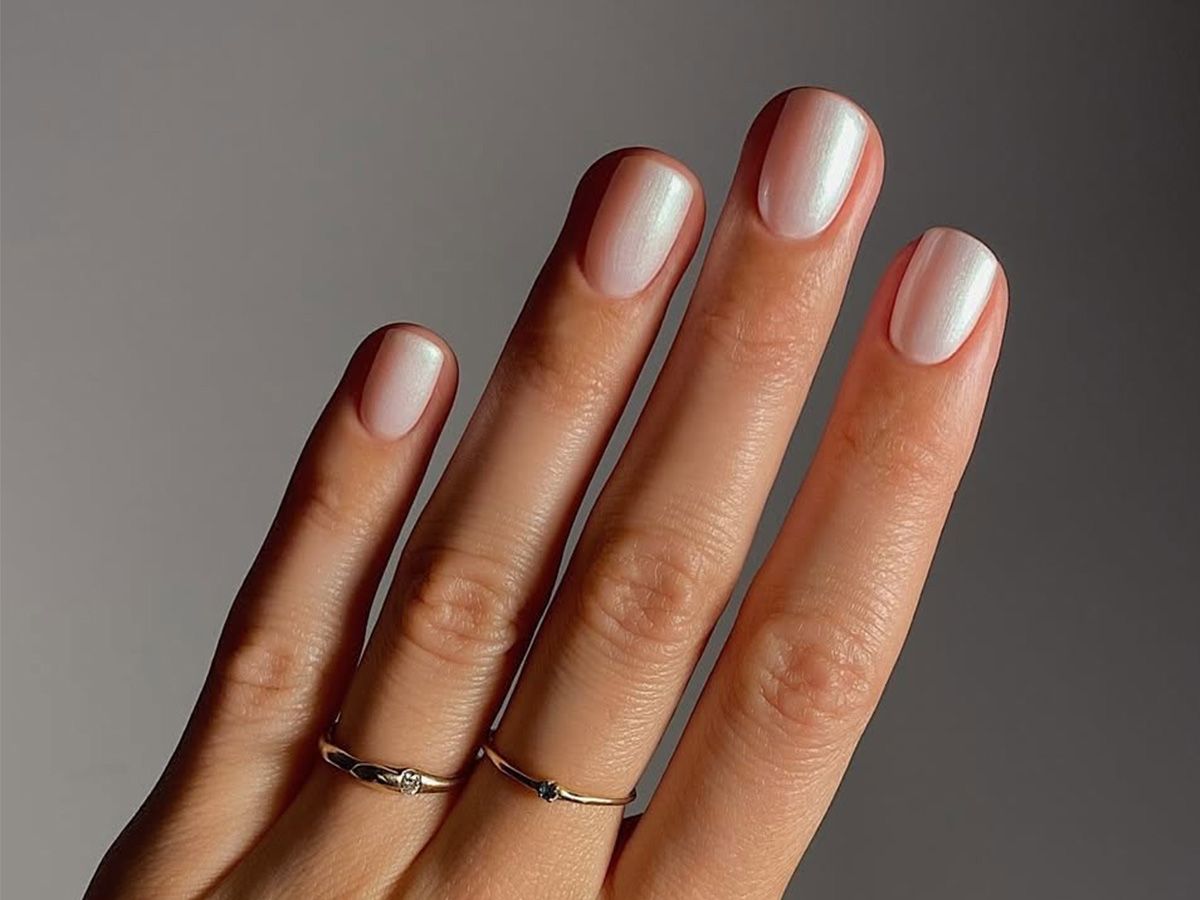
Is a milky finish too subtle for winter? It depends on what you want. The opalescent white with pink undertones looks ethereal in certain light, but it shows every imperfection. Staining is a real risk, especially if you cook with tomatoes or drink coffee. The short oval shape keeps it practical, but the finish itself is fragile. One chip and the whole effect is ruined. Beautiful, but high maintenance for something so quiet.
Deep Burgundy Glossy Short Nails
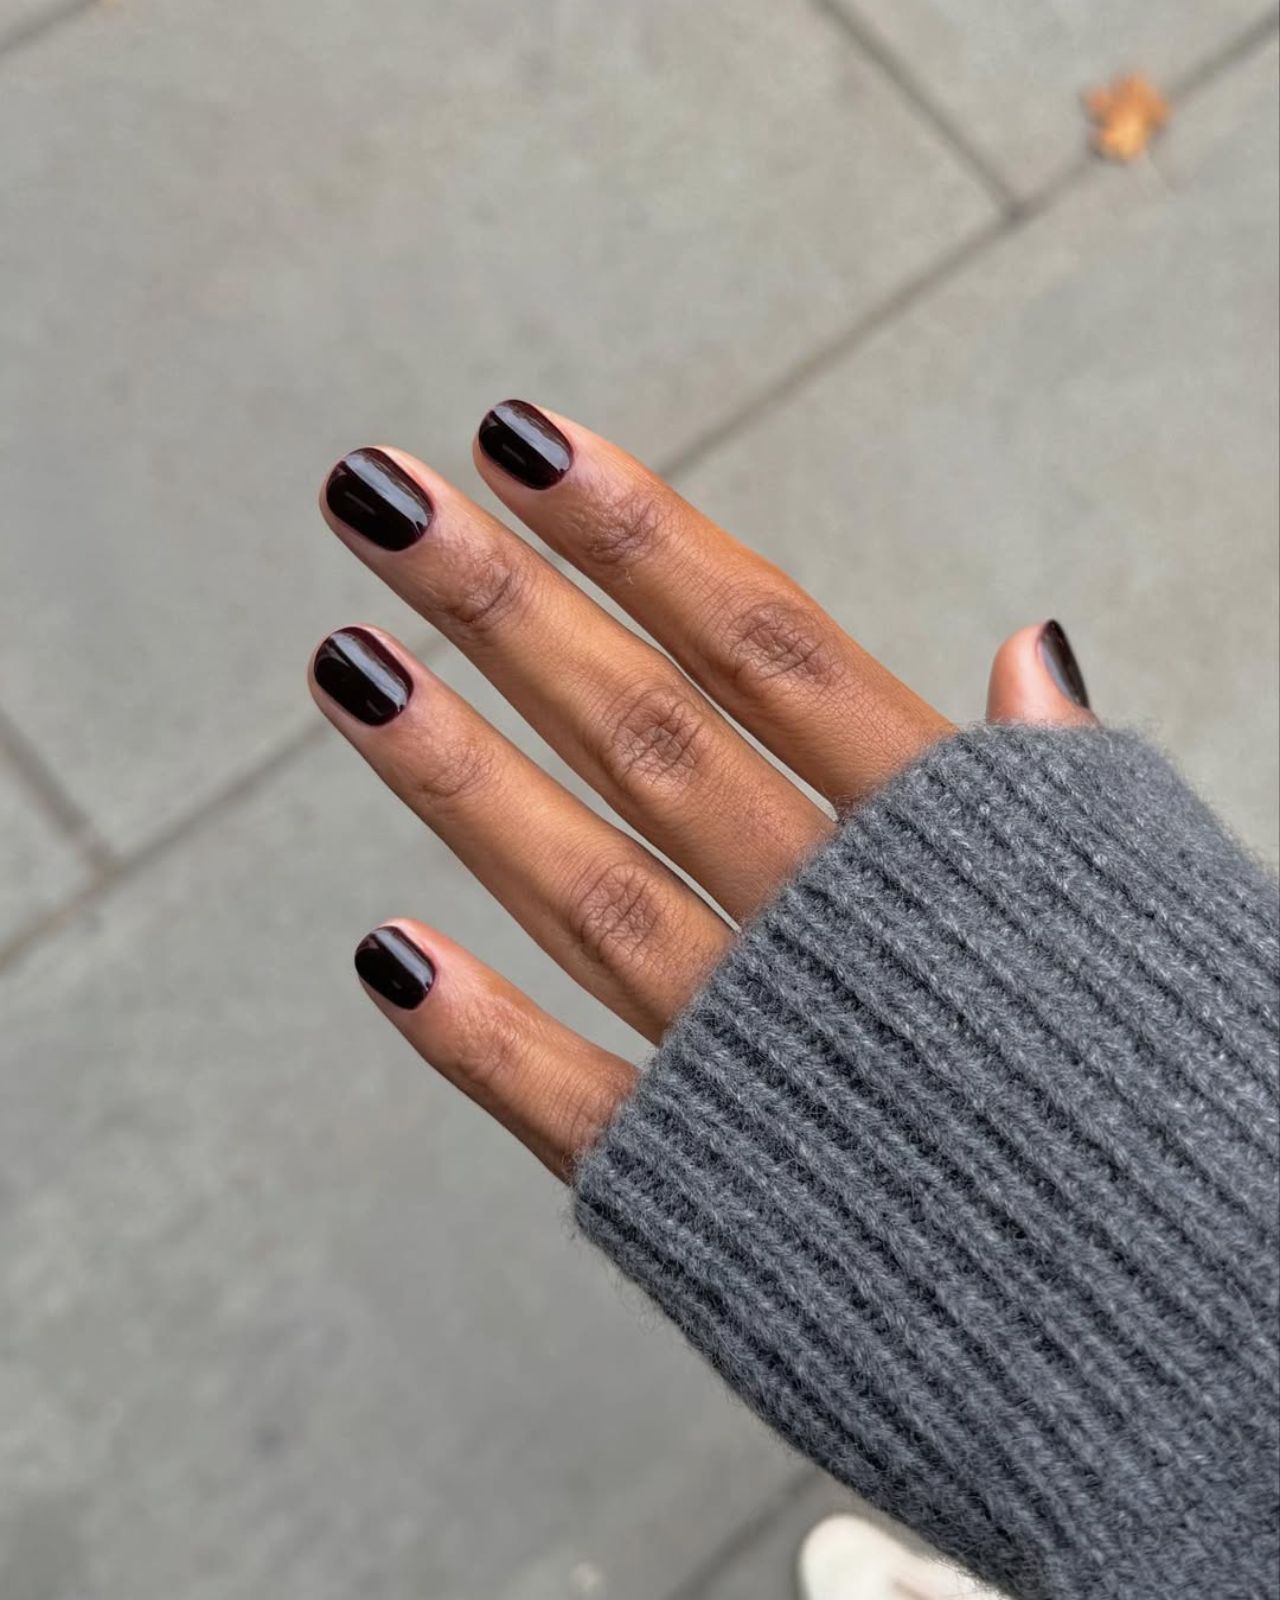
Deep burgundy is a classic, but most people get the application wrong. The mistake is stopping at two coats. This rich color needs three thin layers to reach its full depth, otherwise it looks streaky. The glossy finish demands a fresh top coat every few days to maintain that wet look. On short oval nails, the color reads sophisticated, not heavy. The key is patience during application, let each coat dry completely. Done right, it’s the most luxurious neutral you’ll wear all winter.
Dark Burgundy Glossy Short Square
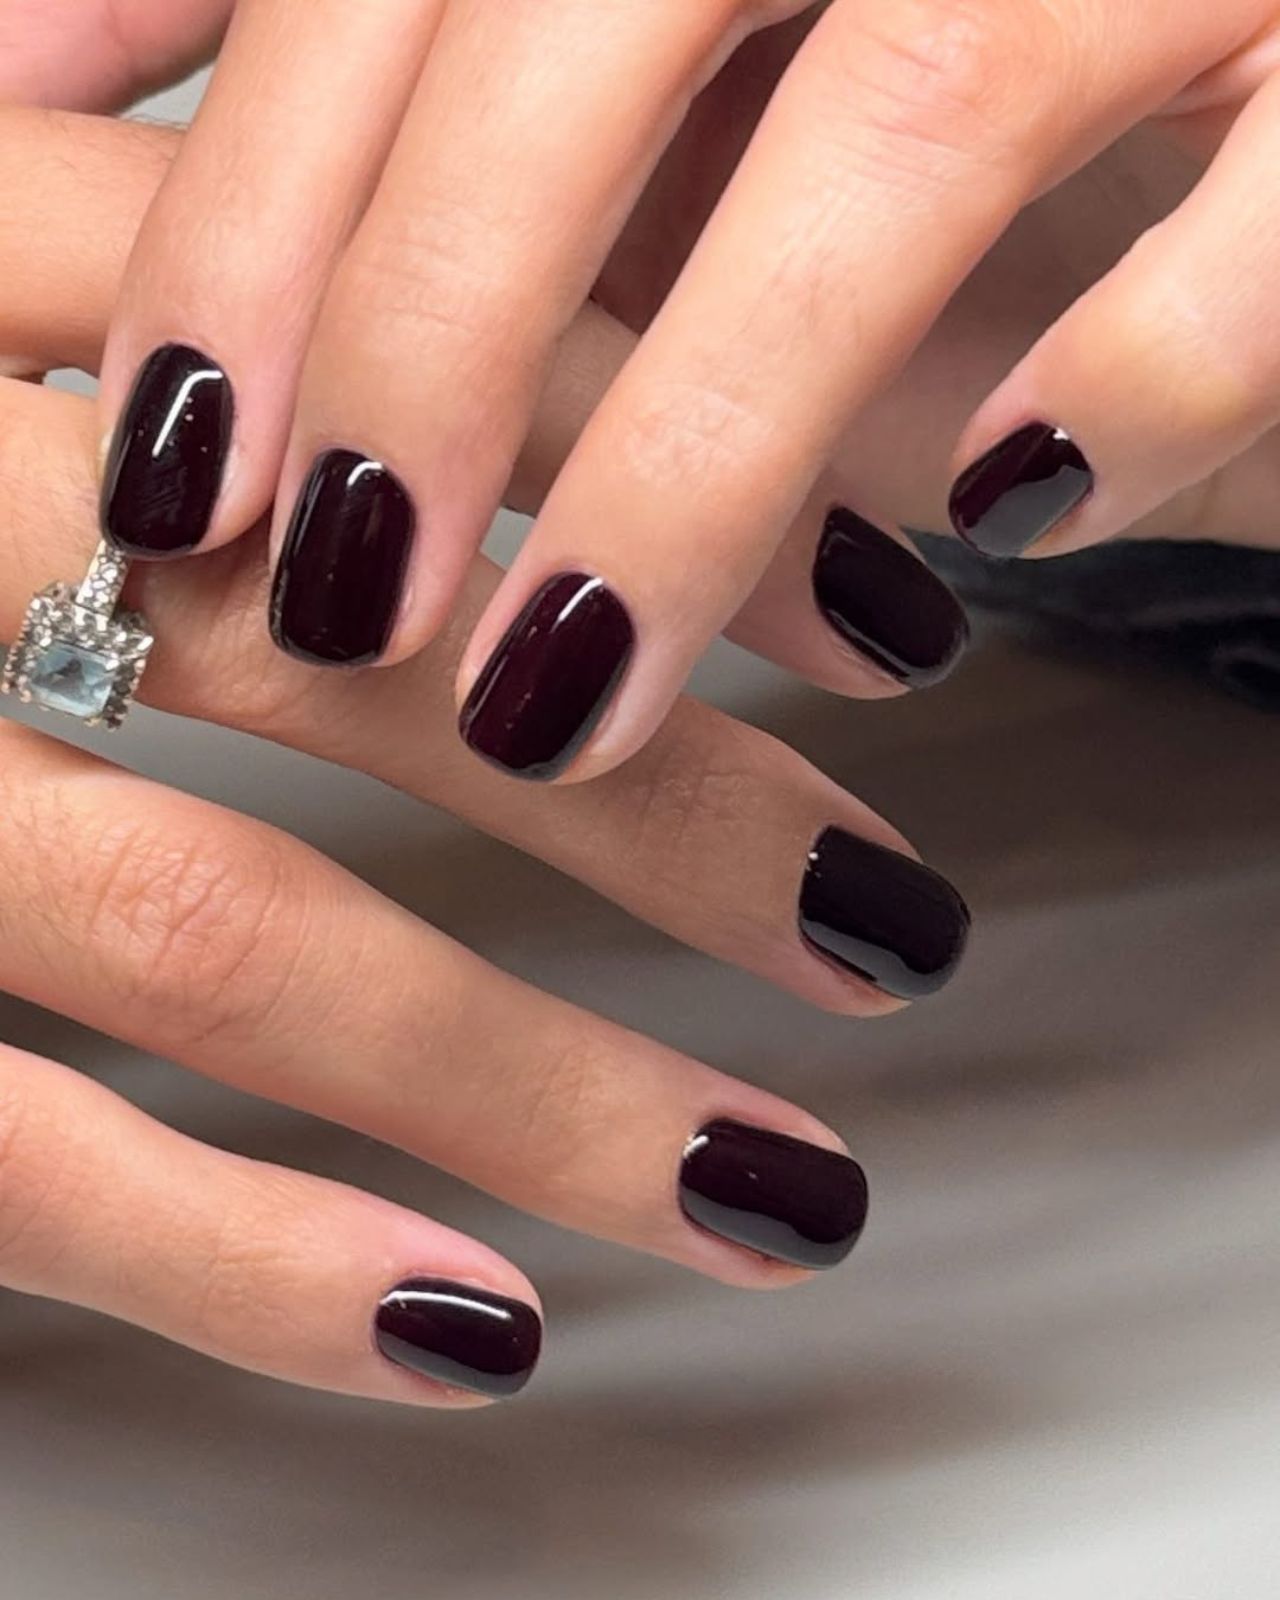
Dark burgundy square nails beat every other deep red I’ve tried this season. The cool undertones keep it from looking brown or muddy, which is what happens with some burgundies that lean too warm. On a short square shape with rounded corners, the high gloss makes the color look almost liquid. It’s not a vampy black-red, it’s a true wine shade that reads expensive. The richness of the pigment means one coat does the job, but two gives that glassy depth. No glitter, no shimmer, just pure color and shine. If you want a winter red that doesn’t scream holiday, this is it.
Dark Blue Grey Ombre Silver Accent
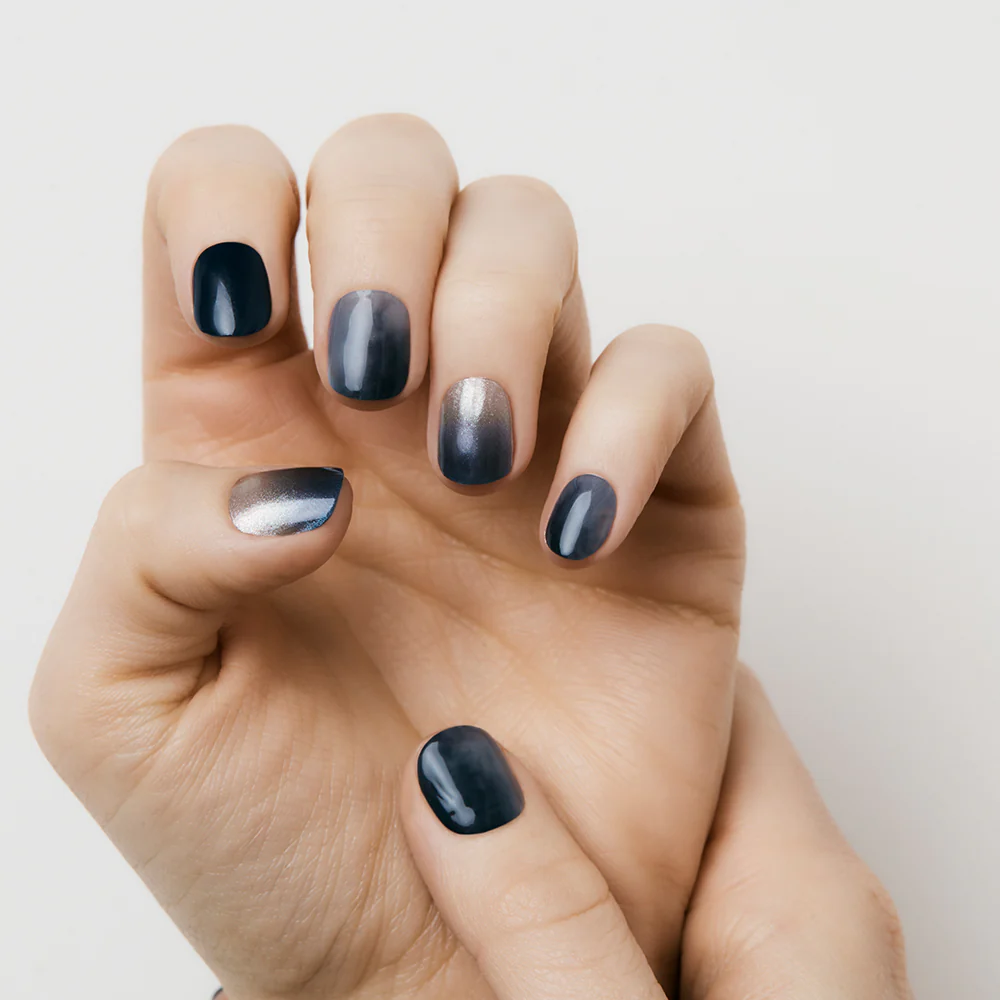
The ombre on these blue grey ombre nails fades so gradually that regrowth is barely noticeable. A week in, the dark blue at the cuticle blends into the grey tip without a harsh line. The metallic silver accent on the index and thumb is the first thing to dull, but that’s a quick touch-up. I wore them through typing and dish duty, and the glossy top coat kept the gradient smooth. No chipping at the tips, just a soft shift as the nail grows. If you hate obvious grow-out, this is the ombre that buys you an extra week.
Off-White Snowflake Short Oval
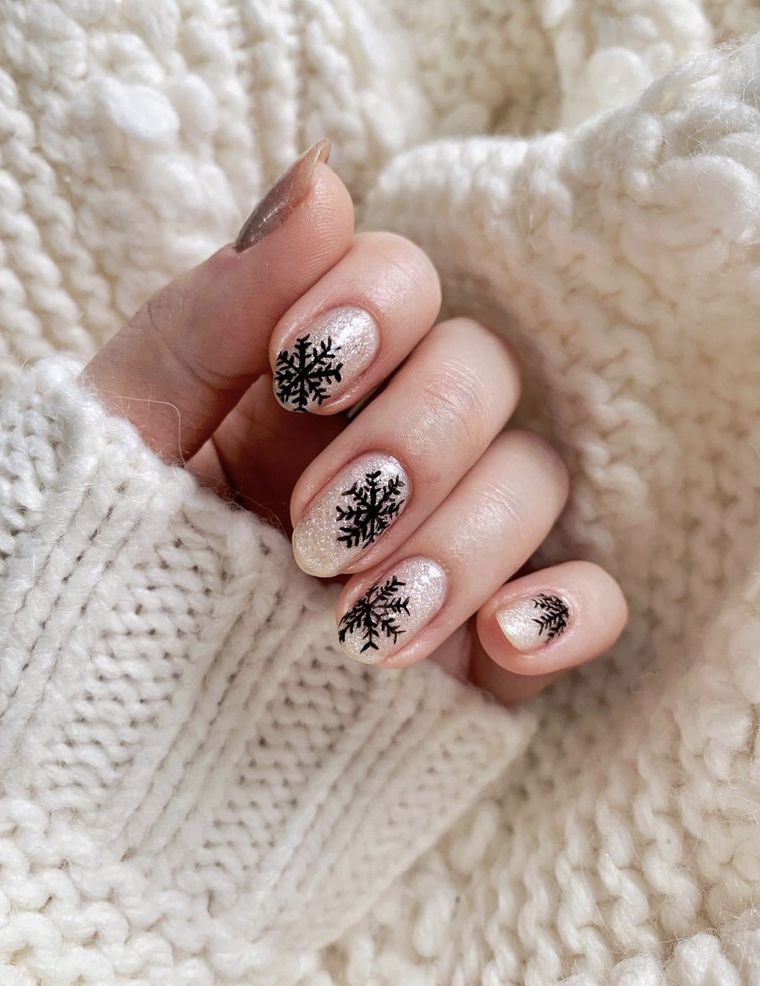
My gut says these off white snowflake nails are the quickest winter set you can ask for. The off-white base with subtle shimmer is one coat, and the black snowflake decal is applied in minutes. But here’s the honest downside: those decals catch on everything. Sweater yarn, hair ties, even the edge of a keyboard. The contrast is beautiful — that creamy white against the crisp black — but you’ll be filing down a lifted corner by day three. If you want the look without the snag, ask for hand-painted snowflakes instead. That adds chair time but saves your sanity.
Deep Purple Chrome Stiletto Nails
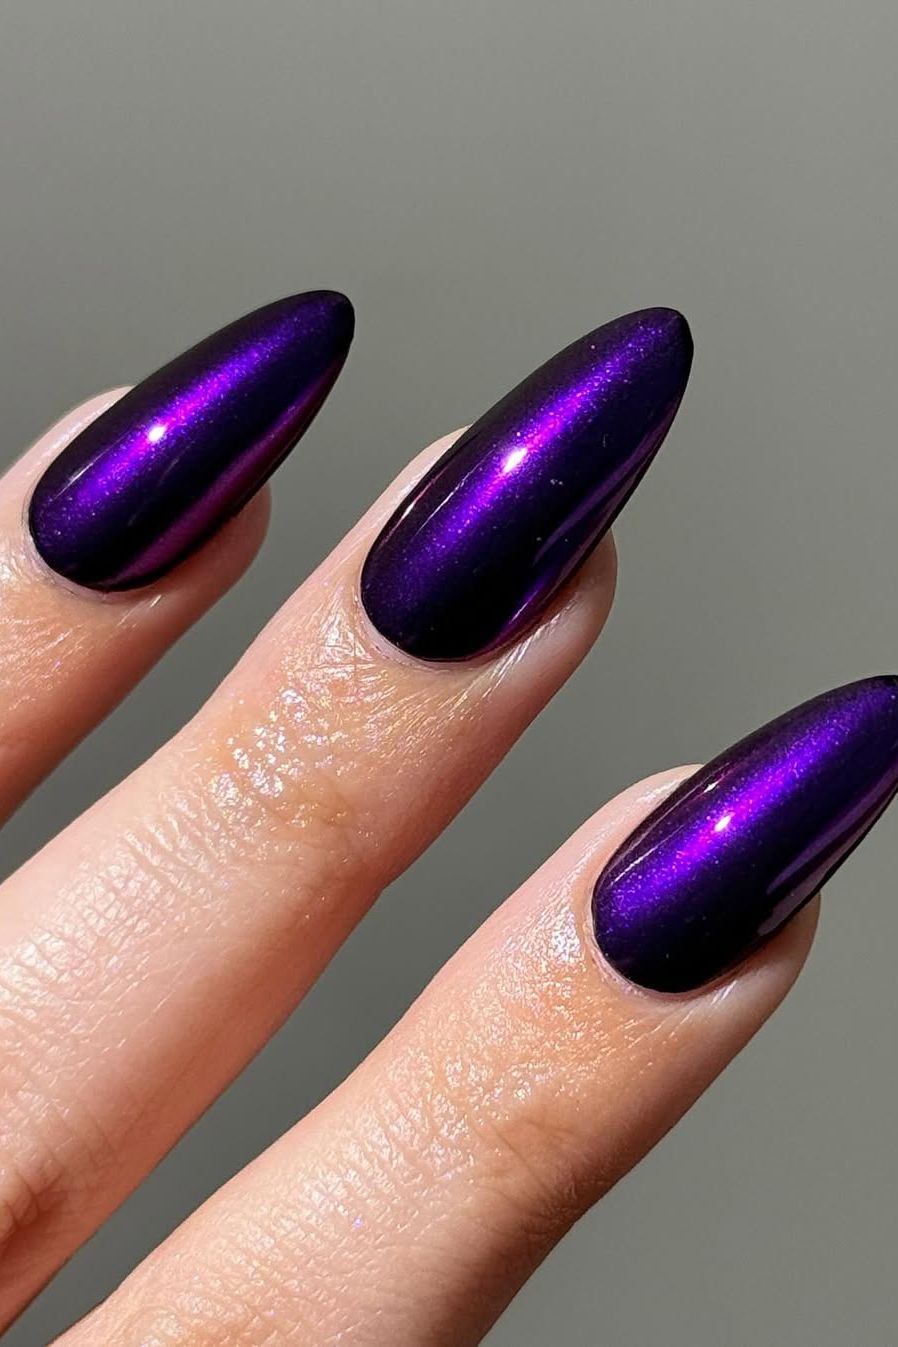
The chrome on these purple chrome nails isn’t a single powder rub. The tech starts with a black gel base to darken the purple, then applies a thin layer of chrome powder over a no-wipe top coat. That’s what gives the high-shine chrome effect without it looking silver or streaky. The deep purple with blue undertones shifts in the light, which is the whole point.
Durability depends on how well the chrome is sealed. A good top coat over the powder locks it in for two weeks, but any missed edge will lift. The stiletto shape makes the tips vulnerable — I’ve seen chrome wear off at the point by day five if the tech skimps on the final coat. Ask for a thick top coat and avoid cuticle oil for the first 24 hours to let the chrome bond. It’s a salon-only job, but the payoff is a mirror finish that catches every glance.
Final Thoughts
After writing 39 of these, I’m back where I started: staring at a pale blue chrome oval and wondering if I have time before the holidays. The answer is always yes. I booked it.